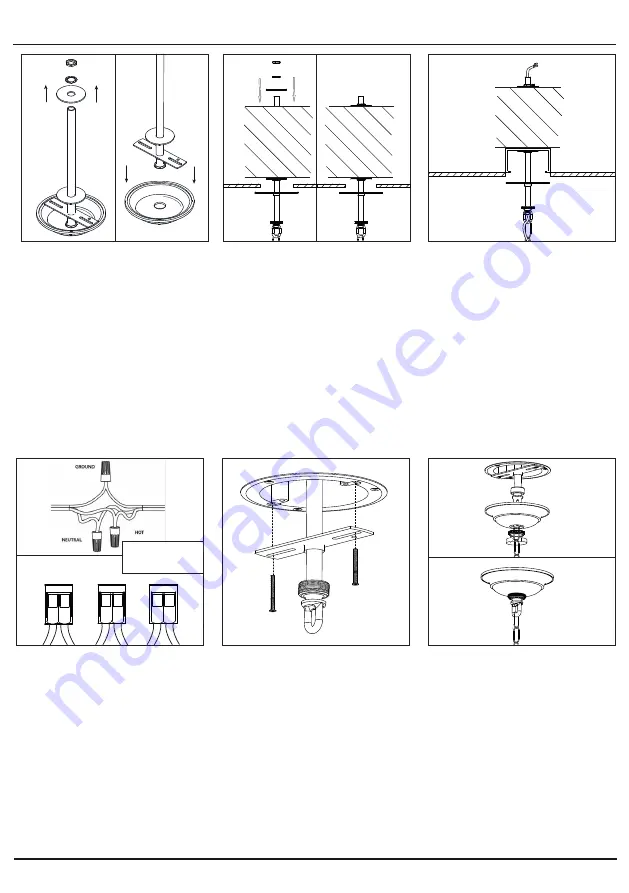
3. Thread the cable through the
ceiling loop and into the threaded
tube until it comes out above the
support.
2. Push the bar through the
structural support, keeping the
bracket below the ceiling.
Reattach the components
removed in the previous step
above the support and ensure
they are secured tightly.
1. The product must be installed
to a structural support suitable for
the weight of the product. Ensure
you have access to the top of the
mounting support. Drill a hole
through the support and remove
the nuts, the lock washer, the
large washer, and ceiling rose.
Ensure the remaining washers and
nut are far enough down the tube
to allow the tube to be fitted the
whole way through the mounting
support.
6. Secure the ceiling rose in place
against the ceiling using the
threaded ring ensuring it is tightly
fitted.
5. Attach the bracket to the
Ceiling Box ensuring it is secured
tightly.
4. Having identified the house-
hold wiring, connect the building
supply and the product cables
together in the wire connectors as
shown above. Ground connection
can be found on the ceiling
bracket.
Hot = (Black)
Ground = (Green)
Neutral = (White)
L L
E E
N N
www.vaughandesigns.com
Mottisfont Porch Lantern
CL0130


