

Vax Careline:
AU: 1300 361 505
NZ: 0800 800 900
vax.com.au
vax.co.nz
8
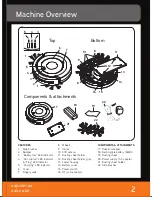
Operation
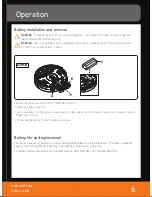
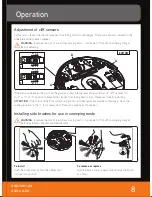
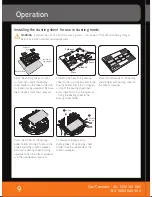
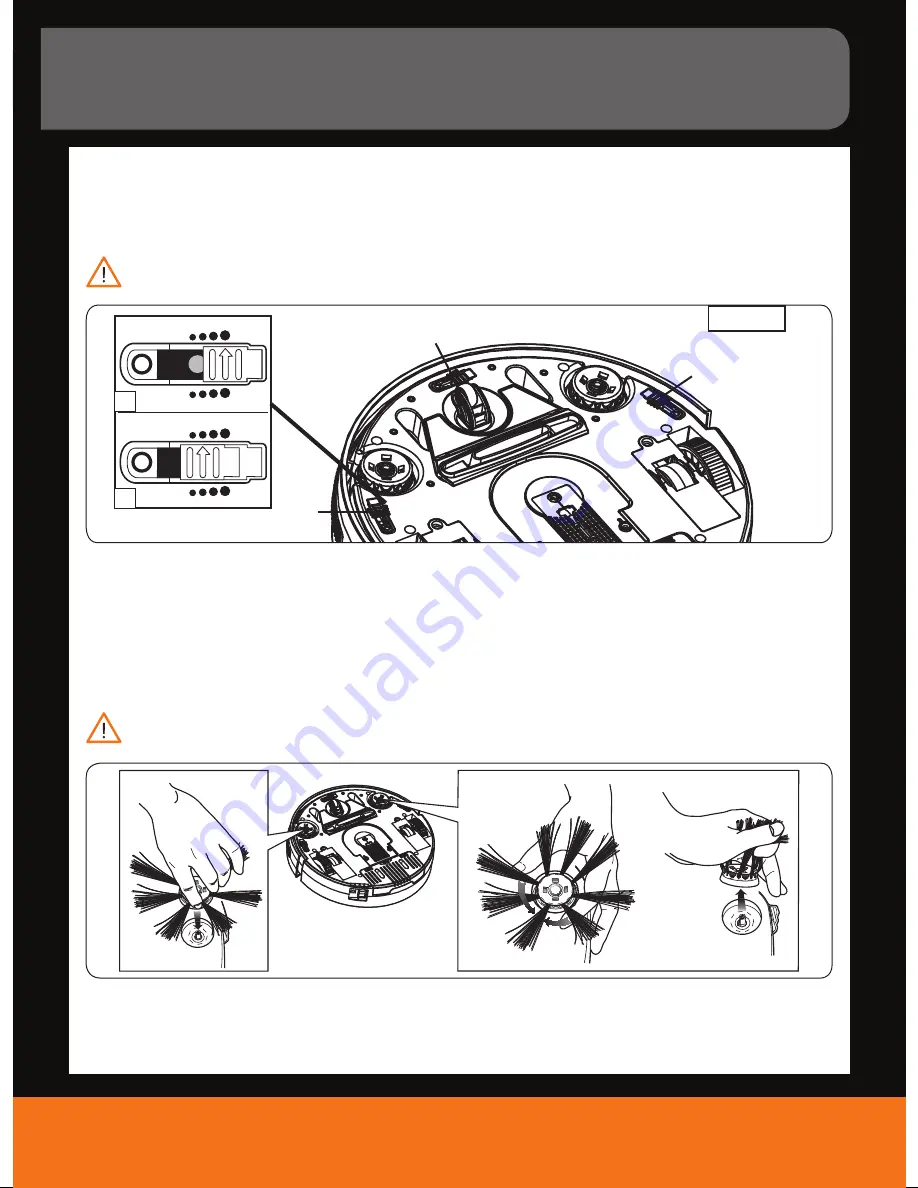
Installing side brushes for use in sweeping mode
To install
Push the brush directly onto the holder until
it snaps into position.
To remove or replace
Hold the brush and pull upward to remove the brush
as shown.
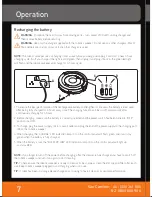
Adjustment of cliff sensors
If the distance between the stair and the ground is short, please adjust both windows of “cliff ” sensors (A)
to “2” or “1” or “0” position to prevent the cleaner from falling down stairs. Please test it before working.
ATTENTION:
If the colour of the fl oor is dark (e.g. Black), and robot goes backwards continuously, close the
window position to the “1” to increase the cliff sensor’s sensitivity (C) position.
BOTTOM
A
A
A
1 2 3
0
1 2 3
0
1 2 3
0
1 2 3
0
B
C
Cliff sensors prevent the robotic sweeper from falling off stairs and ledges. There are 3 sensors located on the
underside of the robotic sweeper.
WARNING:
to reduce the risk of injury from moving parts – turn power off (0=off ) and unplug charger
before adjusting.
WARNING:
to reduce the risk of injury from moving parts – turn power off (0=off ) and unplug charger
before installation and removal/replacement.