


Turn ON the electric circuit at the
main fuse or circuit breaker box.
Attach the glass shade to the plastic
holder by aligning studs and slots,
and then turn it clockwise until it is
locked in place.
Fig.14
Transmitter
Wall Bracket
Anchor
Screw
Fig.16
CCT
Install the transmitter wall bracket in wall by two anchors and two screws
and hang transmitter in it carefully .
PAGE: 7 / 9
Glass
Shade
Slot
Plastic
Holder
Fig.13
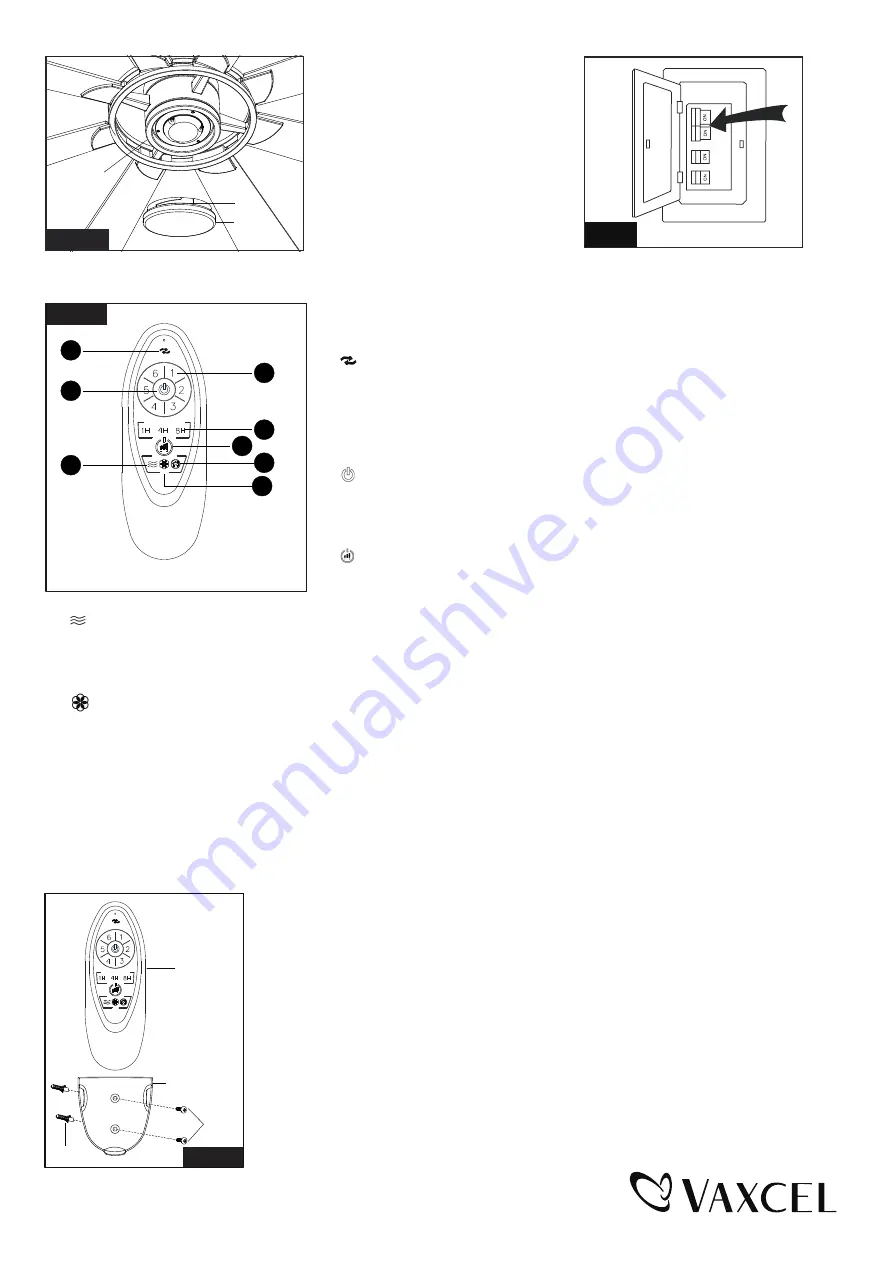
1
3
6
2
4
5
7
8
Fig.15
Remote Control Transmitter
CCT
Remote controller
Install two 1.5 volt batteries (type AAA, included) to the remote controller.
The remote buttons instruct as below:
1. " " Reverse button:
Press this button to control fan direction.
The lateness of reverse function is normal, Please wait for a moment.
2. Fan speed:
1 = minimum speed 2 = low speed
3 = medium low speed 4 = medium speed
5 = medium high speed 6 = high speed
3. " " Button:
Press this button to turn the fan off.
4. Timer Control:
Press "1H","4H" or "8H" button to stop the fan speed after that period.
Press fan off button to stop the timer control, and fan also will be turn off.
5. " " button:
Press this button quickly to turn on or turn off the light. Press and hold this button to
dim or brighten lights to the desired level then release, and the brightness level will be
memorized.
6. " " Breese button:
Press breese button to control the fan speeds automatic cycle between 1 to 6 speeds with a 20-second frequency. And any other fan
speed button can be stop this function.
7. Vacation mode button: Press vacation mode button to turn on the light 5 minutes each 2 hours, any other button can be stop this
function.
8. " " button:
Press this button to change color temperature of fan light, there are total 5 levels color changing from 2700K,3000K,3500K,4000K
to 5000K.
Note:
1. This remote controller has memory function setting. The fan will operate at the same speed and the fan light will stay at the
same brightness as the last time the power supply was turned off.
2. Included transmitter matched with receiver in the motor.
3. One transmitter can be compatible with 4pcs ceiling fan and every ceiling fan can be compatible with new transmitter
according press and hold the fan off button with 5 seconds until you hear the indicator sound of swoosh from the transmitter
and this step should be done within 30 seconds time frame after the main power is turned on.
210413


