background image

Page 1 / 5

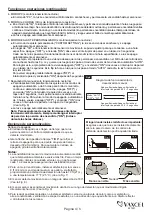
Important to Know:

1. If you are not familiar with state and local electrical

  codes, it is recommended that you consult with a

  qualified electrician.

2. This fixture requires a 120 VAC, 60 Hz power

  source. 

3. For general safety and to avoid any possible 

  damage to the sensor, be sure the power is

  switched "off" before adjustment.

Maximum Wattage: 2-150 W (bulb not included)

Working Temperature Range: - 13

°F ~ 113°F

ASSEMBLY  AND  INSTALLATION 

                INSTRUCTIONS

NOTES: 1. Before installing, consult local electrical codes for wiring and grounding requirements.

               2. READ AND SAVE THESE INSTRUCTIONS.

T0694 / T0695

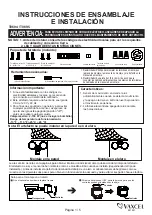
Features:

WARNING:

TO AVOID RISK OF ELECTRICAL SHOCK, BE SURE TO SHUT OFF

POWER BEFORE INSTALLING OR SERVICING THIS FIXTURE.

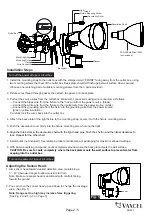
Note: Fixture can be wall mounted or eave mounted. 

Wall Mounted 

Eave Mounted

Read notes section on page 4 for additional information about mounting location of fixture.

Light fixture and sensor should be mounted as shown above when installed (depending upon type of installation)

Before installing the light fixture under an eave, the sensor head must be rotated as shown in the next two steps for 

proper operation and to avoid the risk of electrical shock.

1. Motion sensor: turns light ON automatically when 

    motion is detected and turns light OFF or remains 

    in low-level brightness when motion stops.

2. Photocell keeps the light OFF during daylight hours.

Hardware Package (included):

Decorative cover

Fixture Mounting Screw

Mounting Strap

Wire Connector

Gasket 

Mounting Screw X2

#8/32X1/2 in

Mounting Screw X2

#6/32 X1/2 in

Mounting Screw X2

#10/24 X1/4 in

For eave mounted only:

Rotate the sensor head towards the back plate.

Rotate the sensor head clockwise 180˚ so the controls face down.

Controls

Backplate

Controls

Controls

(1) Phillips-head Screwdriver

(2) 1/8” Flat-head Screwdriver

1. Phillips-head screwdriver for attaching mounting screws to

mounting strap, mounting bracket and fixture to mounting bracket.

2. 1/8” wide flat-head screwdriver for connecting the source wires

into the wiring terminal station on the mounting bracket.

Tools Needed:

221031

Summary of Contents for T0694

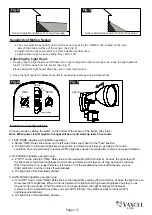
Page 1: ...shown above when installed depending upon type of installation Before installing the light fixture under an eave the sensor head must be rotated as shown in the next two steps for proper operation and...

Page 2: ...black wire from the fixture to the hot wire from the power source black Connect the white wire from the fixture to the neutral wire from the power source white Connect the grounding wire from the fixt...

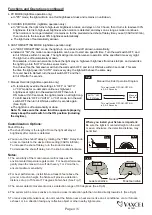
Page 3: ...urns to high level brightness when motion is detected and stays on as long as the motion continues Then it reverts back to low level 30 brightness about 5 seconds after motion is no longer detected 2...

Page 4: ...the light remains on all night long To shift back to OFF or AUTO or 3H mode turn the wall switch OFF then turn it ON twice within 3 seconds again See Fig 6 The light turns off automatically at dawn No...

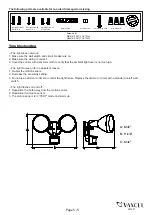
Page 5: ...y that the ambient light level is not too high The light comes on for no apparent reason 1 Re aim the motion sensor 2 Decrease the sensitivity setting 3 Do not use a dimmer or timer to control the lig...

Page 6: ...o se instalen dependiendo del tipo de instalaci n Antes de instalar el artefacto de iluminaci n debajo de un alero el cabezal sensor debe girarse como se muestra en los siguientes dos pasos para obten...

Page 7: ...ble negro del artefacto al cable vivo de la fuente de energ a negro Conecte el cable blanco del artefacto al cable neutro de la fuente de energ a blanco Conecte el cable de descarga a tierra del artef...

Page 8: ...posici n de prueba test La luz se enciende al brillo de nivel alto cuando se detecta movimiento y permanece encendida mientras contin e el movimiento Luego vuelve al brillo de nivel bajo al 30 aproxim...

Page 9: ...n lapso de 3 segundos la luz permanecer encendida durante toda la noche Para volver al modo de apagado autom tico o de 3 horas vuelva a apagar OFF y encender ON dos veces el interruptor de pared en un...

Page 10: ...to La luz se enciende sin ning n motivo aparente 1 Ajuste la direcci n del sensor de movimiento 2 Disminuya el ajuste de sensibilidad 3 No use un regulador de intensidad o temporizador para controlar...

Reviews: