background image

32E200SQB

使用手冊

User Manual

Summary of Contents for 32E200SQB

Page 1: ...32E200SQB User Manual...

Page 2: ...1 2 4 5 6 7 8 9 10 12 13 14 15 16 17 18 19 20 22 23 1...

Page 3: ...AC V DIGI 2 AC AC V DIGI AC AC 110 240V AC AC AC AC AC AC...

Page 4: ...AC AC AC AC AC AC AC AC AC AC AC AC AC 3...

Page 5: ...AC V DIGI AC AC LED 99 99 LED LED LED LED AC AC 4...

Page 6: ...1 1 2 AC 2 5 3 5 5pcs M4 x 12mm 5...

Page 7: ...27 28 29 POWER MUTE 0 9 INFO SOURCE MENU EXIT VOL CH PICTURE SOUND CH LIST ASPECT SLEEP FREEZE FAV LIST USB DTV DVR LIST DVR TEXT SUBTITLE AUDIO ZOOM REP REC PAGE UP PAGE DOWN PLAY PAUSE REW FF STOP...

Page 8: ...INPUT VOL CH POWER MENU 7...

Page 9: ...Pr VGA RF USB HDMI VGA VGA S VIDEO Earphone VGA HDMI1 2 3 S VIDEO SPDIF AV AV USB1 USB2 YPbPr L YPbPr R SPDIF AV AV L AV R HDMI1 RF SPDIF TV DVD AMP HDMI2 USB2 HDMI3 USB1 VGA S VIDEO YPbPr VGA AUDIO E...

Page 10: ...EXIT ENTER HDMI1 HDMI2 HDMI3 S 1 2 POWER POWER 3 POWER POWER 4 15 SOURCE ENTER 4 MENU 5 EXIT 2 ENTER 1 MENU 3 9...

Page 11: ...3 ENTER 1 2 3 4 EXIT 2 1 MENU 10 ENTER ENTER EXIT MENU ENTER EXIT MENU ENTER MENU EXIT ENTER...

Page 12: ...3 4 EXIT 1 100 I DK BG 1 2 3 4 EXIT 1 2 3 TV 6 FAV 4 5 CH CH 11 EXIT ENTER UHF CH 21 474MHz ENTER NO SIGNAL MENU EXIT ENTER MENU EXIT EXIT SAVE 1 PAL I 1 44 00 MHz TV TV 1 C 01 2 C 02 DELETE RENAME MO...

Page 13: ...NTSC 1 2 A B EXIT MENU ENTER 50 50 50 50 0 EXIT MENU ENTER EXIT EXIT MENU ENTER 50 50 50 50 3 ENTER 2 1 MENU 12 ENTER...

Page 14: ...Q EQ EXIT MENU ENTER EQ 0 SPDIF PCM EXIT MENU ENTER EQ 500HZ EQ 1 2kHZ EQ 3kHZ EQ 7 5kHZ 40 40 40 40 EQ 120HZ 40 13 1 MENU 2 ENTER 3 SPDIF PCM AC3 1 MENU 2...

Page 15: ...1 MENU 2 ENTER 5 10 15 20 30 45 60 25 50 75 100 ENTER ENTER ENTER ENTER MENU EXIT 10 20 30 60 90 120 180 240 14 EXIT MENU ENTER __ __ __ __ EXIT MENU ENTER 10 25...

Page 16: ...TER 1 SOURCE 11 2008 01 07 DTV 85 18 00 19 00 8 82 2 J J2 2 8 83 3 8 85 5 1 11 1 18 00 19 00 2 21 1 15 EXIT MENU ENTER EXIT INFO ENTER DATE Reminder Record Mar 2008 01 08 21 ABC1 Once USB 2 0 C PVR MU...

Page 17: ...e USB 2 0 C PVR MUSIC PHOTOS2 PHOTOS1 D O OK K Path 1 1 play Mar 2008 01 08 21 ABC1 Once USB 2 0 C PVR MUSIC PHOTOS2 PHOTOS1 D O OK K Path 1 1 play 21 ABC1 Once C PHOTOS2 0002 jpg 0006 jpg 001 jpg 009...

Page 18: ...XT EXIT EXIT 1 MUSIC 2 ENTER 3 4 ENTER 5 ENTER ENTER 6 PLAY ENTER 17 Mar 2008 01 08 21 ABC1 Once USB 2 0 C PVR MUSIC PHOTOS2 PHOTOS1 D Path 1 1 play Mar 2008 01 08 21 ABC1 Once USB 2 0 C PVR MUSIC PHO...

Page 19: ...ER 1 ENTER ENTER 2 ENTER ENTER 3 PLAY PAUSE PREV NEXT REV FWD STOP EXIT 2 ENTER 1 P Pa at th h 4 up Folder ENTER 5 EXIT 18 Mar 2008 01 08 21 ABC1 Once USB 2 0 C PVR MUSIC PHOTOS2 PHOTOS1 D O OK K Path...

Page 20: ...h 19 The 24 Solar Terms Spring begins The rains Insects awaken Vernal Equinox Clear and bright Grain rain Summer begins Grain buds USB 2 0 1 1 play C txte txt D v 123KByt es The 24 Solar Terms Spring...

Page 21: ...2 2 J J2 2 8 83 3 8 85 5 1 11 1 18 00 19 00 2 21 1 EXIT INFO ENTER DATE Reminder Record EXIT Schedule MENU ENTER 11 2008 18 03 85 2008 11 11 18 00 2008 11 11 19 00 11 2008 18 04 RECORDER SCHEDULE LIST...

Page 22: ...DVR LIST INFO ENTER PLAY DTV OSD Buffalo Drive Station USB2 0 3 5 1TB 21 EXIT MENU ENTER DVR EXIT MENU ENTER USB U C EXIT MENU ENTER USB U C EXIT MENU ENTER USB U C 512MB 3264KBS 1 5MB S DELETE INFO...

Page 23: ...0 60 60 60 60 Hz 1 YPbPr HDMI 480i 480p 720p 1080i 1080P 60 60 60 60 60 Hz 22 32E200SQB 31 5 1920 1080 176 300 cd m2 4000 1 6 5ms DMB TH PAL BG DK I 110 240V 50 60Hz 78W 1 HDMI 3 S 1 YPbPr 1 L R 1 VGA...

Page 24: ...3 5 1 2 Source USB USB Vol Mute L R Super Audio CD DVD Audio HDMI DIGITAL AUDIO OUT COAXIAL Power 23...

Page 25: ...HDMI HDMI 24...

Page 26: ...and Descriptions Basic Operation Menu Operation Channel Menu Picture Menu Sound Menu Time Menu Option Menu Media Menu Photo Music Movie Text Record 29 30 31 32 33 34 34 36 37 38 39 40 41 43 44 45 47...

Page 27: ...r when moving pack it using the original carton and packing material Never cover the ventilation holes or insert anything in the cabinet Leave space around the TV set To ensure proper ventilation and...

Page 28: ...Disconnect the TV set from AC power outlet and antenna during lightning storms Do not throw anything at the TV set The screen glass may break by the impact and cause serious injury If the surface of t...

Page 29: ...y appear constantly on the screen This is a structural property of the screen and is not a malfunction Do not push or scratch the front filter or place object on top of this TV set The image may be un...

Page 30: ...the AC power cord connected to the TV set form AC power outlet before cleaning To avoid material degradation or screen coating degradation observe the following precautions To remove dust form the sc...

Page 31: ...ect the sound mode CH LIST Show channel list ASPECT Adjust image display proportion SLEEP Set the timer turn off TV automatically FREEZE Freeze the picture FAV LIST Display Define favorite channel USB...

Page 32: ...own through the channel list In the TV menu system it acts like the down arrow on the remote control and can be used to select menu options CH Scans up through the channel list In the TV menu system i...

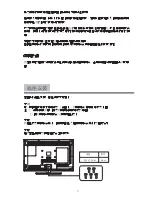
Page 33: ...ut Coaxial output Composite video input Composite audio input Antenna input Earphone output YPbPr audio L R YPbPr VGA RF IN Earphone VGA audio HDMI1 2 3 S VIDEO SPDIF AV AV audio L R USB1 USB2 YPbPr L...

Page 34: ...urce using power cord 2 When the power indicator is in red the TV is in standby mode Now press the POWER button on remote control or POWER button on top panel to turn on the TV The TV work normally wh...

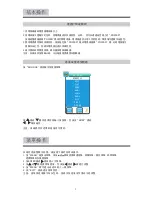
Page 35: ...ess the MENU and to browse the Picture Menu Sound Menu Menu Menu in turn Press EXIT to exit MENU mode buttons CHANNEL Menu Time Option Menu and Media Press ENTER or button to enter the submenu Press b...

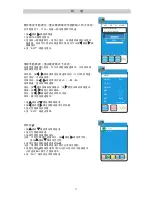
Page 36: ...Press to Can t be adjusted Press button to select Audion System I BG DK Press button to select current channel Press button to adjust frequency Press button to turn on off SKIP Display the current cha...

Page 37: ...kind Channel Menu Picture Menu Press MENU and buttons to select the PICTURE MENU Picture Mode Press button to select among Standard mild user and dynamic modes Contrast Press button to adjust the cont...

Page 38: ...djust it Screen only available in PC RGB mode Press button to enter the submenu Tint Press button to adjust the tint of the picture NTSC mode only EXIT MENU ENTER Screen EXIT MENU ENTER 50 50 50 Auto...

Page 39: ...button to select PCM Off AC3 Only available in DTV SPDIF Output Press button to POP UP the submenu as follow picture to display EQ Only available in the USER sound mode Time Menu Clock Automatic read...

Page 40: ...tton for software update Note No professionals please do not easily use this function Factory Default Press button to select yes no and press ENTER Press MENU button to return Press EXIT button to exi...

Page 41: ...to show the information of the program Important Unique Button Reminder Media Menu MEDIA Press and button to select the Press or ENTER button to enter the submenu Slide show speed Slide show speed Pre...

Page 42: ...Press button to select the PHOTO 2 Press ENTER button to enter the submenu Press ENTER button to confirm 41 05 Mar 2008 01 08 21 ABC1 Once USB 2 0 PHOTO MUSIC MOVIE C PVR MUSIC PHOTOS2 PHOTOS1 MOVIE D...

Page 43: ...button to pause playing the photo Press PLAY button to play the selected photo Press STOP button to stop and return Press NEXT or PREV button to skip to view the photo which are selected the photo Pre...

Page 44: ...playing the selected music as follow display Press button to select the musics which were selected and press ENTER button to confirm playing 43 5 Mar 2008 01 08 21 ABC1 Once USB 2 0 PHOTO MUSIC MOVIE...

Page 45: ...and then can select to view the photo at the same time PAUSE PLAY PREV Press PAUSE button to pause the playing music Press PLAY button to play the music Press PREV button to skip the backward music M...

Page 46: ...it TEXT Press button to select the TEXT icon and press ENTER button to the TEXT interface as follow display 3 Press the PLAY button to play the movie Press the PAUSE button to pause the playing movie...

Page 47: ...Press PLAY button to open and play the file as follow display 5 Press the EXIT button to exit Press FWD button to view a next page Press REV button to view a previous page Press STOP or EXIT button to...

Page 48: ...D De ef fi in ni it ti io o 1 11 1 N No ov v 18 00 19 00 Y Yo ou u r re e E Ey ye es sh hi ie el ld d 2 21 1 I In nv ve en nt t P Pe et t W Wo on nd de er rl la an nd d N Ne ew ws s N Ne ew ws s F Fi...

Page 49: ...ring playing a recorded file press the PAUSE button to pause and press the PLAY button to resume It will go to DTV program playback after the recorded file is played Note The OSD menu pictures are onl...

Page 50: ...ution 1920 1080 Viewing Angle 176 Brightness 300 cd m2 Contrast Ratio Typ 4000 1 Response Time 6 5ms TV System DMB TH PAL Audio System BG DK I AC110 240V Frequency 50 60Hz Power Input Power Consumptio...

Page 51: ...ve some space between the optional equipment and the TV Check the antenna cable connections Keep the antenna cable TV cable away from other connecting cables There is picture or sound noise when viewi...

Page 52: ...to a pay TV service The channel is used only for data no picture or sound Contact the broadcaster for transmission details You cannot view digital channels Contact a local installer to find out if di...

Page 53: ...833 506 Tel 852 28611109 Fax 852 83437386 Email info vdigi com hk Web site www vdigi com hk Winning Perfect Limited Room 506 Tower 2 Cheung Sha Wan Plaza 833 Cheung Sha Wan Road Kowloon Hong Kong...

Reviews: