5pcs
M4 x 12mm
Your TV is packaged with the TV stand separated from the cabinet. To setup the TV table stand,
please carry out the installation according to the instructions below.
Step One
Place the TV faced down on a soft cloth or cushion to prevent the panel from being damaged.
Note:
1. The panel is easy to scratch, so please choose an absolutely flat surface to place the
TV, and use soft cloth or cushion to protect the TV panel. Do not put TV on table directly.
2. Always unplug the AC cord first when installing or removing the stand.
Step Three
Insert the five M4 screws (which are totally the same) and tighten them.
Step Two
Take the stand. Please align the screw holes of the stand and TV.
Stand Installation
Pedestal Screws Quantity
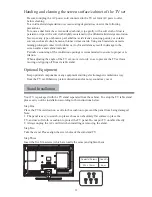
Handing and cleaning the screen surface/cabinet of the TV set
Optional Equipment
Be sure to unplug the AC power cord connected to the TV set form AC power outlet
before cleaning.
To avoid material degradation or screen coating degradation, observe the following
precautions.
To remove dust form the screen surface/cabinet, wipe gently with a soft cloth of dust is
persistent, wipe with a soft cloth slightly moistened with a diluted mild detergent solution.
Never use any type of abrasive pad, alkaline/ acid cleaner, scouring powder, or volatile
solvent, such as alcohol, benzene, thinner or insecticide. Using such materials or main-
taining prolonged contact with rubber or vinyl materials may result in damage to the
screen surface and cabinet material .
When adjusting the angle of the TV set, move it slowly so as to prevent the TV set form
moving or slipping off from its table stand.
Keep optional components or any equipment emitting electromagnetic radiation away
from the TV set. Otherwise picture distortion and/or noisy sound may occur.
29
Periodic vacuuming of the ventilation openings is recommended to ensure to proper ven-
tilation.
Summary of Contents for 32E200SQB
Page 1: ...32E200SQB User Manual...
Page 2: ...1 2 4 5 6 7 8 9 10 12 13 14 15 16 17 18 19 20 22 23 1...
Page 3: ...AC V DIGI 2 AC AC V DIGI AC AC 110 240V AC AC AC AC AC AC...
Page 4: ...AC AC AC AC AC AC AC AC AC AC AC AC AC 3...
Page 5: ...AC V DIGI AC AC LED 99 99 LED LED LED LED AC AC 4...
Page 6: ...1 1 2 AC 2 5 3 5 5pcs M4 x 12mm 5...
Page 8: ...INPUT VOL CH POWER MENU 7...
Page 11: ...3 ENTER 1 2 3 4 EXIT 2 1 MENU 10 ENTER ENTER EXIT MENU ENTER EXIT MENU ENTER MENU EXIT ENTER...
Page 25: ...HDMI HDMI 24...

