


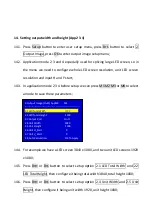
17.3.
Select setup option D.3 Output Image, press OK to enter setup menu, press
Brt+ or Brt- to select setup option, rotate OK to configure parameter value,
press OK to save;
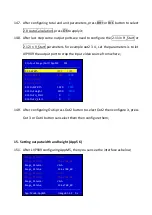
17.4.
In the menu the out width and height depends the window size you need
(
which must be less than the actual width and height of your led screen
); in
the menu out H and V start decide the PIP widow location;
17.5.
In the menu set the In width and height can crop the input source, and set the
In H and V start to crop the input source from where of the input source;
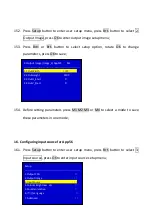
17.6.
PIP function has two windows, when you configure they parameters, press
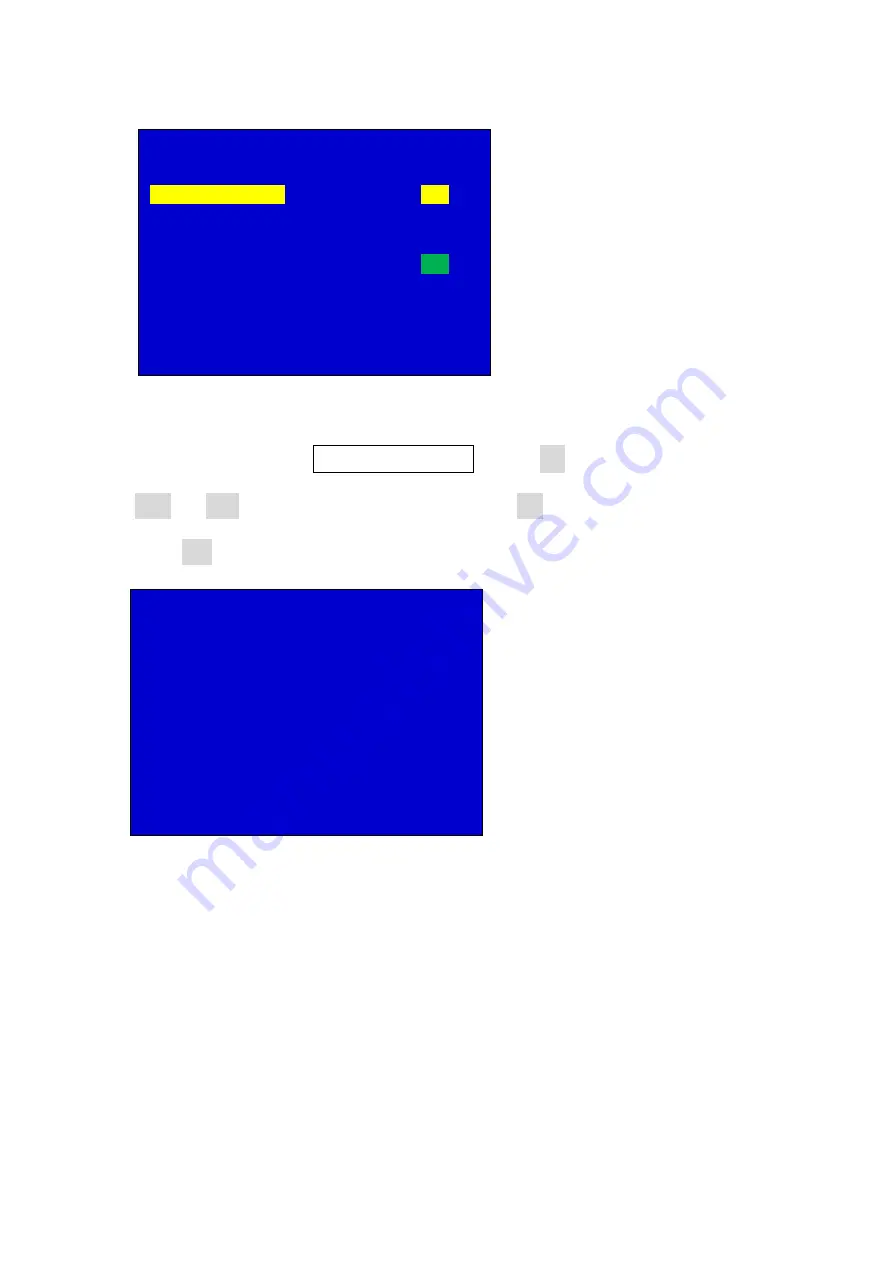
D. PIP AppM1 M1
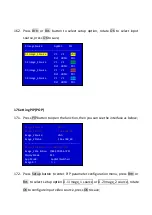
--------------------------------------------------------------------
D.1 Image_1 Source
V1 V2
VGA
DVI HDMI SDI
--------------------------------------------------------------------
D.2 Image_2 Source V1 V2
VGA
DVI HDMI SDI
--------------------------------------------------------------------
D.3 Output Image
>>
D.3 Output Image (Image_1) AppM1 M1
--------------------------------------------------------------------
D.3.1 Out Width 956
D.3.2 Out Height 720
D.3.3 Out H_Start 0
D.3.4 Out V_Start 240
D.3.5 In Width 1920
D.3.6 In Height 1200
D.3.7 In H_Start 0
D.3.8 In V_Start 0


