
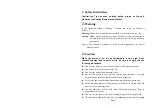

②
Remove scale and oxides from the tinned area of the tip with 80-grit
abrasive polyurethane foam stock or a 100-grit emery cloth.
③
Wrap rosin core solder (
Φ0.8mm
or larger) around the newly exposed
iron surface, insert the tip into the handle, and turn on the system.
NOTE:
De-tinned tips are preventable with proper daily care!
3. Extending Tip Life
1)
Tin the tip before and after each use. This protects the tip from oxidizing,
and prolongs the tip's life.
2)
Do the job at the lowest temperature. Lower temperatures decrease tip
oxidation and are easier on the components being joined.
3)
Use fine point tips only when necessary. The plating on fine precision tips
is less durable than the plating on blunter tips.
4)
Do not use the tip as a prying tool. Bending the tip can cause the plating to
crack, shortening tip life.
5)
Use the minimum activation flux necessary to do the job. Higher activation
flux is more corrosive to the tip plating.
6)
Extend tip life by switching the system off when not in use.
7)
Don‟t apply pressure to the tip. More pressure does not equal more heat. To
improve heat transfer, use solder to form a thermal bridge between the tip
and the solder joint.
9. Error Messages
Various error messages will be display when there is a problem with the unit. If
the following message is displayed, see the trouble-shooting guide.
Sensor Error:
If there is a possibility of a failure in the sensor or
anywhere in the sensor circuit, “S-E” will be displayed
and power to the soldering iron will be cut off.
previous password”.
3.
After inputting the three digits, press “*” key and the display shows
. At
the time, it must repeat the above steps to input the new password again.
4.
If the password is the same as the next, the new password can be changed
successful. The new password is stored into the internal memory. If the
password is not the same as the next, and the display window shows
,
the station will need to rewrite new password. The changing of password is
finished until the lately two passwords are identical.
Note: The word of password is 0 to 9, ten digits. If not, the changed
password is unsuccessful.
6. Calibrating the temperature
The soldering iron should be recalibrated after changing the iron or replacing the
heating element or tip. The unit is designed with digital type of calibration and
key adjust temperature
Method of recalibrating temperature: Use the thermometer to calibrate.
1.
Set the unit‟s temperature to a certain value.
2.
When the temperature stabilizes, measure the tip‟s temperature with
thermometer and write down the reading.
3.
Press “
*
” key not loose and press the “UP” and “DOWN” keys
simultaneously, the soldering station enters into calibration mode.
4.
At the moment, the hundred-digit of LED display temperature is flashing.
Press the “UP” and “DOWN” keys to select the value and press the “
*
” key
to select the digit. Press “
*
” key after inputting the reading. Here, the
calibration operation has been finished.
5.
If the temperature still has deflection, you can repeat calibration in
accordance with above steps.
* Recommend using the 191/192 thermometer measuring the tip temperature.
* It will not be able to calibrate if the unit is locked by password and you must
input the right password.
Page 7
S - E
Page 10


