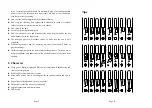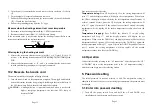
7. To select a correct tip for a solder application
1. Pick a tip that maximizes contact area between the tip and solder Joint.
Maximizing contact area gives the most efficient heat transfer, allowing
operators to produce high quality solder joints quickly.
2.
Pick a tip that allows good access to the solder joint. Shorter tip lengths allow
more precise control. Longer or angled may be needed for soldering densely
populated boards.
8. Tip Care and Use
8.1 Tip
’
s usage
1.
High soldering temperatures can degrade the tip.
Use the lowest possible
soldering temperature. The excellent thermal recovery characteristics ensure
efficient and effective soldering event at low temperatures. This also protects
the soldered items from thermal damage.
2.
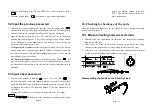
Clean the tip regularly with a cleaning sponge
. Because oxides and
carbides from the solder and flux can form impurities on the tip, these
impurities can result in defective joints or reduce the tip's heat conductivity.
3.
When using the soldering iron continuously, be sure to loosen the tip and
remove all oxides at least once a week. This helps prevent seizure and
reduction of the tip temperature.
4.
Never leave the soldering iron at high temperature for a long period of time,
as the tip's solder plating will become covered with oxide, which can greatly
reduce the tip's heat conductivity.
5.
After using, wipe the tip and coat the tip with fresh solder. It helps to prevent
tip from oxidation.
8.2 Tip
’
s maintenance
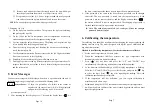
1. Inspect and clean the tip
1)
Set the temperature to a certain temperature , such as 250
℃
or 280
℃
.
2)
When the temperature stabilizes, clean the tip with the cleaning sponge and check
the condition of the tip.
3)
If there is black oxide on the solder-plated portion of the tip, apply new
solder (containing flux) and wipe the tip on the cleaning sponge. Repeat
until the oxide is completely remove. Coat with new solder to protects
the tip from oxidation and prolongs the life of the tip.
4)
If the tip is deformed or heavily eroded, replace it with a new one.
Caution: Never file the tip
to remove oxide.
2. Tin with the tip
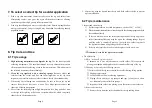
1) Why a “detinned” tip fails to work?
A detinned tip is one, which cannot wet with solder. This exposes the
plating to oxidation and degrades the heat transfer efficiency of the tip.
2) Detinning is caused by the following reasons:
①
Failure to keep the tip covered with fresh solder during idling periods.
②
High tip temperatures.
③
Lack of sufficient flux in soldering operations.
④
Wiping the tip on dirty or dry sponges and rags. (Always use a clean,
wet, industrial grade, sulfur-free sponge.)
⑤
Impurities in the solder, iron plating, or on the surfaces to be soldered.
3) Restore a detinned tip
①
Remove the tip from the solder handle after the tip cooling down.
Page 8
Page 9


