background image

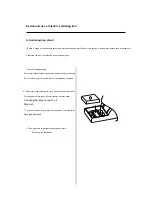
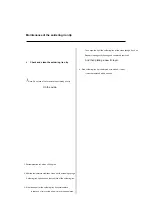
Under the soldering iron tip.

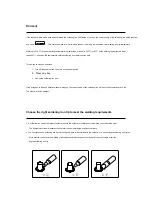
2 ,use 80# Polyurethane grinding foam or 100#

Emery paper to remove the tin-plated surface of the soldering iron tip

Dirt and oxide.

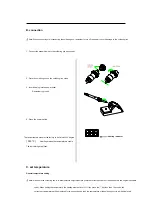
3 , Put the soldering iron tip into the handle and use the rosin inside

Tin wire (Φ 0.8mm Above) package new

The exposed surface of the soldering iron tip tin layer, open

Soldering station power supply.

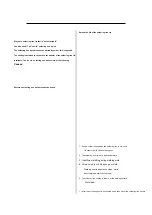
Note: Proper daily maintenance will effectively

Prevent the soldering iron tip from not tinning.

Can prevent the oxidation of the soldering iron tip and prolong the use

Use life.

2 , Try to use the

Low temperature and low humidity can reduce the soldering iron tip

The oxidation can also easily weld components.

1 , Wetting fresh solder after each use, so

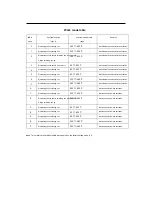
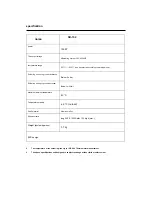
Summary of Contents for SD-150

Page 1: ...VECTECH SD 150 Lead Free Soldering Station High power digital display lead free soldering iron High frequency heating 150W Rapid recovery Operation Manual ...

Page 2: ... future reference table of Contents Precautions Part Name Installation and use of electric soldering iron parameter Sleep Choosing the right soldering iron tip for welding requirements Calibrate soldering iron temperature The use of soldering iron tip Maintenance of the soldering iron tip Error mark Troubleshooting guide How to check heater and temperature sensor components Replace the fuse ...

Page 3: ...ecautions caveat The definitions of Warning and Caution in this manual are as follows Warning abuse may cause death or serious injury to users Note Misuse may cause injury to the user or cause physical damage to the involved objects note ...

Page 4: ...with the operating instructions Do not touch the metal parts near the soldering iron tip Do not use the soldering iron tip near flammable objects Notify others in the workplace that the soldering iron tip is easily burned and may cause dangerous accidents At rest or after Turn off the power after work When replacing the soldering iron tip of a component or device turn off the power and wait for th...

Page 5: ...r than soldering Do not knock the soldering iron on the workbench to remove the flux residue which may severely shake the soldering iron Do not modify the welding station without authorization When replacing parts use the original factory originals Do not get the soldering station wet Do not use or disassemble the soldering station when your hands are wet nor pull the power cord Smoke will be emit...

Page 6: ...ning sponge Wet a small piece of cleaning sponge with water before squeezing Dry put it into the groove of the base of the soldering iron stand 2 Add water to the soldering iron rack Cannot exceed the middle Protruding part After the small quick sponge absorbs water Can keep the large sponge on it Stay wet You can also use a large piece of sponge alone omit the small Sponge and water 3 Then moiste...

Page 7: ...eset at the factory to be Celsius 300 degree 350 Heat finger when the temperature is stable The indicator light will flash Heating indicator C set temperature General temperature setting Note Make sure the soldering iron is in a temperature adjustable state input the correct password or the password is the original password code When setting the temperature the heating element is cut off If you pr...

Page 8: ...e key The middle digit ten digit starts to flash indicating The ten digits can be set 3 3 Select the desired value to replace the tens place use or key to change the display The values are shown in the figure below 1 2 3 4 5 6 7 8 9 0 Press the key The right digit ones digit starts to flash indicating The ones place can be set 4 4 Select the desired value to replace the ones place use or key to ch...

Page 9: ...ously powered during work If you want to set the temperature quickly you should select this method Heating up Without pressing the key press the key directly The set temperature rises by 1 and the display window shows Display the set temperature after releasing the key The display window delays the display of the set temperature for about 2 seconds If you press the key again within the delay of 2 ...

Page 10: ...he temperature quickly Decrease until the desired set temperature is released key parameter The soldering iron uses the following parameters which can be adjusted Set password The original password of the main unit s memory is 000 in this state the temperature setting is allowed If the temperature adjustment is restricted the password must be changed Enter password modification method 1 Turn off t...

Page 11: ...ot be possible Wrong password Enter the password correctly 6 If the display window shows Indicates that the password is correct and about 4 is displayed Seconds later the soldering station enters normal working condition Temperature setting will be allowed This Enter a new password 7 When the display window shows Press key and display This instructs the soldering station to enter the new password ...

Page 12: ...is instructs the soldering station to enter the working mode Set press or key to change To change the displayed value the sequence of digit changing is as follows 0 1 2 3 4 5 6 7 7 6 5 4 3 2 1 0 While pressing X After deciding the working mode press the key to select The predetermined working mode is stored in the memory Show Refer to the description of Working Mode for the meaning of the displaye...

Page 13: ...h Press the key Display the set temperature for 2 seconds if any Password lock will not adjust the temperature Do not Enter parameter setting Mode display C Within 4 seconds Is the key pressed Do not Press or to set Operating mode Press the key Yes Yes Do not Is the password correct Do not Yes Press the key Press at the same time Or key Enter the working mode setting Display working mode numbers b...

Page 14: ...romagnetic soldering iron Electromagnetic soldering iron 200 420 C 200 420 C Has hibernation and automatic shutdown Has hibernation and automatic shutdown Has hibernation and automatic shutdown 3 4 5 6 7 0 1 2 50 600 C 50 420 C 50 420 C 200 480 C 200 480 C 200 420 C 200 420 C Has hibernation and automatic shutdown Has hibernation and automatic shutdown Has hibernation and automatic shutdown Has hi...

Page 15: ...ess any key 3 Pick up the soldering iron pen If the host goes to sleep 40 Minutes without waking up the power supply of the soldering iron will be cut off automatically and the The window will also be blank Choose the right soldering iron tip to meet the welding requirements 1 A soldering iron tip has the largest contact area with the solder joint the largest contact area can produce the most The ...

Page 16: ...er to measure the temperature of the soldering iron tip and record the reading 3 Hold Press the and keys at the same time then the soldering station enters temperature calibration mode 4 At this moment led The hundred digits of the displayed temperature flash press the and keys to select the value press Key for digital selection input the reading value of the temperature tester the numerical input...

Page 17: ... sponge After soldering the residual flux of the soldering iron tip is derived When using the soldering iron continuously for a long time every Monday Disassemble the soldering iron tip to remove oxides and prevent soldering The iron head is damaged and the temperature is reduced When not using the soldering iron do not leave the soldering iron for a long time At a high temperature the soldering i...

Page 18: ...oldering iron tip is deformed or re etched it must It must be replaced with a new one Note Do not use a file to remove the soldering iron tip On the oxide 1 Set temperature to Celsius 250 degree 2 After the temperature stabilizes clean it with a cleaning sponge Soldering iron tip and check the condition of the soldering iron 3 If the tinned part of the soldering iron tip contains black In the case...

Page 19: ...of the following Causes Restore a soldering iron tip that cannot be tinned 1 No new solder is used when the soldering iron is not in use Tin covers the tip of the soldering iron 2 The soldering iron tip is at a high temperature 3 Insufficient melting during welding work 4 Wipe on a dry or dirty sponge or cloth Washing iron tip should use clean moist Industrial grade non sulfur sponge 5 The solder ...

Page 20: ... package new The exposed surface of the soldering iron tip tin layer open Soldering station power supply Note Proper daily maintenance will effectively Prevent the soldering iron tip from not tinning Can prevent the oxidation of the soldering iron tip and prolong the use Use life 2 Try to use the Low temperature and low humidity can reduce the soldering iron tip The oxidation can also easily weld ...

Page 21: ...Service life 5 Use less active rosin flux because High content of active rosin will speed up the soldering iron tip Corrosion of the coating 6 Try to close without using the soldering iron Power supply to extend service life 7 Do not put heavy pressure on the soldering iron tip because it is Large pressure does not mean fast heat transfer in order to improve Heat transfer the solder must be melted...

Page 22: ...o the soldering iron is cut off S E Sensor error If the power is supplied to the soldering iron and the tip of the soldering iron Degree is lower than the set temperature 80 Above significant The temperature will flash and the user s attention should be drawn meaning Temperature display flashesAttract attention Can burn if the soldering station is wrong Iron fever Body transfer Source the window s...

Page 23: ...ion malfunction 1 The welding station cannot be operated malfunction 3 The soldering iron tip heats up intermittently malfunction 4 The tip of the soldering iron cannot get the solder malfunction 5 The temperature of the soldering iron tip is too low malfunction 2 The soldering iron tip does not heat up the sensor or Heater error display Check 1 Is the fuse blown Repair after determining the cause...

Page 24: ...am law an examination 9 Does the soldering iron tip derive oxides age Please refer to Inspecting and Cleaning the Soldering Iron Tip an examination 10 Is the soldering iron properly calibrated Recalibration malfunction 6 The heater is damaged display H E an examination 9 Is the soldering iron wire damaged See how to check for damage to assembled wires an examination 10 Is the heating element damag...

Page 25: ...ws in case a versus b The resistance value between is different from the resistance value in the table below and the heating element needs to be replaced transm Sensor and or wires in case c If the resistance value is greater than the resistance value in the table below you need sandpaper or steel wool to gently erase the part shown in the low 的oxide layer 5 a First 4 Foot and cap 5 Between feet h...

Page 26: ...ohm Soldering iron tip to ground potential Below 2 millivolt Maximum ambient temperature 40 C Temperature stability 2 no load Aluminum alloy Shell material Shape volume long 200 X 130 Width 100 high mm Weight excluding wires 3 7 ESD design The temperature of the soldering iron tip is 191C 190 Thermometer measurement The above specifications and designs are subject to change without further enforce...

Page 27: ...SD 150 soldering iron tip specifications CB 150M 3 5D CB 150M 3C 6mm 6mm CB 150M 5D CB 150M 4C 7mm 6mm CB 150M 8D CB 150M 5C 8mm 6mm CB 150M 8C CB 150M 6C 10mm 8mm CB 150M K CB 150M SK 10mm 8mm ...

Page 28: ......

Reviews: