07
The unit is partly disassembled for ease of shipment and must be completely assembled be-
fore it is used for the first time.
The only tools required for assembly are a Philips (+) screwdriver and a pair of pliers.
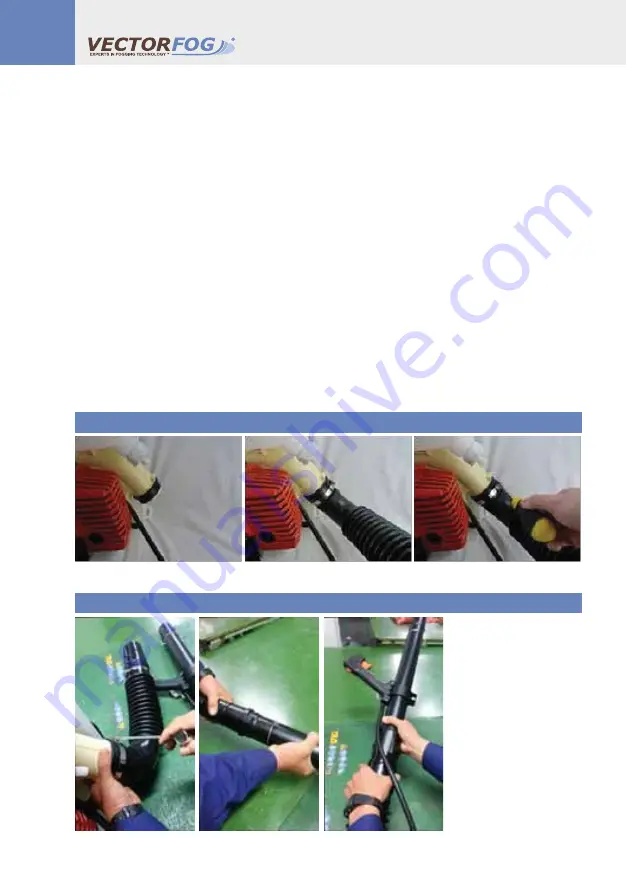
MOUNTING THE ELBOW
To mount the pleated elbow hose onto the body of the machine, first line the elbow up in a
position to allow for the hose to point forward. Loosen the screw that controls the crimp clamp
from the end of the elbow and slide over the body as far as it will go into the body of the
machine. Tighten the screw back to secure the crimp clamp on the body of the machine.
MOUNTING THE SPRAYING ATTACHMENT
Insert the sprayer extension tube into the end of the pleated elbow hose. Loosen the screw on
the crimp clamp at the end of the elbow to attach. To attach the spraying attachment with the
handle and trigger, position the grooves of the tube in line with the extruded guides and slide
onto the extension tube. Once this is as far as it can move rotate the spraying attachment
counter clock-wise until you can hear an audible click. Repeat these steps to attach the sprayer
nozzle onto the end of the spraying attachment.
Attaching the Elbow
Attaching the spraying attachment
ASSEMBLING BM100


