background image


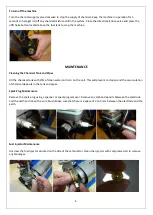
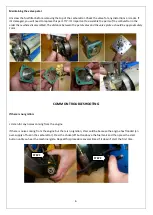
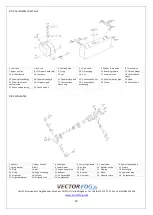
 • Check the spark plug 

Remove the spark plug using a spanner or spark plug remover. Hold the plug by its plastic cap and press the start 
button to check if there is a spark between the electrode and the earth. Also you should hear if there buzzing sound 
from the ignition coil. 

If there is no spark: 


Clean any carbon deposits in between the electrode and earth with a wire brush. 


 Check that there is a distance of 3 to 5 mm between the electrode and earth. 


Check that the battery is fully charged. 


Check that the battery and ignition coil are working. If necessary, replace the battery or coil 


Clean the contacts and wires inside the battery case 


Once these checks have been carried out, try starting the machine again.  

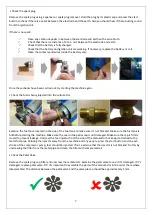
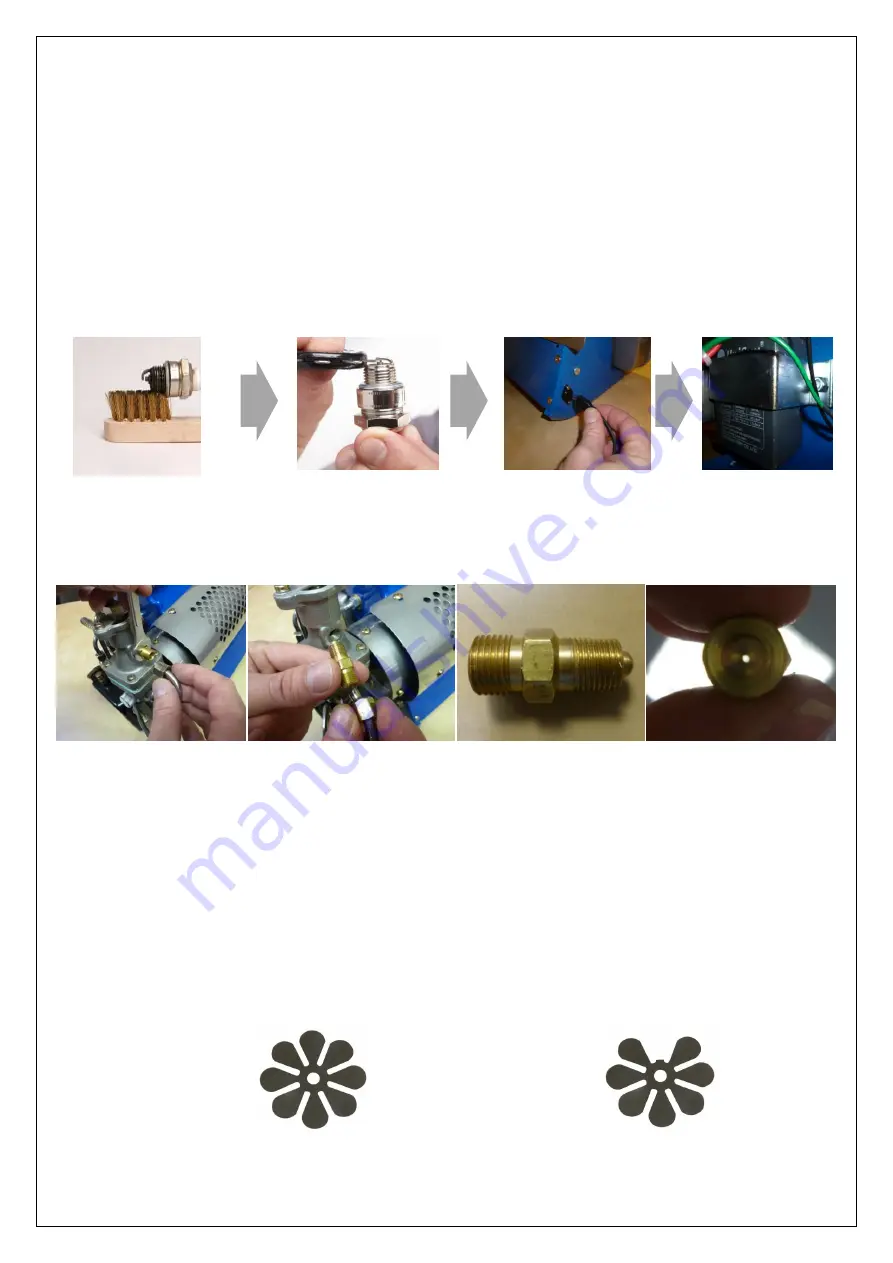
• Check the fuel is being injected into the carburettor. 


Examine the fuel hose located on the side of the fuel tank to make sure it’s not blocked. Make sure the fuel tank is 
full before starting the machine. Make sure the seal in the petrol cap is not damaged. Make sure the cap is firmly 
closed to prevent leakage. Unscrew the fuel injector from the side of the carburettor but keep it attached to the 
metal fuel pipe. Pointing the injector away from the machine and any people, press the start button and on each 
stroke of the compressor pump, fuel should be injected. If not, examine that the injector is not blocked. Do this by 
unscrewing the filter from the metal pipe and clean the filter with compressed air. 
 
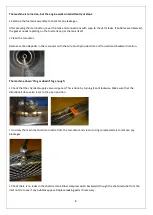
• Check the Petal Valve. 
 
Remove the spark plug cap, filter and unscrew the carburettor. Examine the petal valve to see if it’s damaged. If it’s 
damaged, replace petal valve. TIP: It’s important to assemble the parts of the carburettor in the order there where 
disassembled. The distance between the petal valve and the valve plate o should be approximately 1 mm.  


Summary of Contents for H100

Page 1: ...ment You must exercise caution if fuel is spilt in order to avoid the risk of fire CAUTION MARKS Please read this manual before using the equipment You must wear protective equipment face breathing ma...

Page 2: ...e VectorFog thermal foggers have an auto start and operate through compressed air via a compressor When the auto start button is pressed the compressed air pressurizes the fuel tank causing fuel to fl...

Page 3: ...volts Connect the charger to the unit and then connect to the mains The machine requires around 8 to 10 hours to fully charge Inspect the ignition unit Press the power button and listen to ensure tha...

Page 4: ...econds after you hear combustion starting sounds like a small explosion It is necessary to keep the machine on for about 10 seconds to warm up before opening the chemical valves TIP If the machine fai...

Page 5: ...ill the chemical tank with 25 of clean water and turn on the unit This will prevent corrosion and the accumulation of chemical deposits in the tank and pipes Spark Plug Maintenance Remove the spark pl...

Page 6: ...n the petal valve and the valve plate o should be approximately 1 mm COMMON TROUBLESHOOTING If there is no ignition Listen for any noises coming from the engine If there is noise coming from the engin...

Page 7: ...ose located on the side of the fuel tank to make sure it s not blocked Make sure the fuel tank is full before starting the machine Make sure the seal in the petrol cap is not damaged Make sure the cap...

Page 8: ...with the wire brush provided Use and forward and backward motion The machine doesn t fog or doesn t fog enough Check that the chemical supply valve is opened This is done by turning it anticlockwise M...

Page 9: ...3 Buffer spring 4 Pump shaft 5 Pump nut 6 Washer large 7 Pump packing 8 Washer small 9 Washer medium 10 Spring washer 11 Nut 12 Under cover 13 Piercer 14 Pump peg 15 Body left 16 Spring washer 17 Bol...

Page 10: ...t nut 1 Fuel tank 2 Run tee 3 Fuel tank pipe 4 Check valve 5 Rubber check valve 6 T check valve 7 upper air pipe 8 Oil pressure hose blk 9 O ring 10 Oil tank peg 11 Knocking release 12 Oil tank elbow...

Reviews: