8-22
Menu and Toolbar Descriptions
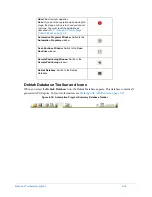
Select
Video > Video Only
to project the video image of the sample surface from the Dektak 150
camera on the monitor.
Select
Video > Graphics Only
to display the graphic screen on the monitor without the video
image.
Select
Video > Video and Graphics
to superimpose the graphic screen over the video image of
the sample surface.
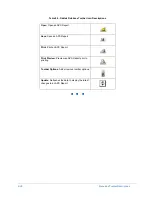
Select
Stylus Reticule
to open the stylus reticule submenu, which offers the following two
choices
Select
Stylus Reticule > Align
to open the
Stylus Alignment
window, where you can align the
targeting cursor to the stylus tip. Then double-click the left mouse button to open a
Confirmation
dialog box, where you can choose whether or not to update the stylus reticule
location, or cancel and close the window. (See
Stylus Reticle Alignment on page 3-19
for more
information.)
Select
Stylus Reticule > Reset
to open a
Confirmation
dialog box, where you can choose
whether or not to reset the stylus reticule location to its default (centered) location.
Select
Update Alignment Reticule
to align the feature reticule with surface features away from
the stylus to more accurately position the stylus prior to scanning. (See
for more information.)
Video Only
Graphics Only
Video and Graphics
Stylus Reticule
Align
Reset
Update Alignment Reticle
Summary of Contents for Dektak 150
Page 1: ......
Page 7: ......
Page 17: ......
Page 81: ......
Page 105: ......
Page 149: ......
Page 191: ......
Page 251: ......
Page 257: ...A 6 Facilities Specifications Figure A 6 Dektak 150 without Enclosure Side View ...
Page 258: ...Facilities Specifications A 7 Figure A 7 Dektak 150 Dimensions without Enclosure Top View ...
Page 259: ...A 8 Facilities Specifications Figure A 8 Dektak 150 without Enclosure Center of Mass ...
Page 273: ......
Page 283: ......
Page 321: ......
Page 331: ......
Page 333: ......
Page 336: ......
Page 337: ......
Page 349: ......

