3D Mapping Function
E-35
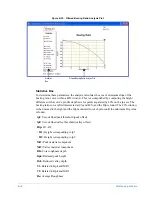
•
Black
indicates that data is bad and unmasked if a detector mask is not applied. If a detector
mask is applied, black can indicate both bad and masked data.
•
Red
indicates that data is bad and masked.
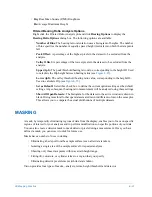
Selecting Data Displays
In the
Mask Editor
window you can choose to display data before or after processing.
Select
Raw
to see the data in its unprocessed state, without any terms applied. When making changes
to a mask that has already been applied, raw data is sometimes better to use because the analysis
mask has not been applied to it.
You can also view
Processed
data that has had masks, terms, or other options applied to it.
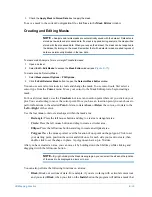
Saving Masks
Terms, analysis, and detector masks can all be saved independently of a dataset. By saving a mask
separately from the data, you can apply the same mask to different datasets.
To save a mask, open the
Mask Editor
and select
To/From Disk
from the
Current Mask
menu.
Click
Save
and enter a file name for the mask. The mask is saved into the specified directory with a
.msk extension.
Applying a Detector Mask
1
Select
Edit
>
Set New Measurement Mask.
2
Enter the path and file name of your saved detector mask in the appropriate slot (or choose
Browse
to
determine the location of your mask).
3
Close the
Mask Editor
.
4
Select
Hardware
>
Measurement Options
>
PSI Options
.
5
Select the
Use Detector Mask
check box.
Applying an Analysis or Terms Mask to a New Measurement
1
Select
Edit
>
Set New Measurement Mask
.
2
Enter the path and the file name of your saved mask in the appropriate slot (either Terms Mask or Analysis
Mask). You may use the
Browse
button to determine the location of your mask.
3
Close the
Mask Editor
.
4
Select
Analysis
>
Processed Options
to access the
Processed Data Options
dialog box.
5
Check either the
Use Analysis Mask
or
Use Terms Mask
box.
6
Select any terms to be removed, if applicable. Filtering, data invert, and data restore options can also be
selected.
7
Click
OK
to close the dialog box.
With this configuration, all new measurements taken will have the selected mask applied.
Summary of Contents for Dektak 150
Page 1: ......
Page 7: ......
Page 17: ......
Page 81: ......
Page 105: ......
Page 149: ......
Page 191: ......
Page 251: ......
Page 257: ...A 6 Facilities Specifications Figure A 6 Dektak 150 without Enclosure Side View ...
Page 258: ...Facilities Specifications A 7 Figure A 7 Dektak 150 Dimensions without Enclosure Top View ...
Page 259: ...A 8 Facilities Specifications Figure A 8 Dektak 150 without Enclosure Center of Mass ...
Page 273: ......
Page 283: ......
Page 321: ......
Page 331: ......
Page 333: ......
Page 336: ......
Page 337: ......
Page 349: ......

