Installing the Dektak 150 System
2-9
INSTALLING THE SYSTEM
This section tells you how to install the Dektak 150 system.
Setting Up the Computer
1
Locate the installation tool kit in Box 3. Keep the tools nearby throughout the installation.
2
Locate the power strip in Box 3, and plug it into your building's AC power outlet. You must connect all
computer and profiler power cords to this strip.
3
Verify that the voltage setting on your Dell computer is set to match the AC power in your building (110VAC
or 220VAC). The voltage switch is located next to the power cord outlet on the back of the computer
(
). The default setting is 220VAC. For instructions on changing the voltage, see
.
4
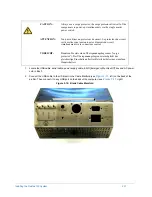
The ground strap is installed on the back of the computer (
). Cut the plastic tie that holds the
strap in place.
Figure 2-8: Ground Strap Installed on the Computer
5
Using the Dell instructions located in Box 1, set up the computer, mouse and keyboard.
NOTE –
Do not place the computer on the same surface that you are using to support the
surface profiler.
6
For instructions on installing the optional monitor, see
Installing the Optional Video Monitor on page
WARNING
Damage can occur if the voltage is not set properly.
Plastic tie
Voltage switch
Summary of Contents for Dektak 150
Page 1: ......
Page 7: ......
Page 17: ......
Page 81: ......
Page 105: ......
Page 149: ......
Page 191: ......
Page 251: ......
Page 257: ...A 6 Facilities Specifications Figure A 6 Dektak 150 without Enclosure Side View ...
Page 258: ...Facilities Specifications A 7 Figure A 7 Dektak 150 Dimensions without Enclosure Top View ...
Page 259: ...A 8 Facilities Specifications Figure A 8 Dektak 150 without Enclosure Center of Mass ...
Page 273: ......
Page 283: ......
Page 321: ......
Page 331: ......
Page 333: ......
Page 336: ......
Page 337: ......
Page 349: ......


