Appendix A
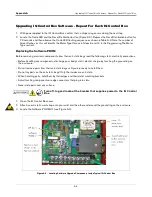
Upgrading IQ Control Box Software - Repeat For Each IQ Control Box
A-7
Calibrating the IQ Control Box
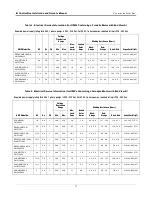
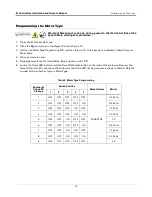
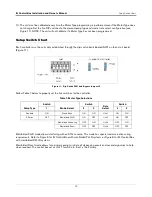
1. The unit must be calibrated every time the Motor Type programming is performed even if the Motor Type does
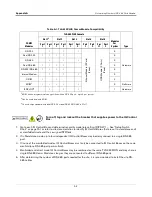
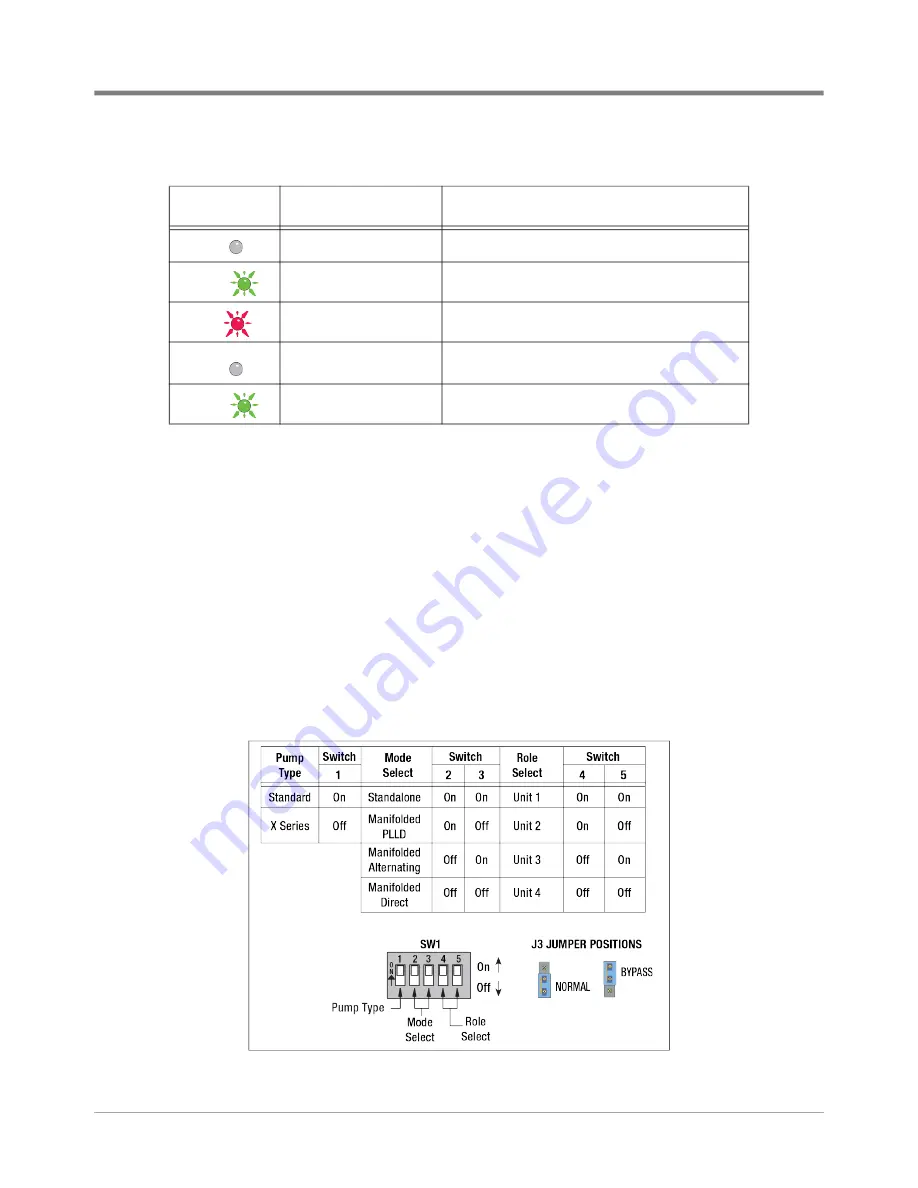
not change. Set the five DIP switches to the desired pump type and mode / role select configuration (see
Figure A-5). NOTE: The unit will not calibrate if a Motor Type has not been programmed.
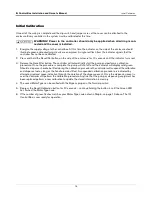
2. Close and secure the cover.
3. Reapply power to the IQ Control Box. (Hook signal must be Off).
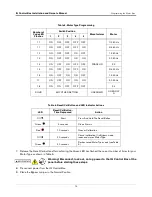
4. Perform a calibration by depressing the Reset/Calibration button for 10 seconds (LED turns red).
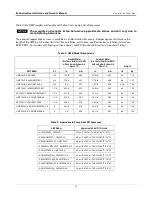
5. The saved Motor Type can be verified with the Bypass jumper in the Normal position.
6. Depress the Reset/Calibration button for 20-seconds – continue holding the button in until the Green LED
has flashed the Motor Type code.
7. If the number of green flashes matches your Motor Type code noted in Step 5. on page 5 above, The IQ
Control Box is now ready for operation.
Figure A-5. SW1 Switch Setup chart
Table A-3. Reset Button and LED Actions
LED
Reset Button - Time
Depressed
Action
Off
Start
Press And Hold The Reset Button
Green
5 seconds
Clears Alarms
Red
10 seconds
Queues Calibration
Off
20 seconds
Cancel calibration. If in Bypass mode, reads and
stores Motor Type.
Green
20 seconds
Flashes saved Motor Type code (see Table A-2)

