DPLLD Transducer Installation
Red Jacket Standard Pumps (DPLLD w/SwiftCheck)
12
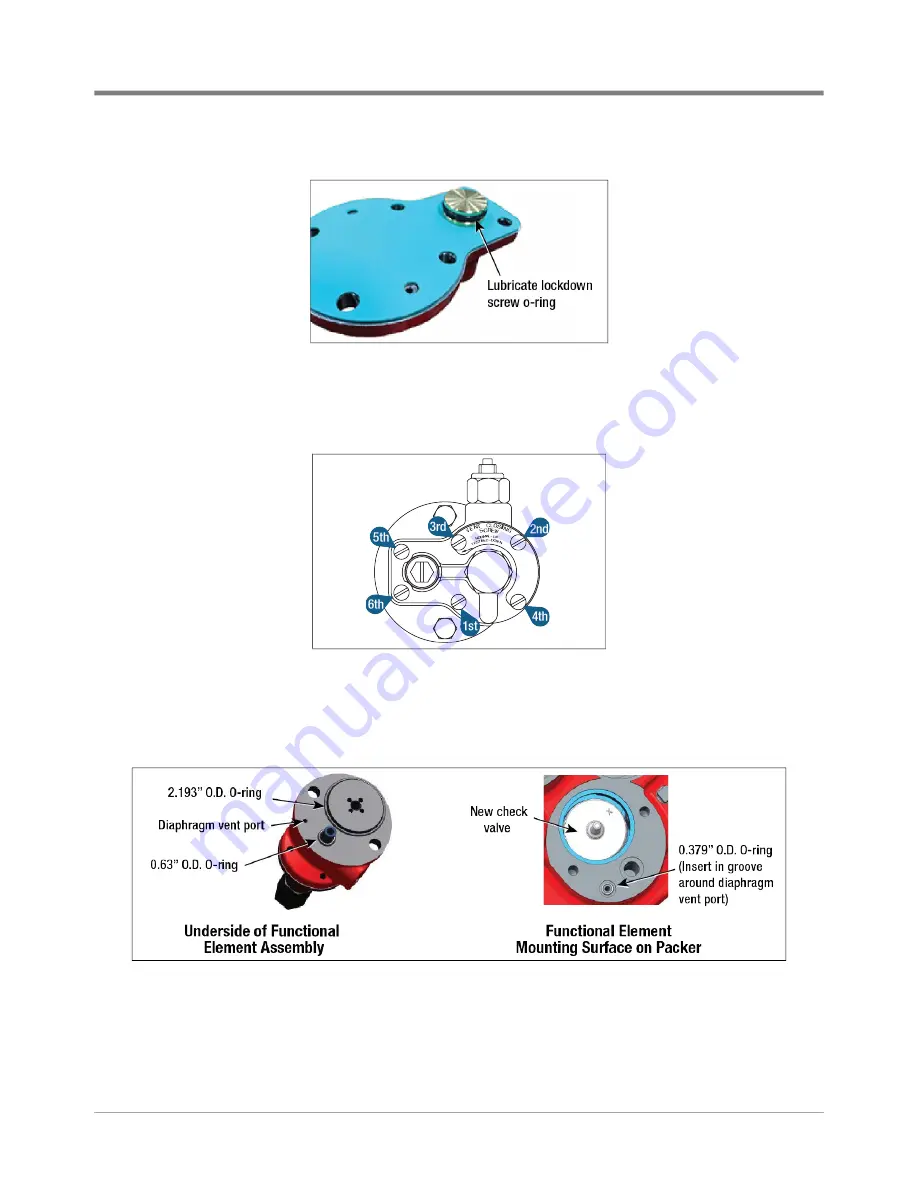
13. Lubricate the o-ring on the Lockdown Screw, using petroleum jelly (see Figure
7).
Figure 7. Functional Element Screw Tightening Sequence
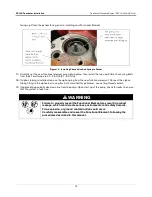
14. Return the Diaphragm to the normal position on the top of the Functional Element. Install the top of the
Functional Element, Poppet, and Diaphragm assembly onto the body of the Functional Element using the 6 –
¼-28 Fillister Head Screws and torque these fasteners, sequentially as shown in Figure
8 to 40-65 in-lbs.
Figure 8. Functional Element Screw Tightening Sequence
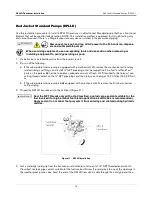
15. Be certain all mating surfaces are clean on the body of the Functional Element and the Packer. Lubricate the
three new functional element O-rings from the kit with petroleum jelly. Install the 2.193” O.D. and 0.63” O.D.
O-rings in the bottom of the functional element as shown in Figure
9. Install the new 0.379” O.D. O-ring in the
groove around the packer’s diaphragm vent port.
Figure 9. Functional Element O-Rings
16. Position the new check valve in the packer in same position as was the old check valve (see Figure
10).
Position the new check valve spring on top of the new check valve with the larger diameter end of the spring


