8
Replacing Left Door (With Or Without Printer)
1.
Perform all of the Steps in the section entitled “Before Turning Off Power” on page 3.
2.
Remove both left door screws (with a T-15 Torx driver) and swing open the door to the left.
3.
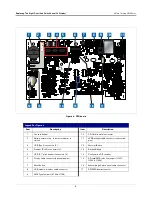
If a printer is installed, remove the printer’s USB cable (pointer 3 in Figure 5) from the top USB connector
(USB 1).
4.
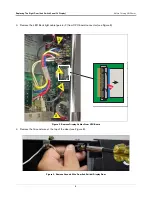
Loosen the T15 ground clamp screw securing the ground wire at the top of the Printer door and slide it free of
the clamp (see Figure 8).
Figure 8. Removing Printer Door Ground Wire
5.
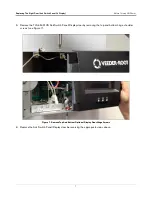
If a printer is installed, unplug the Printer power cable plug from the Power Supply board connector. (see
Figure 9).
Figure 9. Removing Printer Door Power Connector
6.
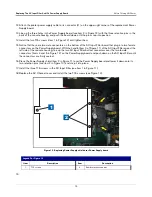
Remove the TLS-450PLUS Printer door by removing the top and bottom hinge shoulder T15 screws (identical
to the Ack Switch Panel/Display Door shoulder screws (item 2, Figure 3).
7.
Replace door reversing appropriate steps above.


