14
Replacing The SD Card
1. Perform a DB Backup of the system as instructed in “Before Turning Off Power” on page 3.
Turn off, tag and lockout the breaker that supplies power to the
console.
2. Remove both left and right door screws (with a T-15 Torx driver) and swing open both doors to the left (see
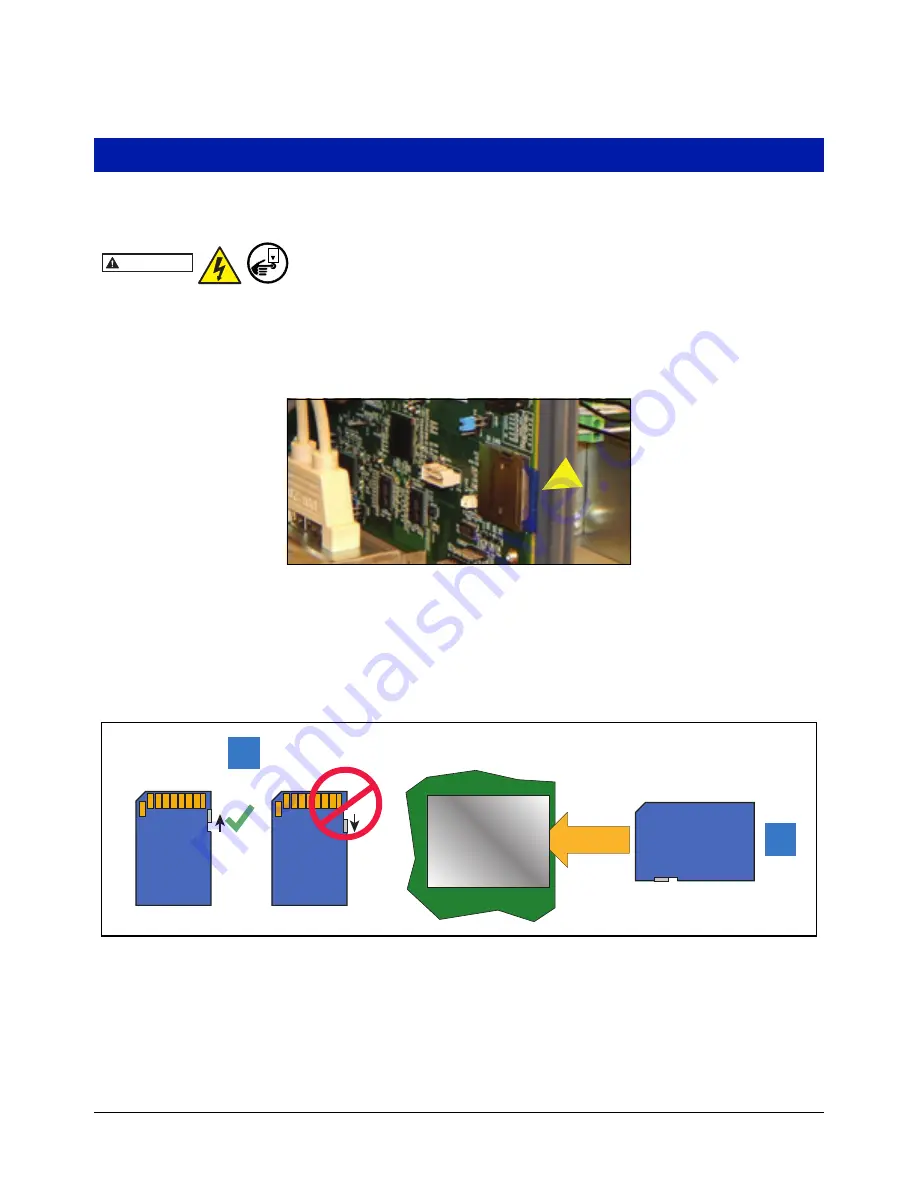
3. Locate the SD card on the CPU board (see Figure 19).
Figure 19. Locating SD card
4. Press the outer edge of the SD card towards the interior of its enclosure and it should spring out so it can be
removed. Remove the SD card from the old CPU board and check that the read/write-protect switch on the
side of the card is in the position shown in (item 1 Figure 20). Insert the SD card into its enclosure on the new
CPU board with the contact side facing the CPU board (item 2) and gently push the card into its enclosure
until it clicks into the enclosure’s latch.
Figure 20. Installing SD Card
5. Close and secure the two doors of the console by reversing the procedure in Step 2 of “Removing The CPU
Board” on page 5.
6. Power up the console and insert the backup thumb drive into an available USB port.
OFF
WARNING
2
1


