background image

Table of Contents

1.  Warnings & General Safety Information
2.  Cleaning & General Maintenance
3.  Overview 
4.  Veer Cruiser Assembly Guide 
5.  Veer Cruiser Operation 
6.  Limited Warranty


HELLO!


Welcome to Veer.  

We hope you enjoy your journeys 
as much as we enjoyed dreaming 
and building this cruiser.  
Let’s get started!

Please review these instructions 
carefully prior to assembly and use 
and you will be on your way to 
a fun filled ride.

Happy Cruising!

VEER 

CRUISER

Getting Started

TM

Summary of Contents for CRUISER

Page 1: ...er Cruiser Operation 6 Limited Warranty HELLO Welcome to Veer We hope you enjoy your journeys as much as we enjoyed dreaming and building this cruiser Let s get started Please review these instructions carefully prior to assembly and use and you will be on your way to a fun filled ride Happy Cruising VEER CRUISER Getting Started TM ...
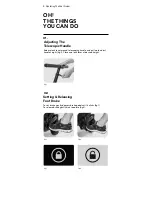
Page 2: ...FROM MOVING WHEELS ALWAYS KEEP FINGERS AWAY FROM MOVING PARTS WHEN FOLDING UNFOLDING OR ADJUSTING THE CRUISER TO PREVENT ENTRAPMENT OR PINCHING DO NOT SIT OR STAND ON THE SIDE WALL PANELS OF THE CRUISER DO NOT SIT OR STAND ON THE FOLDED SEAT BACKS OF THE CRUISER CLIMB CURBS IN PULL MODE DO NOT ATTEMPT TO PUSH ONTO CURBS THIS PRODUCT IS DESIGNED AND MANUFACTURED TO COMPLY WITH ASTM F833 STANDARD CO...

Page 3: ... is structurally unsound Only VEER replacement parts should be used It may be unsafe to use parts supplied by another manufacturer Contact Customer Service with any repair or maintenance questions at 470 344 3200 or behappy goveer com MUST REMAIN SEATED WITH THEIR CRUISER WHILE RIDING PASSENGERS EACH SEAT IS NT CAR SEAT ATTACHED UP TO 55 OF EACH SIDE POCKET IS 2 LBS 9 KG IS 2 LBS 9 KG EXCESSIVE WE...

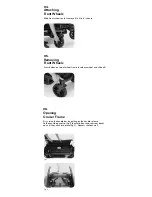
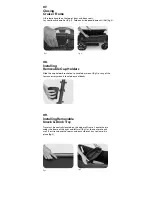
Page 4: ...t center of wheel and slide into frame until a click is heard 02 Removing Rear Wheels Press button in center of wheel to release wheel Slide wheel off 03 Installing Safety Fenders There is a right and left side fender They are coded L and R for ease of installation Make sure tab at the bottom of the fender locks securely in open slot in rear axle mount 01 Fig 1 Fig 2 ...

Page 5: ...heels Press button on top of wheel frame to release wheel and slide off 05 Opening Cruiser Frame First raise the handle bar by pulling on the handle release Fold each side panel up fig 1 then fold front and rear seat backs up until they click into place fig 2 Depress the foot well 06 Fig 1 Fig 2 ...

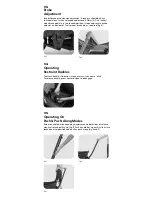
Page 6: ...must be centrally located on the side wall frame Locate the pin under the frame of the right and left wall fig 1 at the center of each wall Rest tray above those pins and push sides of tray to clamp it in place fig 2 09 Closing Cruiser Frame Lift release handle on the top of front and back seats Lay seat backs down flat fig 1 Fold each side panel down until flat fig 2 07 Fig 1 Fig 2 Fig 2 Fig 1 ...

Page 7: ...ose and lock lever at desired height 01 Setting Releasing Foot Brake To set brake gently depress brake pedal until it clicks fig 1 To release brake gently kick toe plate fig 2 02 Fig 1 Fig 1 Fig 2 OH THE THINGS YOU CAN DO 5 Operating The Veer Cruiser ont and back seats ld each side panel down until flat fig 2 Fig 1 Fig 2 ...

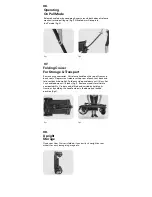
Page 8: ...ease mechanism and pulling up fig 1 Push handle bar up until it clicks into locked vertical position and push or push along fig 2 and 3 05 Brake Adjustment Inspect brake pin extension retraction Brake pin should be flush to wheel mount when unlocked and extend 8 11mm 0 3 0 4 inches when brake pedal is in the locked position If required rotate brake adjuster on bottom of Cruiser near brake pin as r...

Page 9: ...e fig 2 06 Folding Cruiser For Storage Transport Remove any accessories Lift release handle on the top of front and back seats Depress seat releases at top rear of each seat back and fold seat backs down flat Fold each side panel down until it lays flat Lay handle down until it locks fig 1 Remove wheels for ultimate compactability Cruiser can be lifted and carried by holding its frame or by holdin...

Page 10: ...te that a repair issue will NOT be covered by this warranty if The issue is caused by misuse or improper poor maintenance Please refer to this instruction booklet for guidance on the VEER Cruiser use and maintenance Damage is caused by improper installation of VEER parts and or accessories Please refer to this instruction booklet for guidance on VEER Cruiser assembly and use Damage is corrosion mo...

Reviews: