30
31
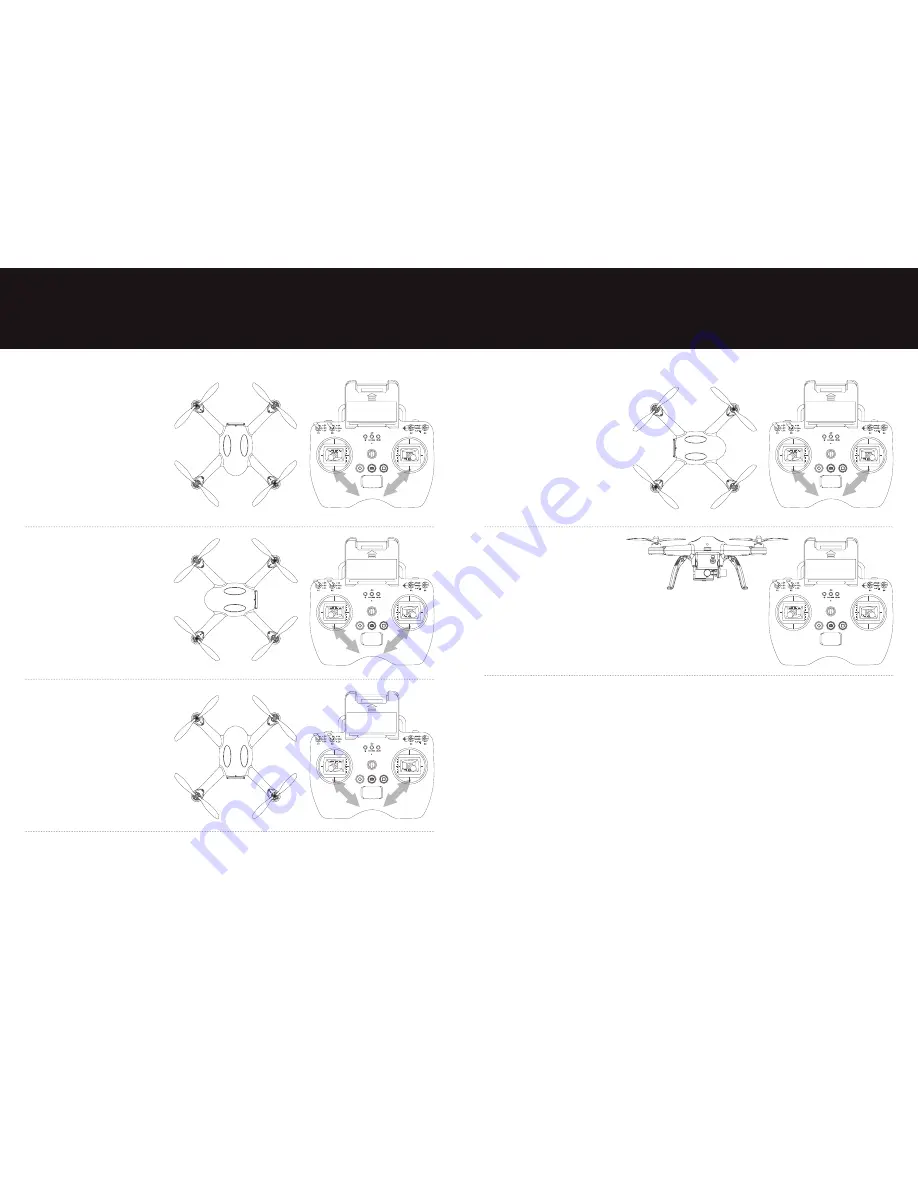
When the four arm lights on the Q-1 Drone
turn on again, lean the four arms of the
Q-1 Drone against a wall, with the nose
facing downwards, to make it perpendicular
to the ground. Toggle both joysticks on
the remote together, moving them down
and inwards as before until the lights go
out on the Q-1 Drone and then return
the joysticks to the middle position.
When the four arm lights on the Q-1 Drone
turn on again, lean the four arms of the
Q-1 Drone against a wall, with the nose
facing to the left, to make it perpendicular
to the ground. Toggle both joysticks on the
remote together, moving them down and
inwards as before until the lights go out
on the Q-1 Drone and then return the
joysticks to the middle position.
When the four arm lights on the Q-1 Drone
turn on again, lean the four arms of the
Q-1 Drone against a wall, with the nose
facing upwards, to make it perpendicular
to the ground. Toggle both joysticks on
the remote together, moving them down
and inwards as before until the lights go
out on the Q-1 Drone and then return
the joysticks to the middle position.
When the four arm lights on the Q-1 Drone
turn on again, lean the four arms of the
Q-1 Drone against a wall, with the nose
facing to the right, to make it perpendicular
to the ground. Toggle both joysticks on the
remote together, moving them down and
inwards as before until the lights go out
on the Q-1 Drone and then return the
joysticks to the middle position.
When the four arm lights on the Q-1 Drone
turn on again this means the calibration
has been successful. Place the Q-1 Drone
back on the ground the correct way up
and turn the Q-1 Drone and the remote
off.
Summary of Contents for MUVI Q-1
Page 1: ...User Manual VQD 002 Q1...
Page 19: ...veho muvi com...


