background image

the previous end point to a next point and so on. 


3)


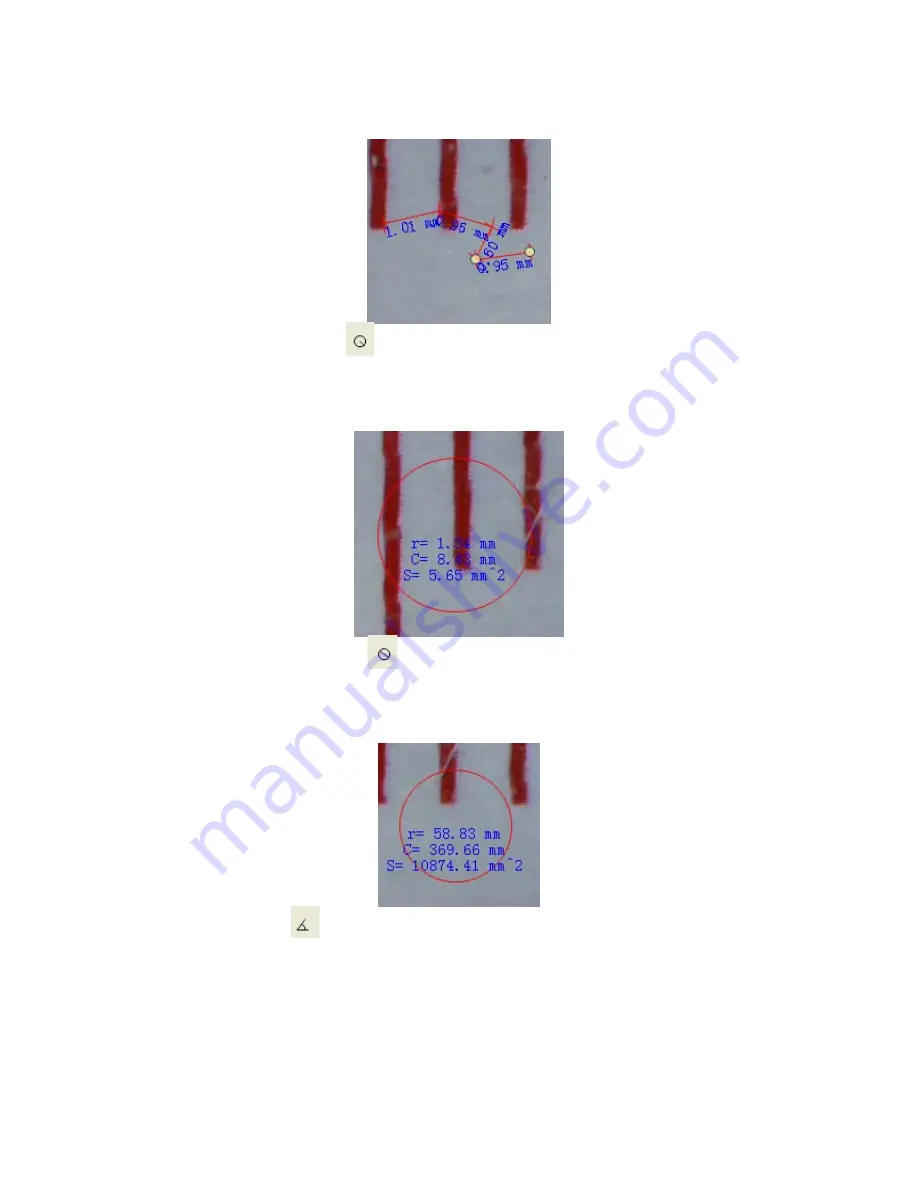
Circle-radius: click

, left-click to choose a start point for a circle; 

draw the circle to an end point, release the mouse, and the radius of 

the circle will be displayed. 


4)


Circle-diameter: click

, left-clicking to choose a start point for a 

circle; draw the circle to an end point, release the mouse, and the 

radius of the circle will be displayed. 


5)


Angle: click

, left-click to choose a start point for an angle, draw 

the line to another point and then release the mouse to create one line 

for an angle. Move your mouse to bring out another line of the angle, 

left-click when the angle is ok. The angle value will then display. 

Summary of Contents for VMS-001

Page 1: ...User instructions...

Page 2: ...nsor 1 3 Mega Pixels interpolated to 2M Still capture resolution 1600x1200 1280x1024 1280x960 1024x768 800x600 640x480 352x288 320x240 160x120 Video capture resolution 1600x1200 1280x1024 1280x960 102...

Page 3: ...display the following interface 1 Install the driver by clicking install Microscope Driver The Install Shield Wizard will walk you through the whole process Click on the Next button to continue 2 Inst...

Page 4: ...icroscope before use 2 Use the FOCUS WHEEL to adjust focus on the subject 3 The SNAPSHOT BUTTON enables user to capture snapshots by hardware photo capture by software is discussed later on in this ma...

Page 5: ...ware by clicking the icon generated on the desktop after installation and you will see the following screen pop up 1 When the Microscope is disconnected from your PC USB port the screen will display N...

Page 6: ...eview size by the following operation Note The size of the photo taken is equivalent to the preview size selected in the Options menu Preview Size z Rotate the output image angle You can rotate the ou...

Page 7: ...z Date Time You can display or turn off Date Time by the following operation z Language You can choose On Screen Display language by the following operation...

Page 8: ...he following operation z Full screen 1 You can enter quit full screen mode by 1 Double clicking the preview area 2 Clicking the full screen icon 3 Choose Full screen mode from menu When in full screen...

Page 9: ...z Preferences Major operations under preferences include Brightness Contrast Saturation white balance etc...

Page 10: ...can record video by either of the following two ways 1 Click the video camera button 2 Choose from the menu bar Capture and then click Video When recording there is a red dot flashing on the video cam...

Page 11: ...2 You can double click the image thumbnail and an independent preview box will pop up as shown below 2 Save photos You can save photo by right clicking on the thumbnail and then choose Save...

Page 12: ...view and select jpeg save options 3 Delete photos By right clicking and then choosing Delete you can delete the selected photo Or at the independent preview box you can choose delete icon to delete th...

Page 13: ...z Quit MicroCapture z Tips You can preset the preview window size output image angle language etc by editing an ini file named settings at C Programs MicroCapture...

Page 14: ...lower end of the focus wheel note down the magnification value that corresponds to the indicator marker on the microscope body as shown below That value is the magnification at which the focus was set...

Page 15: ...of the object you have taken using the available options Click on the icons on top of the window Following are the options 1 Direct line click left click mouse to choose a start point and drag mouse...

Page 16: ...ter click left clicking to choose a start point for a circle draw the circle to an end point release the mouse and the radius of the circle will be displayed 5 Angle click left click to choose a start...

Page 17: ...taken 2 select font font style font size etc 3 draw line box etc on the photo 4 line color 5 line thickness 6 line type 7 undo operation Note 1 The magnification ratio you are allowed to input is fro...

Page 18: ...ware Open mac folder from the disc and copy MicroCapture onto your desktop for daily use Part II How to use MicroCapture 1 Plug your Microscope into PC USB port 2 Double click MicroCapture icon to ope...

Page 19: ...ew resolution From Options you can choose the preview resolution The current resolution will be displayed at the left bottom corner of the preview window Please note that the preview window size alway...

Page 20: ...5 Date Time From Options you can turn the date time on or off 6 Photo capture You can capture photo by 1 Choosing Capture Photo 2 clicking photo capture icon...

Page 21: ...e video by 1 choosing Capture Video 2 clicking video capture icon Note After clicking on the icon the video capture icon will turn red to indicate video clip recording Click the red icon again to stop...

Page 22: ...Captured photo video appear as thumbnails on the right side of the preview window 1 photo Double click a photo thumbnail to open in the main preview window You can then carry out operations as you nor...

Page 23: ...o clip thumbnail the video will play automatically 9 Help info By choosing About MicroCapture you can get help info from your local agent 10 Quit MicroCapture Choose Quit MicroCapture as follows you c...

Page 24: ...g time Powerful light may hurt the light sensitive electronics z Avoid touching the lens z The white LEDs which illuminate the Microscope target field are very bright Do not stare directly into these...

Page 25: ...For support in the UK please visit our FAQ Technical and Download center on our website Veho is a registered trade mark www veho uk com or technical support contact technical veho uk com...

Reviews: