Introduction
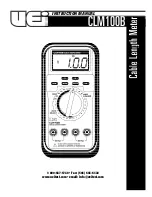
The CLM100B digital Cable Length Meter is an excellent tool to measure
spooled cable/wire. This best seller is built solid and supplied with a
Ruggedized boot for reliable field performance. Currently being utilized
by major utility companies, electrical contractors, wholesalers, and
installers where quick and accurate inventory management or measure-
ments are needed for job accountability. Simply attach the Kelvin Clips
to both ends of the cable and adjust the indicator to the size wire being
measured. A temperature compensation circuit ensures accuracy by
compensating for the temperature of the wire.
Features include
• Increased resolution to 0.000
• Improved accuracy to ±1% of reading for lengths greater than
300 ft (100m)
• Measures copper and aluminum cables; covers the major
wire gauges
• 6 User programmable wire gauge settings
• 25 Pre-set wire gauge settings
• Automatic temperature compensation
• Reads in feet and meters
• Milliohm measurement capability
• Wire size: 26 ga – 4/0 ga
• 250 MCM – 5000 MCM
• Resistance 65
• Auto off
• Two easy-to-attach Kelvin Clip leads connect to cable
WARNING!
Make sure wire under test is not energized. Never apply voltage
to inputs.
NOTE:
Temperature affects accuracy of readings. Please see accuracy
specifications. For best results, allow the CLM100B to attain the same
ambient temperature as the wire under test. The length of time this will
take depends on the ambient temperature. Typically it will take 10 to 15
minutes for the CLM100B to attain equal ambient temperature.
Safety Tips
Before using this meter, read all safety information carefully. In
this manual the word
"WARNING"
is used to indicate conditions
or actions that may pose physical hazards to the user. The word
"CAUTION"
is used to indicate conditions or actions that may
damage this instrument.
Operating Instructions
Calibration Procedures
1. Turn the rotary selector from off to any position to turn the
meter on.
2. Set the rotary selector to “
R
” on the dial.
3. Insert the black test leads into one pair of input jacks and the
red test leads into the other pair of input jacks. (Ignore the gray
marking on the banana plug). This is very important to ensure
that the meter works correctly. If black and red test leads are
mixed the unit will give a false reading. (Fig 1)
4. Connect the Kelvin clips to the calibration standard. Make sure
the clips are as close together as possible. (Fig 2)
NOTE:
Make sure the calibration standard is clean. The Kelvin
clips must be connected across the diameter of the standard.
Use the abrasive pad to clean the calibration standard.
NOTE:
Make sure clips are as close together as possible. Use the
tips of the Kelvin clips when performing measurements on small
diameter wire.
5. Press and hold the ”
CAL
” button until all segments in the display
illuminate. This completes the calibration procedure and will
ensure all measurements are as accurate as possible.
6. Disconnect the leads from the standard.
Measuring Length of Wire
1. Turn the CLM100B on and perform the calibration procedure in
the “
R
” position.
2. Allow the CLM100B to attain the same temperature as the
wire under test.
NOTE:
Temperature affects accuracy of readings. Please see
accuracy specifications. For best results, allow the CLM100 to
attain the same ambient temperature as the wire under test.
CLM100B-MAN
P. 1
(Fig 2)
(Fig 1)

