- 8 -
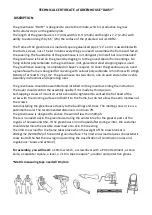
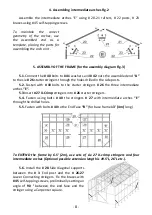
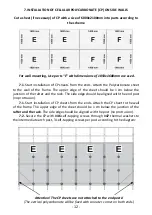
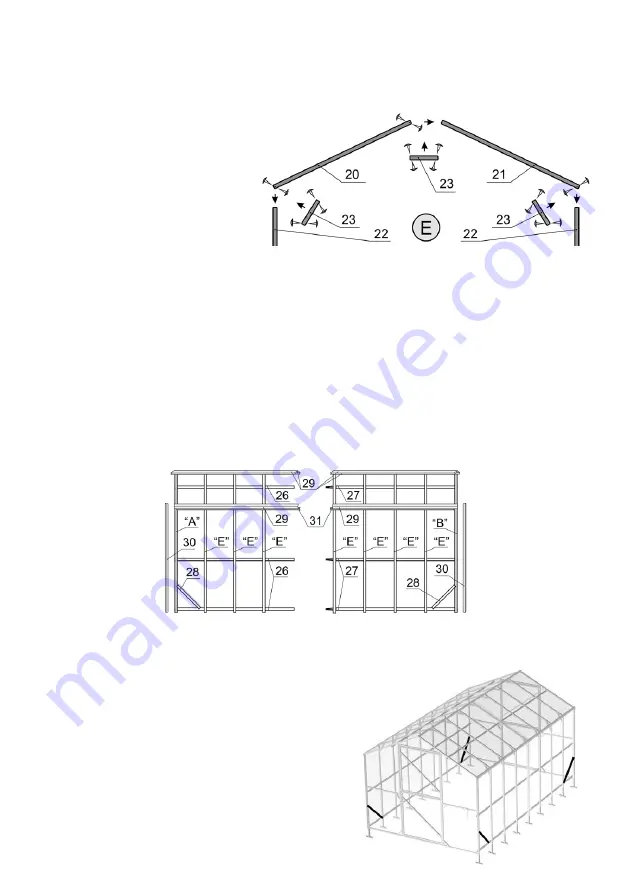
4. Assembling intermediate arches Fig.2
Assemble the intermediate arches “E” using # 20
-21 rafters, # 22 posts, # 23
braces using # 45 self-tapping screws.
To
maintain
the
correct
geometry of the arches, use
the assembled end as a
template, placing the parts for
assembling the arch on it.
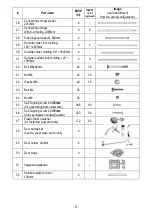
5. ASSEMBLY OF THE FRAME (for the assembly diagram
Fig.3)
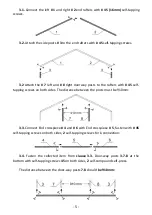
5.1.
Connect the
# 40
bolts to
# 41
washers and
# 42
nuts the assembled end
“A”
to the six
# 26
starter stringers through the holes drilled in the side posts.
5.2.
Fasten with
# 40
bolts to the starter stringers
# 26
the three intermediate
arches
“E”.
5.3
Insert
# 27 X-Crimp
stringers into
# 26
starter stringers.
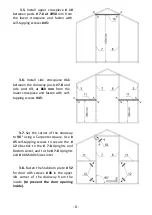
5.4.
Fasten using bolts
# 40
the stringers
# 27
with intermediate arches
“E”
through the drilled holes.
5.5.
Fasten with bolts
# 40
to the End Face
“B”
(for base frame
13’ (4 m)
long)
To EXTEND the frame by 6.5’ (2m), use sets of six 27 X
-crimp stringers and four
intermediate arches (Optional possible extension length is
19.5’L,
26’L etc.).
5.6.
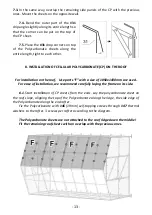
Install the
# 28
Side diagonal supports
between the
# 3
End post and the
# 26-27
Lower Connecting stringers. Fix the braces with
# 45
self-tapping screws, preliminarily setting an
angle of
90 °
between the end face and the
stringer using a Carpenter square.


