14
Assembly into the unit
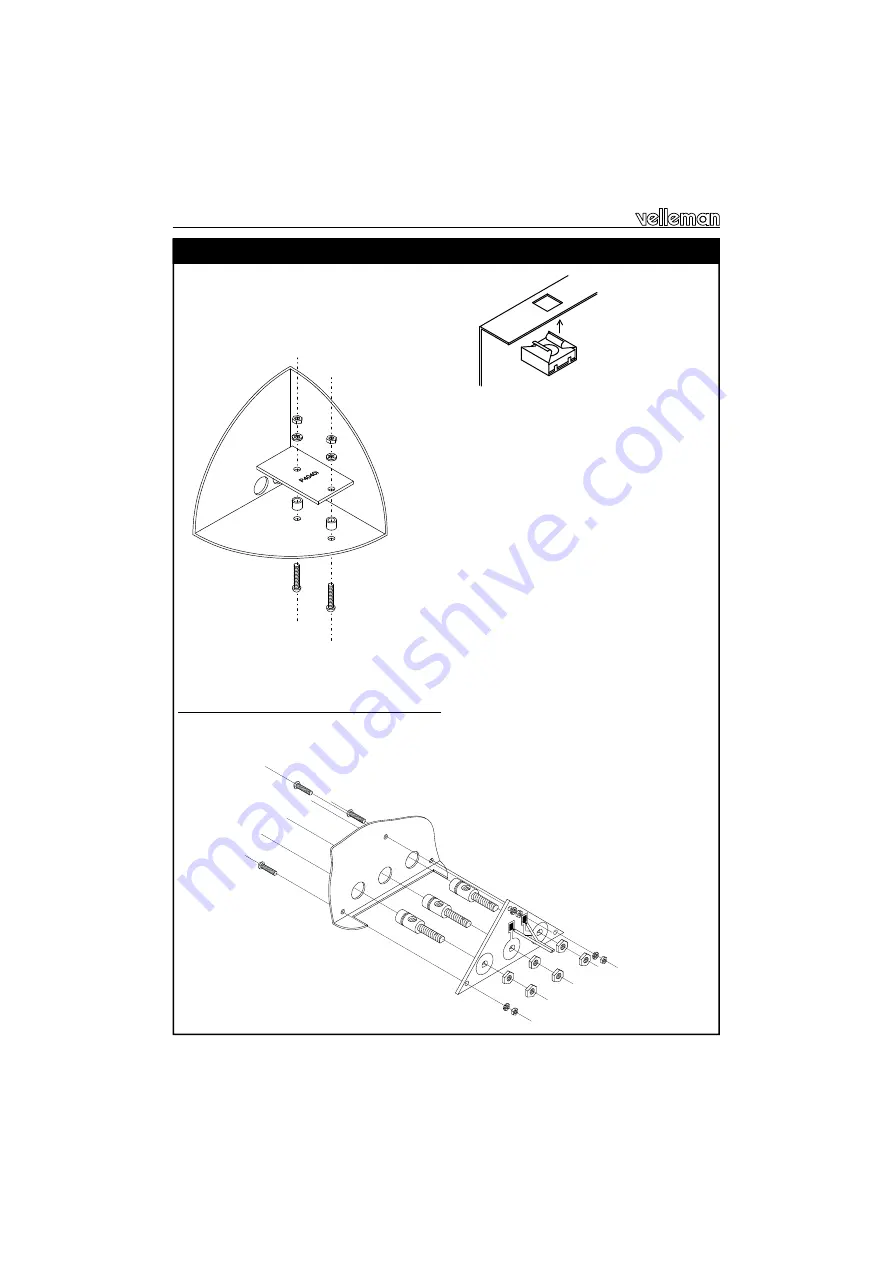
Mount the cage nuts into the square holes concerned,
from the inside to the outside, (with the nut along the
inside). These nuts are used to fasten the covers down,
and there are 7 of them in the cabinet base.
Mount the input PCB on the right-hand side of the housing as
shown in the figure. It is possible that a masking sticker from
the cabinet will have to be removed, so that one of the sup-
porting bushes can make contact with the cabinet.
Mount the chrome feet at the four corners of the cabinet using an M4 bolt. A piece of felt can be sticked
under each foot.
Mount the loudspeaker terminals (repeat twice):
Mount the three loudspeaker terminals on the triangular PCB plate (see figure), the connecting eyes
should not be used.
27. Assembly into the unit
CLICK INTO HOLE
Fig. 1.0
16mm M3 BUTTON HEAD BOLT
5mm SPACER
M3 NUT
M3 LOCK WASHER
Fig. 2.0
M3 NUT
M3 LOCK WASHER
LS TERMINAL
NUT LS TERMINAL
PCB SUPPORT
NUT LS TERMINAL
HOUSING (REAR)
16mm M3 BUTTON HEAD BOLT
Fig. 3.0


