background image

PARA CLIENTES

PREFACIO

ANTES DEL PRIMER USO

¡Gracias por comprar nuestro deshumidificador DryTank 3000! Asegúrese de leer la totalidad de este 
manual de usuario detenidamente antes de utilizar el producto. Si tiene alguna pregunta sobre el uso 
de este producto, póngase en contacto con nosotros en 

service@velgoo.com

. ¡Esperamos que le guste 

su nuevo deshumidificador Energy Star!
Encuéntrenos en línea
Buscar 

@Vellgoo • #Vellgootech

 en las redes sociales para 

obtener consejos, ofertas especiales, obsequios, inspiración y más.

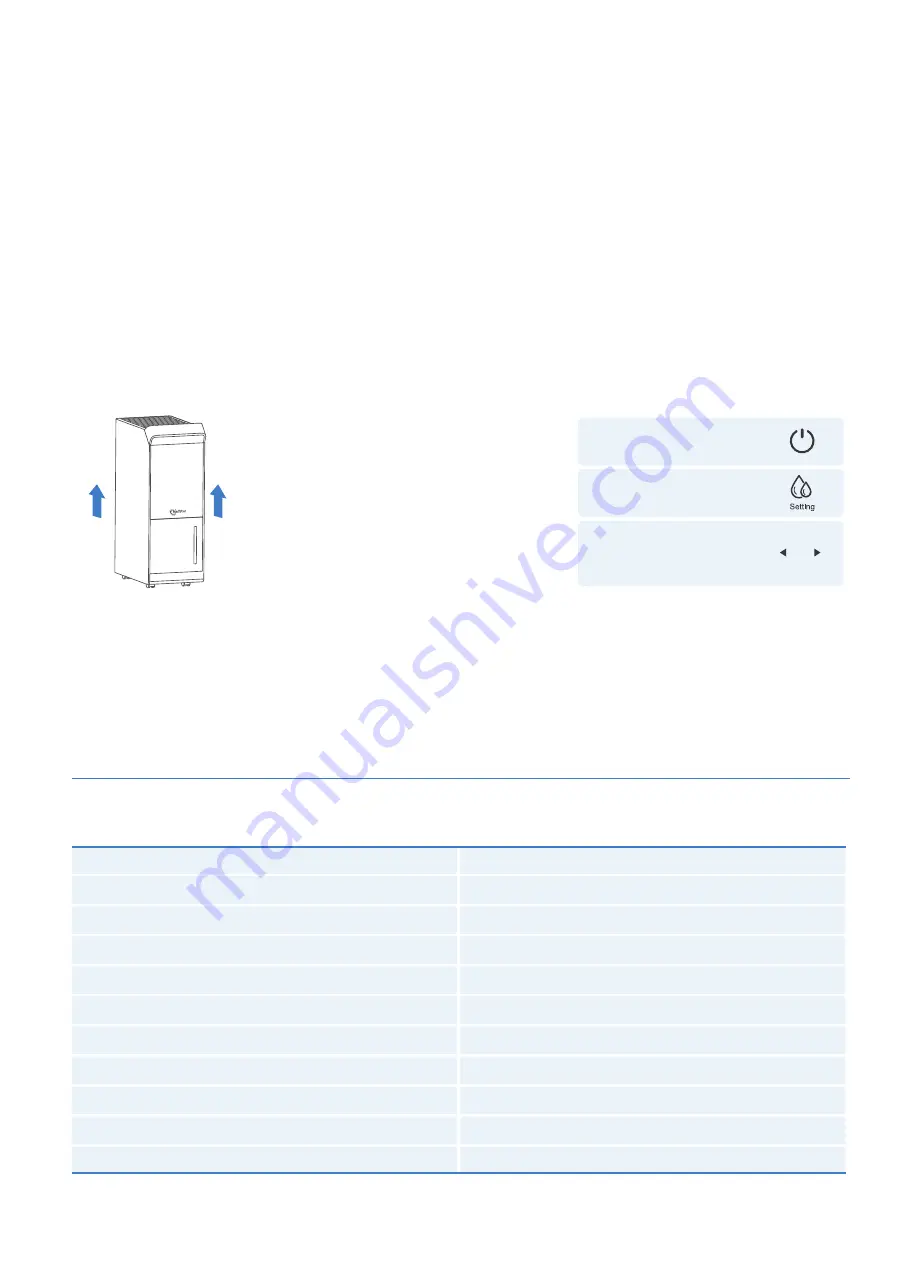
Para evitar cualquier daño interno, es importante mantener la unidad de refrigeración (Figura 1.0) en 
posición 

VERTICAL

 durante todo el viaje. Colóquelo en posición vertical fuera de la caja durante 

24 

HORAS

 antes de insertarlo.

Si el producto falla o el cliente lo considera defectuoso, el cliente debe ponerse en contacto con el 
Servicio de atención al cliente y mantener el producto defectuoso espere más instrucciones. Los 
productos defectuosos deben estar claramente marcados o almacenados en lugares que no se 
puedan reutilizar Error. La falta de retención del producto puede impedir la capacidad de Vellgoo para 
corregir cualquier problema legítimo y puede limitar la medida en que Vellgoo puede proporcionar un 
recurso.

AVISO IMPORTANTE PARA EL PRIMER USO
TENGA EN CUENTA: 

Este deshumidificador tiene por defecto

MODO CONTINUO

, desactivando

Uso de los botones 

IZQUIERDO / DERECHO.

Para reutilizar el botón, asegúrese de que 
el 

MODO CONTINUO

 esté desactivado.


13

ESPECIFICACIONES

ENCENDER

DESHUMIDIFICADOR
APAGAR MODO 

CONTINUO
COMIENCE A USAR

BOTONES IZQUIERDO 

/ DERECHO

Figura 1.0

DryTank 3000 
21.98 Pints/Day(10.4L/Day)
52 Pints/Day(25L/Day)
5.5 MPa (798 PSIG)  
1.2 MPa (174 PSIG)
14.38*8.64*24.09 inches (36.6*22*61.3cm)
32.12 lb (14.6Kg)
5°C-35°C(41°F-95°F)
1.45 Gal/5.5L
120V~60Hz
400W

Modelo
Eliminación de humedad (18.33°C, 60% RH)
Eliminación de humedad (30°C, 80% RH)
Presión máxima permitida    
Presión máxima de succión
Dimensión
Peso
Temperatura de funcionamiento
Capacidad de cubo
Fuente de alimentación
Potencia nominal

Summary of Contents for DryTank 3000

Page 1: ...Dehumidifier User Manual Model DryTank 3000...

Page 2: ...NCE TROUBLESHOOTING WARRANTY INFORMATION CUSTOMER SUPPORT PREFACIO ESPECIFICACIONES INFORMACI N DE SEGURIDAD DESCRIPCI N DE LAS PIEZAS OPERACI N CUIDADO MANTENIMIENTO SOLUCI N DE PROBLEMAS INFORMACI N...

Page 3: ...etain the defective product pending further instructions Defective product should be clearly marked or stored where it cannot be used again by mistake Failure to retain the product may impede Vellgoo...

Page 4: ...h other appliances Do not place the dehumidifier in places where it may be splashed by water Always insert the filter firmly Make sure to clean the filter once a month Do not put vases or other water...

Page 5: ...Customer Service in order to avoid a hazard If the dehumidifier is knocked over during use turn off the dehumidifier and unplug it from the main power supply immediately Visually inspect the dehumidi...

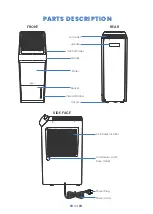
Page 6: ...PARTS DESCRIPTION 04 FRONT SIDE FACE REAR Handle Caster Air Outlet Control Panel Panel Bucket Visual Window Handle Air intake Air Filter Continuous drain hose Outlet Power Cord Power Plug...

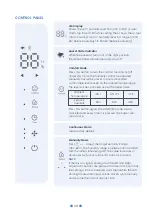
Page 7: ...m plete cycle until after three 3 minutes The operation will automatically start after three 3 minutes Bucket Full Indicator Light The indicator glows when the bucket is ready to be emptied Auto Defro...

Page 8: ...bient temperature The level will be controlled as per the below table Press this button again the COMFORT mode will be canceled and every time it is pressed the buzzer will sound once Ambient Temperat...

Page 9: ...reset the timing Wind Speed Button Low Speed Mode Press this button once Medium Speed Mode Press this button twice High speed Press this button Three times NOTE Low Speed Mode Sleep Mode The brightne...

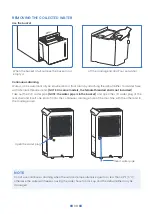
Page 10: ...ically be emptied into a floor drain by attaching the dehumidifier to a water hose with a female threaded end NOTE On some models the female threaded end is not included Take out the PVC water pipe NO...

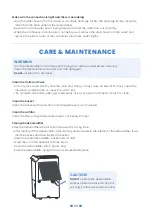
Page 11: ...Grille and Case Do not splash water directly onto the main unit Doing so may cause an electrical shock cause the insulation to deteriorate or cause the unit to rust The air intake and outlet grilles...

Page 12: ...and flashes Pressing any button at this time has no effect Please contact the customer service Stop working the LED displays L3 and flashes Pressing any Button at this time has no effect Re power on a...

Page 13: ...additional safety or use warnings included in the product packaging and manual THIS WARRANTY DOES NOT APPLY TO THE FOLLOWING Damage in return transit Improper or inadequate maintenance Unsupervised us...

Page 14: ...D Please do not return your product before contacting our Vellgoo customer service team If you have any questions or concerns about your new product please contact our helpful Customer Support Team Al...

Page 15: ...spere m s instrucciones Los productos defectuosos deben estar claramente marcados o almacenados en lugares que no se puedan reutilizar Error La falta de retenci n del producto puede impedir la capacid...

Page 16: ...on otros aparatos No coloca el deshumidificador en lugares donde el agua pueda derramarse Aseg rese de insertar el filtro firmemente Aseg rese de limpiar el filtro una vez al mes No coloca jarrones u...

Page 17: ...de atenci n al cliente para evitar peligros Si el deshumidificador se derriba durante el uso apague el deshumidificador inmediatamente y desenchufe la red Revise visualmente el deshumidificador para...

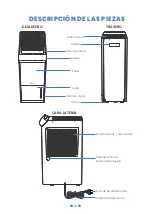
Page 18: ...6 DELANTERO CARA LATERAL TRASERO Tirador Castor Salida de Aire Panel de Control Panel Cubo Ventana Visual Tirador Entrada de Aire Filtro de Aire Drenaje Continuo Salida de Manguera Cable de Alimentaci...

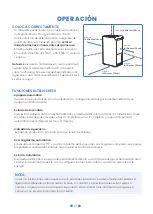
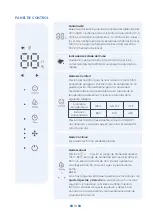
Page 19: ...a funcionar despu s de que se haya completado un ciclo completo La operaci n se inicia autom ticamente despu s de tres 3 minutos Indicador de Agua Lleno Cuando el cubo est listo para vaciarse la luz...

Page 20: ...o est preestablecido en funci n de la temperatura ambiente El nivel se controlar de la siguiente manera Presiona este bot n nuevamente el modo COMFORT se cancelar y cada vez que se presiona el zumbado...

Page 21: ...n y botones Bot n de Velocidad del Viento Modo de baja velocidad presiona este bot n una vez Modo de velocidad media presiona este bot n dos veces Alta velocidad presiona este bot n tres veces NOTA Mo...

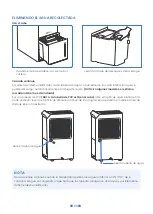
Page 22: ...a una tuber a de agua con un extremo roscado interior el agua se puede descargar autom ticamente en la fuga del suelo NOTA En algunos modelos el extremo roscado interior no est incluido Saca la tuber...

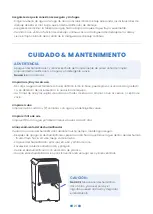
Page 23: ...asa No salpica agua directamente sobre el anfitri n Si no lo hace puede provocar una descarga el ctri ca un deterioro del aislamiento o la oxidaci n del equipo Las tomas de aire y las rejillas de sali...

Page 24: ...n en este momento no tiene ning n efecto P ngase en contacto con el servicio de atenci n al cliente Deje de funcionar el LED muestra L3 y parpadea Presionar cualquier bot n en este momento no tiene ni...

Page 25: ...de seguridad o uso contenidas en los manuales de usuario o en el embalaje y los manuales del producto ESTA GARANT A NO SE APLICA A LO SIGUIENTE Da os en tr nsito de retorno Mantenimiento inadecuado U...

Page 26: ...producto antes de ponerse en contacto con nuestro equipo de atenci n al cliente de Vellgoo Si tiene alguna pregunta o inquietud sobre su nuevo producto comun quese con nuestro til Equipo de atenci n...

Page 27: ...Home Dehumidifier Expert...

Reviews: