29
110332-02 - 6/22
PHTM II
Installation, Operating & Service Instructions
9
Vertical Direct Venting
(continued)
6. Assembly
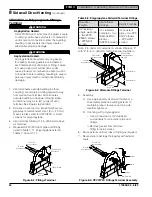
A. Use appropriately sized roof flashing
to maintain proper clearance and
provide weather-tight seal.
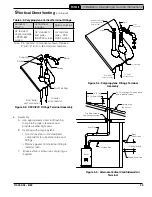
B. If venting with polypropylene
i. Use UV resistant or UV stabilized
components for all exterior pipe and
fittings.
ii. Remove gasket from terminal fitting to
install screen.
7. Brace exterior vertical runs of piping as
required.
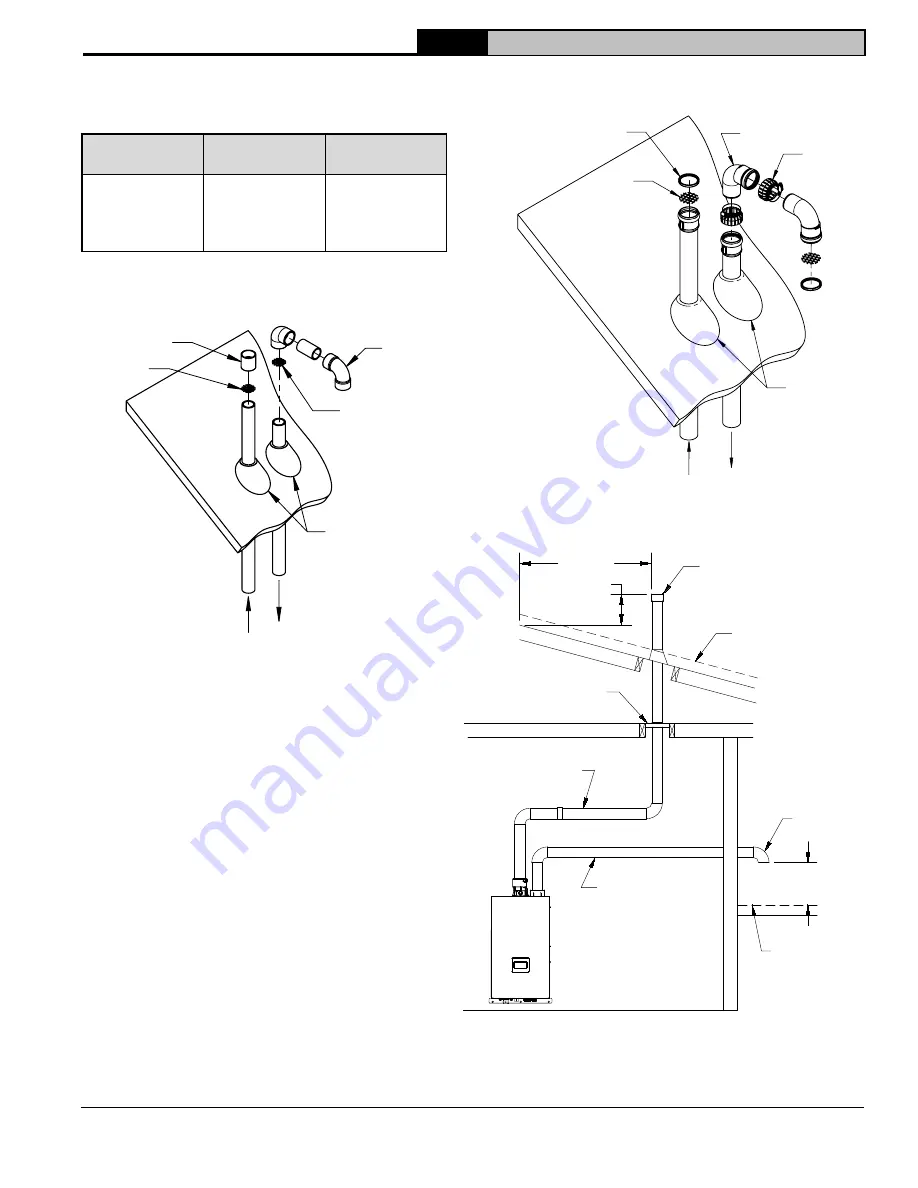
Figure 9-3: CPVC/PVC Fittings Terminal Assembly
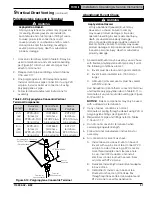
Figure 9-4: Polypropylene Fittings Terminal
Assembly
Table 9-2: Polypropylene Vertical Terminal Fittings
DuraVent
PolyPro
Centrotherm
InnoFlue
Selkirk PolyFlue
UV resistant
single wall pipe
+ 2PPS-BG
screen
UV stabilized
end pipe +
IASPP02 screen
UV resistant
pipe + 2PF-
HVST screen
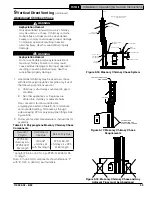
Figure 9-5: Alternate Vertical Vent/Sidewall Air
Terminal
Normal snow
line on roof
Elbow
with screen
Grade/Snow Line
10' (3.1m)
24" (610mm) Min
Air Intake Pipe
PVC Coupling or Polypropylene
end pipe with screen
Fire Stop listed for
use with vent system
Vent Pipe
Boiler
12" (305mm) Min
Roof Flashing
Elbow
Coupling
Screen
Screen
To boiler
air connection
From boiler
vent connection
Note: 2 in. (60 mm) components shown. Replace
"2" with "3" for 3 in. (80 mm) part numbers.
From boiler
vent connection
To boiler
air connection
Roof Flashing
DuraVent & Selkirk:
Remove gasket to
install screen
Screen
Elbow
Joint
Connector


