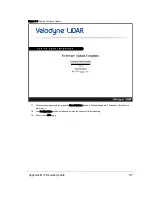
1. Unplug/disconnect power from the Interface Box.
2. Remove the Interface Box cover with a small Phillips screwdriver, retaining all four screws.
3. Carefully remove the fuse.
4. Replace it with an identical, fresh fuse.
5. Replace the Interface Box’s cover and restore power.
11.3 Technical Support
11.3.1 Purchased through a Distributor
IMPORTANT: If you purchased the sensor through a distributor, you should pursue technical assistance through the dis-
tributor first.
11.3.2 Factory Support
Follow the steps below to obtain technical assistance from the factory.
1. On your browser go to the Contact Us page at
http://www.velodynelidar.com/contacts.php
.
2. Click CONTACT TECHNICAL SUPPORT.
3. Select 'for Technical Support' if it isn't already selected.
4. Fill out the rest of the form. Required fields are marked with a red asterisk. Optional fields may be left empty.
5. IMPORTANT: In the Description field, please describe the problem concisely, including any non-default sensor
configuration and setup details as necessary.
6. Attachments are limited to a maximum individual file size of 20 MB. No limit is placed on the number of attach-
ments, nor on the total size of all attachments. For very large files, please host them somewhere suitable and
include a link in the Description field. Bundling files in zip files is fine.
7. Click the Submit button.
11.3.3 Support Desk
You may also contact our Support Desk directly at +1 (669) 275-2230. Toll charges may apply.
11.4 Return Merchandise Authorization (RMA)
If your product was damaged during initial shipping or has failed during or beyond its warranty period, a Return Mer-
chandise Authorization (RMA) must be issued prior to shipping the product to Velodyne LiDAR for service.
The Return Merchandise Authorization (RMA) form can be downloaded from the Velodyne LiDAR Downloads page at:
http://velodyneLiDAR.com/downloads.html
. Follow its instructions to complete the RMA process. Once filed, you may
request status on the repair by contacting
.
90
VLP-16 User Manual


