English
English
12 VELUX
®
VELUX
®
13
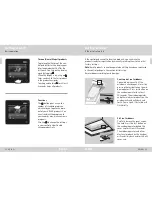
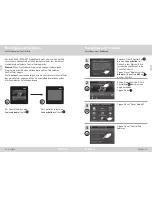
Turn on/Home/Stop all products
To prolong the lifetime of the con-
trol pad batteries, the display goes
into sleep mode shortly after the
last touch. You turn on the display
again by tapping .
When the display is on, a tap on
takes you back to the first product
in the product navigator.
Touching and holding for at least
3 seconds stops all products.
Functions
The button gives access to a
number of standard programs
which help you to get even more
out of your VELUX products. You
can also adjust the programs to
your needs or even make your own
programs.
Also tap to change the settings
in your control pad or to add,
change products etc.
Centre-pivot roof windows
Open window manually (if the
window is already open, close it by
pressing the test button on the win-
dow operator). Press test button on
the window operator for at least
10 seconds. The window operator
and other electrical products on the
window will run briefly back and
forth. Frame lights, if installed, will
flash briefly.
If the control pad cannot find certain products, you can make the
products ready for registration by manually resetting them to the initial
factory settings.
Note:
Reset products cannot be operated until they have been registered
in the control pad again. See section
Initial set-up
.
Reset window according to window type:
Flat roof windows
Carefully remove the cover cap on
the kerb. Press the test button on
the window operator behind the
cover cap for at least 10 seconds.
The window operator and other
electrical products on the window
will run briefly back and forth. Refit
cover cap.
Getting started
Basic operation
Getting started
If the initial set-up fails
Summary of Contents for INTEGRA KLR 200
Page 85: ...168 VELUX VELUX 169 VELUX INTEGRA 1 2 AA LR6 3 1 2 O 1 2 3 1 2 5 4 3 1 2...
Page 86: ...170 VELUX VELUX 171 1 2 3 4 5 0 100 6 O 1 2 3 4 0 100 5 0 100 1 2 3 5 4 6 3 2 1 5 4 5 5...
Page 87: ...172 VELUX VELUX 173 H 3 VELUX 10 10...
Page 88: ...174 VELUX VELUX 175 200 1 3 5 2 4...
Page 89: ...176 VELUX VELUX 177 VELUX INTEGRA B 1 3 5 2 4 A A B 1 2 A A B B 3 4 A A...
Page 90: ...178 VELUX VELUX 179 A B O B 1 2 RESET 5 3 5 6 A B B 1 2 1 2 3...
Page 133: ......
Page 134: ......


