8 VELUX
®
$-+061:+0-6.795);176
"' (-6;9)4-
$?8(
44/-5-1676;)/-
*D1>4
?3
*59D5F?>
1>42E38- +538>9;
!++175C<938D).=2.59458?BCD U<<8?BCD +5>75B>+5<56?> +5<561H
U<D97F?=EC712541DE=29CJEB%5E1E6<175595D19<<TCE>75>21E@8IC9;1<9C385>>7125>'B?4E;D ?45B$1D5B91<25C38B592E>75>C9>4D538>9C385N>45BE>75>F?B2581<D5>
95C5,>D5B<175/5938>E>79CDEB8525BB538D<93875C38UDJDE>4E>D5B<957D;59>5=N>45BE>7C495>CD5B=@6S>75B41B6C95>EBJE45=/G53;25>EDJ5>JE45=C9598=1>F5BDB1EDGEB45
44/-5-16
1-7;:;975)33<::16,)44-)09-)<:@<>-+0:-46
)+0;91//-96,-96;91-*-
.S8B5>445B5BCD5>$9>ED5>>13859>5B). EC<TCE>7G5B45>495>DB9525JI;<9C381<<5$9>ED5>
>13875DB9775BD#?C2B5385>J259F5B59CD5>"<1@@5>"E@@5<>ECG
(<6)+0-;@)<:.)44
1$9>ED5>>138%5DJ1EC61<<618B5>U25B495#U6DE>7C6E>;D9?>75T66>5D5>DB95251ED?=1D9C38JE
95C5E>;D9?>9CD259). EC<TCE>71ER5B5DB952
G.;<6/I%H*-1-;@)<:.)44
B6?<7DGS8B5>445BWE6V E>;D9?>U25B495#U6DE>7CD1CD5B59>%5DJ1EC61<<618B5>495>DB9525U25B
495;;ECG59D5B1E6:54?38C38<95R5>49575T66>5D5>>DB95251ED?=1D9C38>13831$9>ED5>G9545B
95;;E;1@1J9DSD9CD895B6UB1EC75<57D
&#+0<;@
<<59> E>4EC7S>75C9>47575>59>75;?@@5<D5*DTBE>75>75C38UDJD
<9@:+04<:::+0<;@
<<5EC7S>75C9>47575>"EBJC38<ECCE>4Q25B<1CD75C38UDJD
')9;<6/
). ><175>C9>4=9>45CD5>C59>=1<:S8B<9384EB3859>51ED?B9C95BD513869B=1JEG1BD5>
95.1BDE>7E>4Q25B@BU6E>745B><1759CD4EB3859>5'BU6@<1;5DD51>45B). /5>DB1<5
E>49>59>5=.1BDE>7C2E38JE4?;E=5>D95B5>
76;)/-
E6@EDJ=?>D175
952453;;1@@55BU8BE>7CC38EDJ12C38B1E25>95*D5E5BJ5>DB1<59>45>259<9575>45>E6@EDJB18=5>
59>C5DJD5>E>44EB38495565CD97E>7C<T385B2565CD975>%13845B$?>D17545>%5DJ1>C38<ECCF?B>58=5>
E>4495*38EDJ;1@@5G9545B=?>D95B5>
,>D5B@EDJ=?>D1759>/9575< 5D?>G1>4
95565CD97E>7C<1C385>1E645B)U3;C59D545C
58SEC5C9>495U8BE>7CC3895>5CD53;5>E>4
=9D45>259<9575>45>*38B1E25>2565CD975>
*?G95<9>;C9=9<441B75CD5<<D95#1C385>;T>>5>
:5>138'EDJCDSB;5E>D5BC38954<938=?>D95BDG5B45>
16UBG5B45>495#1C385>>EB1>45BC85BE=1E675CD53;D
,>D5B@EDJ=?>D1759>?8<G1>4
95565CD97E>7C<1C385>6UB?8<G1>4=?>D1751E6
45B)U3;C59D545C58SEC5C9>49581<2BE>45U8BE>7C
C3895>5<575>E>4=9D45>259<9575>45>*38B1E25><5938D
2565CD975>1C58SEC59>495.1>4@<1DJ95B5>E>4495
*38B1E25>1>J9585>*?G95<9>;C9=9<441B75CD5<<D
95). +1CD5B9>59>5BT85F?>31=L =U25B&"=?>D95B5>
General information / Installation
General information
The back-up batteries must be replaced every four years.
Retriggering the motors
During the first 30 minutes after an alarm activation, the motors are retriggered cyclically every two minutes (for instance
removing ice if the staircase smoke exhaust is blocked).
Comfort ventilation CLOSE after power failure
In case of power failure, all staircase smoke exhausts that have been opened via the comfort ventilation will automatically
close after about two minutes. In case of fire alarm, this function is not active.
Comfort ventilation OPEN in case of power failure
In case of power failure while the OPEN function of the ventilation switch has been activated, the motors still keep the
staircase smoke exhausts open via the batteries but close them automatically after about two minutes.
The battery capacity is designed for this.
EMC protection
All inputs and outputs are protected against coupled interference.
Short-circuit protection
All outputs are protected against short-circuiting and overload.
Maintenance and service
Smoke exhaust systems must be inspected by certified personnel at least once a year. Tests and inspections must be docu-
mented in accordance with national regulations.
Installation
Installation on wall
Unscrew the cover cap (touch protection). Insert the control unit into the frame supplied and fix it to the wall with screws
in the four holes. After installation, connect to power supply and refit the cover cap.
The break-glass point should be installed in compliance with local regulations.
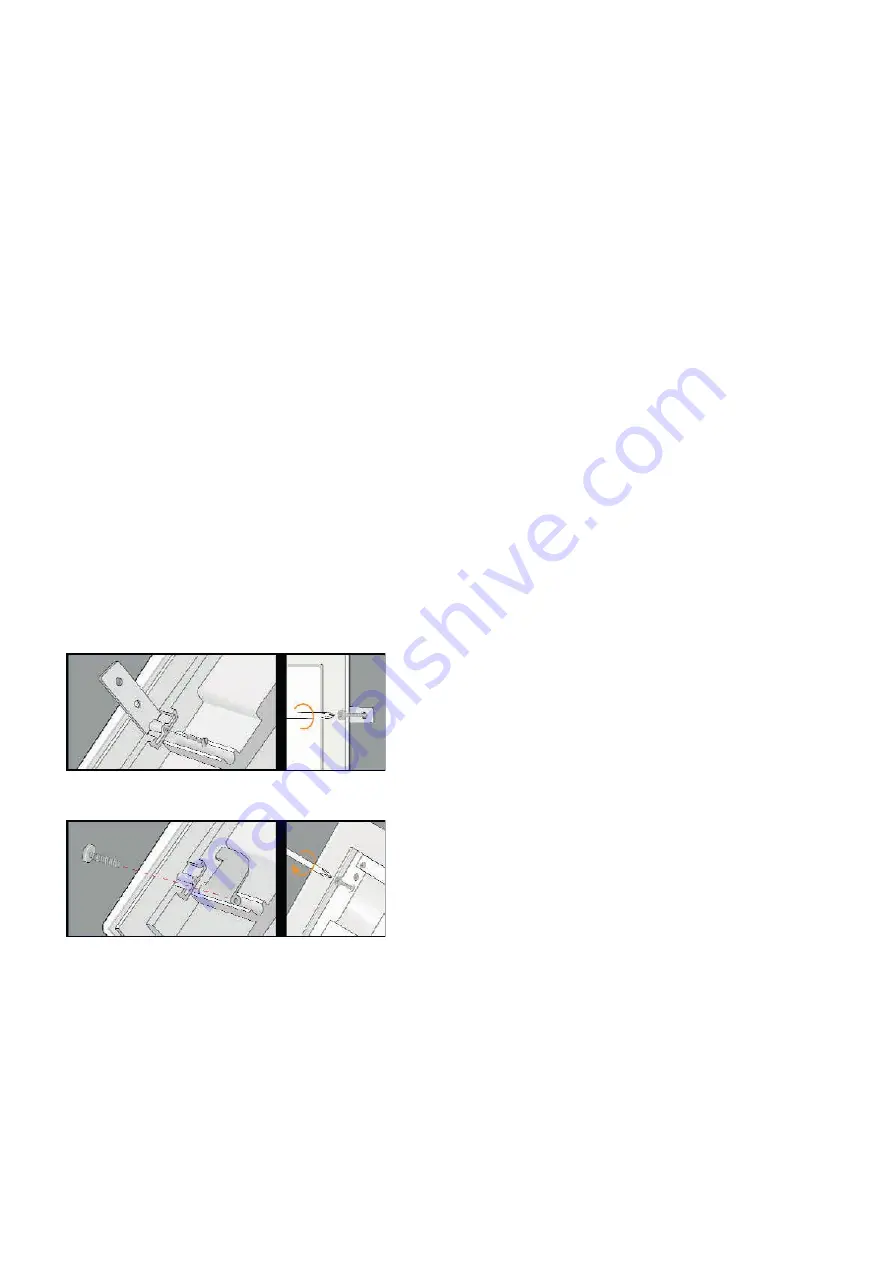
Recessed installation in brick/concrete wall
Insert the fastening brackets at the back of the hou-
sing into the guide rail and fasten with the screws sup-
plied, see illustration. Depending on plaster thickness,
the brackets can also be fitted by attaching them the
other way round.
Recessed installation in timber frame wall
Insert the fastening brackets at the back of the hou-
sing in the semi-circular guide rail, insert the screws
supplied and fasten them lightly. Place the housing in
the wall and tighten the screws, see illustration.


