HP10E / HP12E / HP15E / HP20E - Dairy design
4. Setting up
4-1
© VEMAG 2013
4. Setting up
4.1 General information
• To set up the machine, select a double screw housing, the double
screws to suit the product to be processed and the required accesso-
ries.
Danger!
To prevent injury, switch off the machine before setting up. Then switch
off the main switch to disconnect the machine from the mains.
4.2 Fitting the double screw housing
Danger!
There is a risk of crushing when fitting and removing the double screw
housing and the double screws. To prevent injury, proceed extremely
carefully when fitting and dismantling these parts.
• Inspect the double screw housing for residual product prior to as-
sembly.
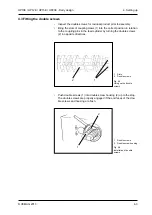
• Push double screw housing (1) right into the feed cylinder of the ma-
chine. Inlet bore (2) for product and vacuum should face upwards.
1 Double screw housing
2 Inlet bore
Fig. 4-1
Installing double screw
housing
1
2
Summary of Contents for HP10E
Page 8: ......
Page 10: ...HP10E HP12E HP15E HP20E Dairy design 0 Foreword 0 2 VEMAG 2013...
Page 26: ...HP10E HP12E HP15E HP20E Dairy design 3 Installation and commissioning 3 6 VEMAG 2013...
Page 34: ...HP10E HP12E HP15E HP20E Dairy design 4 Setting up 4 8 VEMAG 2013...
Page 38: ...HP10E HP12E HP15E HP20E Dairy design 5 Operation 5 4 VEMAG 2013...
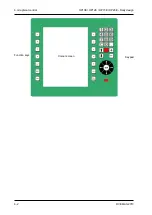
Page 52: ...HP10E HP12E HP15E HP20E Dairy design 6 Graphical control 6 14 VEMAG 2013 Mode group Mode View...
Page 56: ...HP10E HP12E HP15E HP20E Dairy design 6 Graphical control 6 18 VEMAG 2013...
Page 58: ...HP10E HP12E HP15E HP20E Dairy design 6 Graphical control 6 20 VEMAG 2013...
Page 60: ...HP10E HP12E HP15E HP20E Dairy design 6 Graphical control 6 22 VEMAG 2013...
Page 97: ...HP10E HP12E HP15E HP20E Dairy design 6 Graphical control 6 59 VEMAG 2013...
Page 100: ...HP10E HP12E HP15E HP20E Dairy design 6 Graphical control 6 62 VEMAG 2013...


