ENG-5
Power Supply
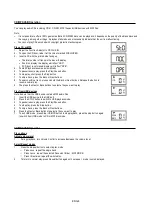
Connect AC power
Caution:
Ensure that the power supply voltage corresponds to the voltage printed on the rating label located on the back or bottom of the unit.
Warning:
When you disconnect the AC power cord, always pull the power plug out of the wall first.
Note:
Install the product near the wall power socket and where the AC power plug can be easily reached.
1. Connect the power cord to the AC IN jack on the unit and to the wall outlet.
2. To save energy: After use, switch OFF.
Install batteries (not included)
Note: Use DC batteries for the product.
Batteries are not supplied.
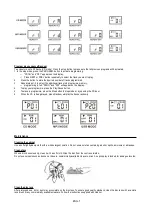
1. Open the battery compartment.
2. Insert 6 x DC1.5V “C” (UM-2“C”) batteries with correct polarity (+/-) as indicated.
3. Close the battery compartment.
Handling the batteries
Never use batteries that show signs of electrolyte leaks or cracking.
Never dispose of used batteries in an open fire.
Keep batteries out of the reach of children.
Never short circuit battery terminals.
Always remove dead batteries from the product.
Do not mix up different kind of batteries or new and empty batteries together.
Only use batteries of the recommended or equivalent type.
Remove batteries from the unit at the end of its service life.
Dispose of the batteries in accordance with local regulations.
General Operations
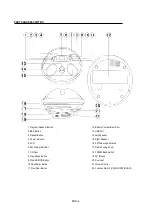
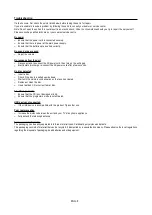
1. To switch on and select your operation source, adjust the Function Selector to CD/AUX IN-OFF-RADIO.
2. Adjust the sound with Volume Control.
3. To switch off the unit, adjust the Function Selector to OFF.
Note:
To avoid unnecessary energy consumption, always adjust the Function Selector to OFF.
Radio Reception
1.
Adjust the Function Selector to RADIO.
2.
Adjust the Band Selector to AM FM or FM ST.
3.
Turn the Tuning Knob to tune to the desire station.
Note:
The FM stereo indicator comes on if the band selector is set on FM stereo and you have turned the radio to FM stereo again.
Helpful hints:
To improve FM reception, you can extend or rotate the telescopic antenna for best reception.
To improve AM reception, turn the unit to face a different direction.


