5.6 I
NSTALLING
D
UAL
E
XTERIOR
H
OOD
(
CONT
’
D
)
5.6.3 C
ONNECTING
T
ANDEM
®
TRANSITION TO EXTERIOR
D
UAL
H
OOD
(
CONT
’
D
)
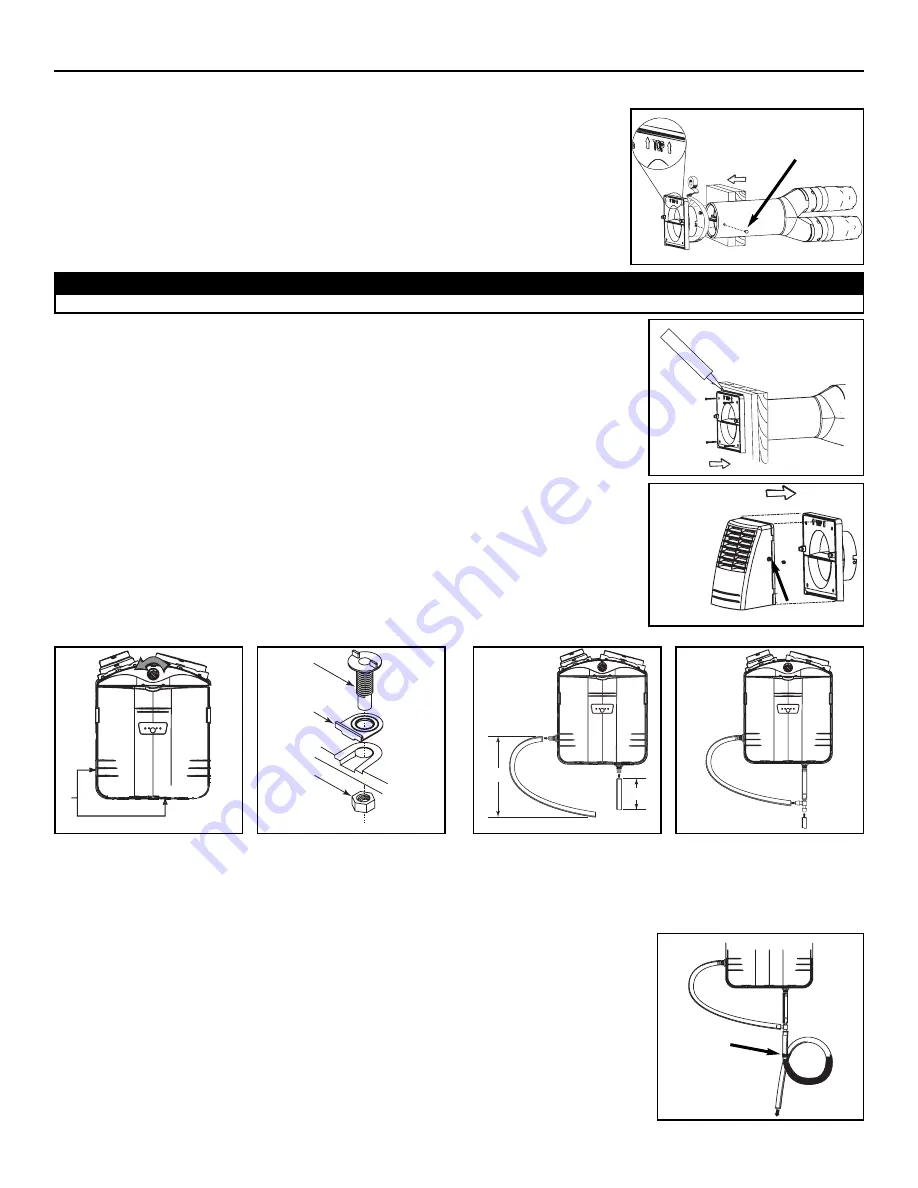
2.
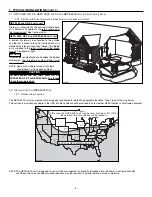
Joint the end of the Tandem® transition to the rear of the exterior backplate. Secure
with 2 Xmas tree pins and seal properly with duct tape.
3.
Lean the exterior backplate to the exterior wall. Using 4 #8 x 1 1/2” screws, fix it to the wall.
Seal the outline with caulking.
4.
Snap the assembled exterior hood on its backplate and secure with 2 provided screws
(#8 x 3/4” long).
5.7 C
ONNECTING THE
D
RAIN
(HRV 2500, HR 2.5, HEPA 3000
AND
HF 3.0
UNITS ONLY
)
VD0085
CAUTION
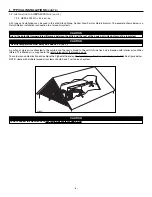
The exterior backplate must be installed with the word ‘’TOP’’ pointing upward.
Xmas tree pin
VD0086
VD0087
screw
5. INSTALL THE UNIT
(CONT’D)
VO0025
1
VO0046
1
2
3
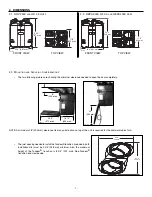
2.
Hand tighten the 2 plastic
drain fittings (
1
) using the
gaskets (
2
) and nuts (
3
) as
shown. Close the door.
VO0027
27''
686 mm
7''
(178 mm)
3.
Cut 2 sections of plastic tubing;
one 7’’ (178 mm) long and one
27’’ (686 mm) long, and attach
them to each drain fitting as
shown.
VO0028
4.
Join these 2 sections to the
‘’T’’ junction and main tube as
shown.
VO0029
1
3
2
4
5
Tie-wrap
To drain
5
.Make a water trap loop in the tube to
prevent the unit from drawing
unpleaseant odors from the drain
source. Make sure this loop is situated
BELOW the ‘’T’’ as shown. This will
prevent water from being drawn back
up into the unit in case of negative
pressure. Run the tube to the floor
drain or an alternative drain pipe or
pail. Be sure there is a slight slope
for the run-off.
- 17 -
1
.Remove the door by turning
the switch knob to the OFF
position (to unlock the door).
Then, unlatch the door and
open it. Slide out the core
assembly to access the 2
drain fitting hole locations (
1
).
Punch out the holes.

