background image

Page 3 of 8 

Installation 

IMPORTANT: 

If you are not knowledgeable about and comfortable with electrical circuitry or HVAC 

installation, you should have a qualified electrician install a compatible thermostat for you. 
 

Install the thermostat by following the enclosed Venstar documentation. 

Note: This thermostat is not compatible with Venstar accessories that connect via the phone-style jack on 
bottom of Venstar products. 


Setting Up INSTEON Scenes 

In a scene,  one or more INSTEON responders respond to an INSTEON controller. When the scene is 
triggered (turned On), all devices return to the states they were at when the scene was programmed. 


Adding Venstar Thermostat as an INSTEON Responder 

Thermostat includes a special feature that allows you to link individual commands to the On and Off 
buttons on your controller. For example, you can link the heat to turn on when you press the On button 
and link the fan to turn on when you press the Off button on your controller. 

NOTE: “Scene On” and “Scene Off” must be added/linked separately. If you only add/link to “Scene On,” 
nothing will happen when you trigger a “Scene Off.” 


1)  Press and hold the scene controller button until it beeps.

1


Controller’s LED will blink.


2)  Adjust the mode, setpoints, etc. on the thermostat to the desired scene settings. 

3)  If you wish to link to “Scene Off,” double-tap thermostat’s Set button. Otherwise proceed to step 4. 

4)  Press and hold thermostat’s Set button until it double-beeps. 


Thermostat will flash all its LCD characters twice. 


Thermostat’s INSTEON LED will flash once and return to 

green

.

2


Controller will double-beep

3

 and its LED will stop blinking. 


5)  Confirm that scene  addition  was successful by tapping  sending an On  (and/or  Off)  from  the 

controller’s scene button. 


Thermostat’s settings will return to scene settings. 


Adding Venstar Thermostat as an INSTEON Controller 

Scenes can be triggered  when the thermostat begins or ends actively heating or cooling. Further, it can 
trigger/control a scene when the fan mode is switched between always on and auto.  This feature is 
helpful to control equipment such as booster fans, dampers, etc. 

1)  Activate the desired controller mode. 

a.  A/C: Turns responders on when A/C begins cooling (thermostat’s status LED green) and off 

when A/C ends cooling. 

i. Tap thermostat mode button until only cool setpoint is displayed. 

b.  Heat: Turns responders on when Heating begins (thermostat’s status LED red) and off when 

Heating ends. 


1

 If the controller does not have a beeper, wait until its LED begins blinking 

2

 You may need to dim your room lights and/or hold a white piece of paper up to bottom of the thermostat in order to see the LED 

3

 Most models 

Summary of Contents for INSTEON 2491T1E

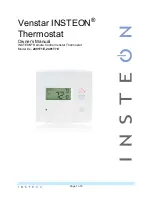
Page 1: ...Page 1 of 8 Venstar INSTEON Thermostat Owner s Manual INSTEON Remote Control Venstar Thermostat Model s 2491T1E 2491T7E ...

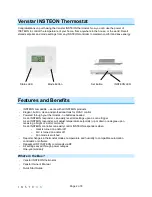
Page 2: ...ies needed As an INSTEON responder can easily recall all settings upon a scene trigger As an INSTEON responder will adjust temperature setpoint s up or down one degree upon receiving a bright or a dim command As an INSTEON controller can easily control INSTEON responders when o Heat is turned on and or off o A C is turned on and or off o Fan mode is switched Reports changes in thermostat modes tem...

Page 3: ...tpoints etc on the thermostat to the desired scene settings 3 If you wish to link to Scene Off double tap thermostat s Set button Otherwise proceed to step 4 4 Press and hold thermostat s Set button until it double beeps Thermostat will flash all its LCD characters twice Thermostat s INSTEON LED will flash once and return to green 2 Controller will double beep 3 and its LED will stop blinking 5 Co...

Page 4: ...gs Adjust Temperature Up or Down by a Degree Some devices such as RemoteLinc have specific dim brighten buttons which can be used to adjust the current thermostat setpoint s up or down by a single degree To adjust your thermostat s setpoint by a single degree 1 Recall a mode setpoint by pressing On from the desired linked controller 2 Tap the brighten button to increase or dim button to decrease t...

Page 5: ...en flashes Thermostat s INSTEON LED will blink green 3 Press and hold thermostat s INSTEON Set button again time until LCD screen flashes a second time Thermostat s INSTEON LED will continue to blink green 4 If scene responder is a multi scene device tap the scene responder button 5 Press and hold the responder s Set button until it beeps and or LED flashes Thermostat s INSTEON LED will stop blink...

Page 6: ...t LED will continue blinking green 5 Press and hold the Set button on the desired automation controller or interface for 3 seconds The thermostat s INSTEON LED will stop blinking Restoring Power to Thermostat This INSTEON device stores all of its settings such as links to other INSTEON devices On Levels Ramp Rates etc in non volatile memory Because settings are saved in this non volatile memory th...

Page 7: ...hree times then return to normal The INSTEON LED will flicker for a few moments and then turn solid Troubleshooting Problem Possible Cause Solution Thermostat does not respond to Off commands Did not link to off See Adding Thermostat as an INSTEON Responder and link to Scene Off LED won t come On Difficulty viewing LED Turn off room lights Hold a piece of white paper at a 45 degree angle up agains...

Page 8: ...onsult the dealer or an experienced radio TV technician WARNING Changes or modifications to this device not expressly approved by the party responsible for compliance could void the user s authority to operate the equipment ETL UL Warning CAUTION To reduce the risk of overheating and possible damage to other equipment do not install this device to control a receptacle a motor operated appliance a ...

Reviews: