17
EN
Reminder/Interval Actions
!
Attention!
Ensure that the device is switched off during the following actions
and the power plug is disconnected from the power supply!
B
CHANGE
HYGIENE DISC
Open evaporator compartment. Remove VentWave™ DISC stack
and unlock the drive wheel. Remove hygiene DISC and replace
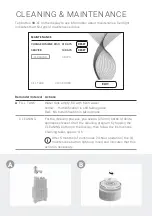
it. Re-assemble the appliance and switch it on. Tap button
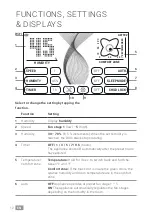
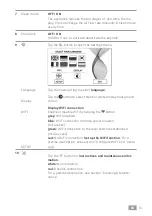
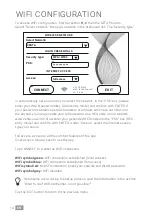
on the display to access the maintenance menu. Then tap
RESET next to CHANGE HYGIENE DISC and hold for 3 seconds
until the time is reset.
i
After 3 months, the maintenance button
lights up in red
and indicates that this action is necessary.
The service life of a hygiene DISC is approx. 3 months (at con-
tinuous 24-hour operation) and depends on the water hardness,
water quality, daily evaporation performance and number of
operating hours.
You can use the Venta ReNew recycling program to return
the hygiene DISC to us (see RECYCLING & DISPOSAL).
SERVICE
Empty the residual water out of the water tank and water tray.
Clean the water tray, VentWave™ DISC stack and water tank un-
der running water. Fill the water tank up to the MAX marker with
fresh water. Re-assemble the appliance and switch it on. Tap
button on the display to access the maintenance menu. Then
tap the RESET button next to SERVICE and hold for 3 seconds
until the time is reset.
i
After 14 days, the maintenance button lights up in red
and indicates that this action is necessary.
Recommenda-
tion
every 3 years
To ensure the full performance of the UVC lamp, you should
change the bulb every 3 years.
Note:
UVC lamp is on for 4 h per day or 1 h in timer mode.
You can carry out the maintenance steps CHANGE HYGIENE DISC, SERVICE and
CLEANING whenever necessary. When you are finished, simply tap the relevant
RESET button in the maintenance menu
and hold for 3 seconds until the time is
reset. The next reminders for the actions performed will be indicated at the normal
intervals.
Any residues in the water tray and on the VentWave™ DISC stack (white, green-yel-
low or brown deposits or discolorations) do NOT impair the function of the device.
Summary of Contents for AW902
Page 2: ......
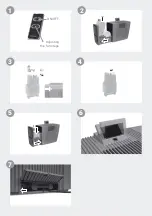
Page 11: ...Adjusting the fan stage ON OFF 1 2 1 2 1 3 4 6 2 5 7 ...
Page 29: ...Réglage des niveaux de ventilation ON OFF 1 2 1 2 1 3 4 6 2 5 7 ...
Page 47: ...Ajuste de la velocidad del ventilador ON OFF 1 2 1 2 1 3 4 6 2 5 7 ...
Page 58: ......
Page 59: ......

