background image

PARTS

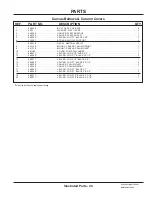
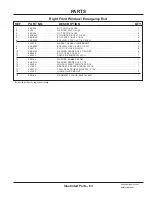
Illustrated Parts - 51

Use only original Ventrac 

replacement parts.

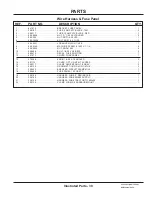
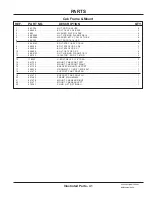
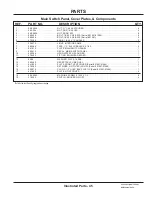
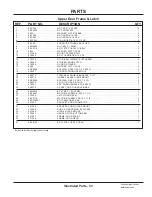
REF. 

PART NO. 

DESCRIPTION 

QTY.

1   . . . . . . . . . 30.0317  . . . . . . . . . . . . . . . . . . . .FUSE, 10 AMP ATC BLADE - RED  . . . . . . . . . . . . . . . . . . . . . . . . . . . . . . . . . . . . . . . . . . . 1 

2   . . . . . . . . . 99.SF04   . . . . . . . . . . . . . . . . . . .NUT, SRF 1/4-20 USS . . . . . . . . . . . . . . . . . . . . . . . . . . . . . . . . . . . . . . . . . . . . . . . . . . . . . . 7 

3   . . . . . . . . . 99.A04N  . . . . . . . . . . . . . . . . . . .LOCKNUT, NYLON 1/4-20  . . . . . . . . . . . . . . . . . . . . . . . . . . . . . . . . . . . . . . . . . . . . . . . . . . 7 

4   . . . . . . . . . 99.0406  . . . . . . . . . . . . . . . . . . . .BOLT, 1/4-20 X 3/4 BSCS  . . . . . . . . . . . . . . . . . . . . . . . . . . . . . . . . . . . . . . . . . . . . . . . . . . . 7 

5   . . . . . . . . . 94.04  . . . . . . . . . . . . . . . . . . . . . .WASHER, FLAT 1/4 USS  . . . . . . . . . . . . . . . . . . . . . . . . . . . . . . . . . . . . . . . . . . . . . . . . . . . 7 

6   . . . . . . . . . 31.0069  . . . . . . . . . . . . . . . . . . . .SWITCH, WIPER ROTARY W/WASHER  . . . . . . . . . . . . . . . . . . . . . . . . . . . . . . . . . . . . . . 1
7   . . . . . . . . . 31.0069-1  . . . . . . . . . . . . . . . . . .KNOB, WIPER SWITCH . . . . . . . . . . . . . . . . . . . . . . . . . . . . . . . . . . . . . . . . . . . . . . . . . . . . 1 

8   . . . . . . . . . 95.04  . . . . . . . . . . . . . . . . . . . . . .WASHER, FLAT 1/4 SAE  . . . . . . . . . . . . . . . . . . . . . . . . . . . . . . . . . . . . . . . . . . . . . . . . . . 14 

9   . . . . . . . . . 47.0403  . . . . . . . . . . . . . . . . . . . .WIPER ARM, RADIAL 16” WET . . . . . . . . . . . . . . . . . . . . . . . . . . . . . . . . . . . . . . . . . . . . . . 1 

10   . . . . . . . . 47.0287  . . . . . . . . . . . . . . . . . . . .WIPER BLADE, WINDSHIELD 21”  . . . . . . . . . . . . . . . . . . . . . . . . . . . . . . . . . . . . . . . . . . . 1 

11 . . . . . . . . . 95.04-3  . . . . . . . . . . . . . . . . . . . .WASHER, FLAT 1/4 SAE SS  . . . . . . . . . . . . . . . . . . . . . . . . . . . . . . . . . . . . . . . . . . . . . . . . 2 

12   . . . . . . . . 99.K0142 . . . . . . . . . . . . . . . . . . .BOLT, SHCS 1/4-28 X 1/2 SS  . . . . . . . . . . . . . . . . . . . . . . . . . . . . . . . . . . . . . . . . . . . . . . . . 2
13   . . . . . . . . 79.0096  . . . . . . . . . . . . . . . . . . . .BRUSH, CANVAS SUPPORT  . . . . . . . . . . . . . . . . . . . . . . . . . . . . . . . . . . . . . . . . . . . . . . . 2 

14   . . . . . . . . 44.0276  . . . . . . . . . . . . . . . . . . . .CANVAS,WINDSHIELD BOTTOM   . . . . . . . . . . . . . . . . . . . . . . . . . . . . . . . . . . . . . . . . . . . 1 

15   . . . . . . . . 44.0306  . . . . . . . . . . . . . . . . . . . .WINDOW, FRONT WINDSHIELD 3/16  . . . . . . . . . . . . . . . . . . . . . . . . . . . . . . . . . . . . . . . . 1 

16   . . . . . . . . 06.0072*  . . . . . . . . . . . . . . . . . . .TRIM, SEAL DOUBLE BULB 3/16 X 128”  . . . . . . . . . . . . . . . . . . . . . . . . . . . . . . . . . . . . . . 1 

17   . . . . . . . . 85.B0098 . . . . . . . . . . . . . . . . . . .BUSHING, STEP 1/4 X 7/8 X 5/16H . . . . . . . . . . . . . . . . . . . . . . . . . . . . . . . . . . . . . . . . . . 14 

18   . . . . . . . . 99.K0119 . . . . . . . . . . . . . . . . . . .BOLT, STEP 1/4-20 X 1-1/2 BLK   . . . . . . . . . . . . . . . . . . . . . . . . . . . . . . . . . . . . . . . . . . . . . 7
19   . . . . . . . . 05.0166  . . . . . . . . . . . . . . . . . . . .SPACER, 1/4 X 1/2 X 3/8L   . . . . . . . . . . . . . . . . . . . . . . . . . . . . . . . . . . . . . . . . . . . . . . . . . . 7 

20   . . . . . . . . 27.0004  . . . . . . . . . . . . . . . . . . . .TUBING, WASHER FOR WIPER ARM  . . . . . . . . . . . . . . . . . . . . . . . . . . . . . . . . . . . . . . . . 1 

21   . . . . . . . . 37.0056  . . . . . . . . . . . . . . . . . . . .MOTOR, WINDSHIELD WIPER 1 SPD . . . . . . . . . . . . . . . . . . . . . . . . . . . . . . . . . . . . . . . . 1 

22   . . . . . . . . 47.0301  . . . . . . . . . . . . . . . . . . . .KIT, WIPER MOTOR HARDWARE  . . . . . . . . . . . . . . . . . . . . . . . . . . . . . . . . . . . . . . . . . . . 1 


*Sold by the foot. Specify length when ordering.

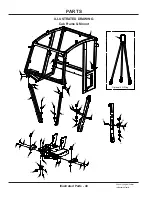
Front Windshield & Windshield Wiper

Summary of Contents for KW452

Page 1: ...Operator s Manual Parts Drawings Weather Cab Model KW452 Revised 05 04 17 09 10120 Rev 07 Original Operator s Manual ...

Page 2: ..._________________________ Dealer ____________________________________________________________________________ Dealer Address _____________________________________________________________________ _____________________________________________________________________ Dealer Phone Number _______________________________________________________________ Dealer Fax Number _________________________________...

Page 3: ...dures 14 WEATHER CAB SETUP INSTRUCTIONS PAGE 15 Identification of Parts 15 Setup Instructions for Power Unit Weather Cab 17 OPERATIONAL CONTROLS PAGE 27 Operational Control Locations 27 Outer Door Handle Lock A 27 Inner Door Handle B 27 Window Latch Handle C 27 Interior Light Switch D 27 Hazard Light Switch E 27 Strobe Light Switch F 28 Rear Work Light Switch G 28 Front Work Light Switch H 28 Wind...

Page 4: ...Mount 40 Cab Roof Mount 42 Main Switch Panel Cover Plates Components 44 Front Rear Work Lights 46 Canvas Bellows Column Covers 48 Front Windshield Windshield Wiper 50 Upper Door Frame Latch 52 Lower Door 54 Left Rear Window 56 Rear Window 58 Right Rear Window 60 Right Front Window Emergency Exit 62 Lower Right Window 64 Four Point Seatbelt 66 Fuel Tank Cover Frame Seals Decals 68 70 2006 6 Defrost...
Page 5: ...ator s manual will help you as well as others avoid personal injury and or damage to the equipment Keep this manual with the machine at all times The manual should remain with the machine even if it is sold If this manual becomes damaged or unreadable it should be replaced immediately Con tact your local Ventrac dealer for a replacement When using a Ventrac attachment be sure to read and follow th...

Page 6: ...ughout this manual Right Hand and Left Hand is determined as if sitting on the power unit seat facing forward SIGNAL WORD DEFINITIONS Indicates a potentially hazardous situation which if not avoided could result in death or serious injury Indicates an imminently hazardous situation which if not avoided will result in death or serious injury This signal word is limited to the most extreme cases Ind...

Page 7: ... all safety decals legible Remove all grease dirt and debris from safety decals and instructional labels If any decals are faded illegible or missing contact your dealer promptly for replacements When new components are installed be sure that current safety decals are affixed to the replacement components A A C D 1 ...

Page 8: ...SAFETY Safety 8 Decal Description Part Number Quantity A Warning Pinch Point 00 0218 2 B Warning KW452 00 0420 1 C Danger Gasoline Only 00 0332 1 D Danger Diesel Only 00 0333 1 A 1 B C D ...

Page 9: ...g parts Be sure guards and shields are in proper working condition and are secured in place Make all necessary adjustments before operating machine Some pictures in this manual may show shields or covers opened or removed in order to clearly illustrate any instructions Under no circumstance should the machine be operated without these devices in place Alterations or modifications to this machine c...

Page 10: ...n the engine in a building without adequate ventilation Do not touch the engine or the muffler while the engine is running or immediately after stopping the engine These areas may be hot enough to cause a burn Do not change the engine governor settings or over speed the engine Operating engine at excessive speed may increase the hazard of personal injury To reduce the hazard of fire keep the batte...

Page 11: ...und to improve stability While operating on slopes drive in an up and down direction when possible If turning is necessary while driving across slopes reduce speed and turn slowly in the downhill direction Assure a sufficient supply of fuel for continuous operation A minimum of one half tank of fuel is recommended Roadway Safety Operate with safety lights when operating on or near roadways Obey al...

Page 12: ...mponents while the engine is running or imme diately after stopping the engine These areas may be hot enough to cause a burn Allow the engine to cool before storing and do not store near an open flame Do not change the engine governor settings or over speed the engine Operating engine at excessive speed may increase the hazard of personal injury Springs may contain stored energy Use caution when d...

Page 13: ... tubes are in good condition Repair any leaks and replace any damaged or deteriorated hoses or tubes before starting the machine Hydraulic leaks can occur under high pressure Hydraulic leaks require special care and attention Use a piece of cardboard and a magnifying glass to locate sus pected hydraulic leaks Keep body and hands away from pinhole leaks or nozzles that eject high pressure hydraulic...

Page 14: ...Do not place hands or fingers between power unit dash and cab front frame cross member Pinch points may be created by the oscillation of the power unit front frame Always wear the 4 point seatbelt when operating a power unit and KW452 weather cab The seat belt must be adjusted to fit individual operators Do not operate power unit and KW452 weather cab without the headrest cushion in place The KW45...

Page 15: ...Setup 15 Identification of Parts 1 2 3 4 5 6 7 8 9 10 11 12 13 14 15 16 17 18 19 20 21 22 23 WEATHER CAB SETUP INSTRUCTIONS ...

Page 16: ...or To KW450 1 30 Clamp Wire Mt Adh 1 2 Gray 2 31 Washer 531 X 1 75 3 16 Thick 4 32 Plate Drill Template KW450 1 Ref Name Qty 33 Decal Gasoline Only 1 34 Decal Diesel Only 1 35 Grommet 7 16ID 3 4OD 1 4THK 2 36 Tyton Tie 50 18 x 8 Black 4 37 Breaker Circuit 30 Amp Mini 1 38 Velcro Loop 1 2 Black x 2 long 1 39 Velcro Loop 1 2 Black x 5 long 1 40 Velcro Loop 1 2 Black x 16 long 1 41 Velcro Loop 1 Blac...

Page 17: ...to be removed from the harness with a metri pack terminal removal tool After pulling the wire harness remove the fuse from slot 6 in the front fuse panel Remove the light switch from the dash and install a blank plug into the cutout 3 If power unit is equipped with a directional sig nal light kit the light kit must be removed from the roll bar If the cab will be removed in warm weather and the dir...

Page 18: ...te covered by the flex tread 12 Drill out the pilot holes to 9 32 remove any metal shavings and use red touch up paint on the drilled holes 13 Install the mount support bracket 11 under the right foot platform Fasten loosely with 2 1 4 x 3 4 button head bolts 48 and flange nuts 14 11 48 26 28 Install the right and left front cab mounts 26 28 on the lower mounting holes in the lower rear frame Fast...

Page 19: ...e pump cover on the power unit with the included pump cover with flanges 3 3 21 Attention Prior to installation of velcro strips clean area thoroughly and make sure to remove any residue Alcohol wipes are recommended for cleaning Install a 5 piece of 1 2 wide velcro loop 39 to the left dash panel above the front fuse panel 22 39 42 Install a 2 5 piece of 1 wide velcro loop 42 to the front frame be...

Page 20: ...rminal with the hole point ing up and insert into the fuse panel The termi nal needs to snap into place If necessary use a needle nose pliers to push the terminal in being careful not to damage the wire insulation Double check the connection by tugging gently on the wire with your hand 30 Reinstall the toolbox liner panels NOTE do not reinstall the 2 bolts that fasten the toolbox liner panels to t...

Page 21: ... each seat belt anchor Add 2 7 16 flat washers between each seat belt anchor and the seat box rear panels Fasten to the seat box rear panels with a 7 16 flat washer and a 7 16 lock nut 40 Remove the 2 1 4 x 3 4 button head bolts from the inside of the right fender and discard Place the rear window right bracket 17 on the back side of the fender flange and fasten with 2 1 4 x 3 4 but ton head bolts...

Page 22: ... mount tabs or lower supports 46 Install a two piece isolator in the mount ing hole of both rear cab mounts Insert the stepped piece of the isolator down through the cab mount and install the bottom piece 47 Place a 3 16 thick 7 notched washer onto a 1 2 x 3 bolt Insert the bolt through the isolator on the right cab front support Install the right cab front support 7 on the right front cab mount F...

Page 23: ... 2 x 3 bolt into the cab mount brackets and guide into the rear cab mount isolators 55 Raise or lower the weather cab until the front cab supports align with the cab mounting holes cab supports mount on the inside Install 4 1 4 x 1 step bolts 49 and fasten with 1 4 flange nuts Do not tighten 56 49 Lower the weather cab until the rear cab mount brackets are resting on the rear cab mount isola tors ...

Page 24: ...et 14 on the 3 rear step bolts 2 3 4 and fasten all four places with 1 4 flange nuts Tighten only until rubber washer under the step bolt head begins to bulge slightly 62 Install the lower 50 door window support to the door frame with 2 5 16 x 3 4 bolts 50 and 5 16 flat washers Fasten with 2 5 16 locking flange nuts Tighten until snug but support can still be moved 63 Install the lower door window...

Page 25: ...e left and right canvas column mounts 2 Hook the bottom bellows support straps to the left and right cab front supports 3 and the left and right flanges of the pump cover 4 2 1 3 4 70 Fasten the outer 2 1 3 Velcro strips on the canvas bellows to the Velcro strips on the left and right cab front supports 1 Fasten the Velcro strips on the triangular win dows to the Velcro strips on the left and righ...

Page 26: ...ear side windows by placing the hinge pivots on the window over the hinge pins on the weather cab Place the latches over the latch pins and push down to latch window 78 CAUTION Do not exceed 30 amp draw to weather cab and additional accessories 37 Install the 30 amp circuit breaker 37 into slot 2 of the rear fuse panel 79 If the power unit is equipped with a gasoline engine install the gasoline sa...

Page 27: ...ck and counter clockwise to unlock the door Inner Door Handle B Squeeze the button on the inner door handle to unlatch the door The door cannot be locked from the inside Window Latch Handle C The side windows of the weather cab can be opened and latched in place Raise the window latch handle push out on the window and lower the handle to latch in place When the window is open the latch handle can ...

Page 28: ... position Between the off and fixed positions is the intermit tent position that sets the wiper speed to a long or short interval between wiper cycles Rotate the switch clockwise for a shorter interval Rotate the switch counterclockwise for a longer interval Heater Fan Speed Switch J Rotate the heater fan speed switch to select the desired fan speed position Off Low Medium or High Heater Temperatu...

Page 29: ...eatbelt and adjust the lap belt until snug but not tight Tighten by pulling bon the ends of the lap belt straps Tighten both sides evenly so the buckle remains centered on the operator Loosen by pulling up on the edge of the seatbelt strap lock facing away from the buckle Upper buckle location Pull strap to tighten Lift up on tab to release Fasten the upper buckle of the 4 point seatbelt and adjus...

Page 30: ... window latch pin and move away from the window slightly If the window latch is hard to close move the win dow latch pin toward the window slightly Window Latch Handle Adjustment If the window latch handle is A not properly positioned when latched to close to the glass or sticks out to far from the glass the window latch handle posi tion can be adjusted Unlatch the handle loosen the handle bolt A ...

Page 31: ...tighten the bolts on the lower door window support Fuse Replacement The fuse panel is located in the headliner to the right of the main control panel 1 Remove the two thumb screws A from the fuse panel cover B 2 B A Remove the defective fuse from the socket 3 1 2 3 4 5 6 7 8 9 10 Position Fuse Circuit 1 5 amp Front Work Lights 2 5 amp Rear Work Light 3 5 amp Interior Light USB outlet 4 10 amp Wind...

Page 32: ...ab 2 Locate the wires from the strobe light where they connect to the main wire harness The yellow wire is used to cycle the strobe light modes 3 Turn the power unit key switch to the On posi tion to allow power to the cab 4 Turn the strobe light switch to the on position 5 Insert the bare end of the yellow wire into the back of the terminal on the red power supply wire Each time you touch the yel...

Page 33: ...on of the left cab heater hose and the power unit heater hose at the front edge of the power unit foot platform Pinch the hoses on each side of the connection to prevent loss of fluid Disconnect the heater hoses and cap the ends with the fittings pro vided with the heater kit Repeat for right side heater hoses 4 Unsnap and remove the lower rear canvas window 5 Disconnect the cab wire harness under...

Page 34: ...hout the weather cab If the 4 point seatbelt is removed from the power unit the original lap belt must be reinstalled 23 Place all cab components that were removed from the cab and power unit on the pallet inside the weather cab 24 Reinstall the right emergency window and the right and left rear windows onto the cab 25 Place the door inside the cab for storage or remove the lower door window the w...

Page 35: ...n 219 cm Length installed on power unit w standard hitch 92 in 234 cm Turning Radius cab installed on power unit 68 in 173 cm Features Glass on frame design Tempered glass Removable door and side windows Emergency exit Window in lower rear panel Windows in front pleated canvas panels Contoured headliner and roof assembly Heavy duty front wiper and wiper motor Front and rear LED work lights 4 point...

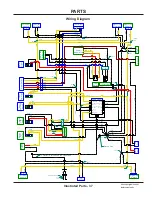
Page 36: ...ire Hazard Wire Reference Key Harness Section Identifier Black Wire White Wire Ground Splice or Connection All black wires that are part of the wire harness are part of the ground circuit However some components such as lights may be wired where black may be positive All other wires colors are as shown Black Ground Red Secondary Power White Primary Power Yellow Light Hazard Wire Color Circuit Type...

Page 37: ...01 V 002 V 005 V 006 V 008 V 009 V 010 V 013 V 017 V 017 V 011 V 003 V 043 V 011 V 040 V 041 V 034 V 010 V 048 V 049 V 050 V 052 V 005 V 006 V 002 V 029 Y 058 Y 058 Y 064 Y 065 Y 066 Y 062 Y 063 Y 070 Y 069 Y 064 Y 065 Y 066 SPL 1 SPL 6 SPL 7 SPL 10 SPL 8 SPL 9 SPL 11 Y 061 Y 063 Y 068 Y 069 SPL 16 SPL 15 SPL 2 V 010 Y 059 A B V 051 Strobe Light Switch Strobe Light 5A Hazard Light 5A Hazard Light ...

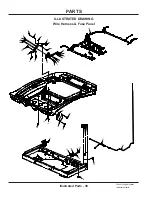
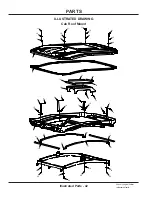
Page 38: ...llustrated Parts 38 Use only original Ventrac replacement parts 11 16 16 15 15 2 2 2 3 17 18 21 19 20 13 13 14 12 1 10 10 10 10 10 7 9 9 9 9 4 4 4 4 4 8 8 8 8 5 6 22 ILLUSTRATED DRAWING Wire Harness Fuse Panel ...

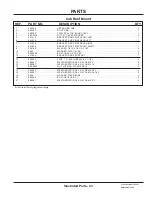
Page 39: ...W 10 32 X 1 1 4 4 9 99 E0035 NUT SRF 10 32 4 10 99 0406 BOLT 1 4 20 X 3 4 BSCS 5 11 00 0412 DECAL FUSE POSITION 1 12 60 1273 COVER FUSE PANEL 1 13 47 0399 KNOB 1 4 20 X 1 KNURLED 2 14 60 1175 COVER OPT LIGHT KIT ACCESS 1 15 30 0217 CLAMP WIRE MT ADH 1 2 GRAY 2 16 05 0136 GROMMET 7 16ID 3 4OD 1 4THK 2 17 30 0445 BREAKER CIRCUIT 30 AMP MINI 1 18 30 0499 FUSE PANEL 10 POS ATC 1 19 32 0168 HARNESS WIR...

Page 40: ... only original Ventrac replacement parts ILLUSTRATED DRAWING Cab Frame Mount 17 12 12 12 12 13 13 20 19 18 22 21 14 15 16 8 8 8 9 10 10 10 10 3 3 3 3 2 2 5 5 5 5 11 11 11 11 7 7 7 7 1 1 1 1 1 1 6 6 6 6 4 4 4 4 Optional Lift Sling 40 ...

Page 41: ...5 16 18 USS X 3 4 3 9 90 0508 BOLT 5 16 18 USS X 1 1 10 90 0824 BOLT 1 2 13 USS X 3 4 11 99 E0103 NUT LOCKING FLANGE 1 2 13 4 12 05 0123 ISOLATOR 53 ID X 1 87 OD 4 13 11 0053 U BOLT 3 8 16 2 1 16 ID SQ 2 14 64 1732 MOUNT CAB FRONT LEFT 1 15 64 1733 MOUNT CAB FRONT RIGHT 1 16 64 1738 BRACKET MOUNT SUPPORT 1 17 05 0036 GROMMET 1 1 2ID 2 1 8OD 9 16T 1 18 64 1474 SUPPORT CAB FRONT RH 1 19 64 1473 SUPP...

Page 42: ...arts 42 Use only original Ventrac replacement parts 9 9 9 9 15 15 21 21 21 21 18 18 17 17 14 14 1 2 5 6 8 7 12 11 11 11 11 20 20 20 20 10 10 10 10 19 19 19 19 4 4 4 4 16 16 16 16 13 13 3 ILLUSTRATED DRAWING Cab Roof Mount ...

Page 43: ...0168 WASHER 1 4 ID X 7 8 OD X 1 4T 4 10 94 04 WASHER FLAT 1 4 USS 4 11 90 0420 2 BOLT 1 4 20 X 2 TAP ZP 4 12 64 1945 BRACKET ROOF SUPPORT 1 13 06 0084 TAPE 1 X 045 VHB BLACK X 1 1 2 L 2 14 06 0081 WEATHERSTRIP 3 4 X 3 4 FOAM X 9 2 15 06 0081 WEATHERSTRIP 3 4 X 3 4 FOAM X 14 2 16 99 E0082 NUT LOCKING FLANGE 3 8 16 4 17 06 0081 WEATHERSTRIP 3 4 X 3 4 FOAM X 38 L 2 18 06 0081 WEATHERSTRIP 3 4 X 3 4 F...

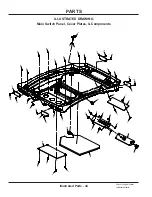
Page 44: ...se only original Ventrac replacement parts 9 16 13 19 6 10 15 5 5 11 8 14 17 17 17 17 12 4 4 4 4 4 4 4 4 3 3 3 3 3 3 3 3 1 1 1 1 1 1 18 18 18 18 18 18 18 18 2 2 2 2 7 7 ILLUSTRATED DRAWING Main Switch Panel Cover Plates Components ...

Page 45: ... BLACK X 1 4 L 2 8 64 1914 PLATE MAIN SWITCH PANEL 1 9 00 0413 DECAL MAIN SWITCH PANEL 1 10 44 0364 UPHOLSTERY HEADLINER 1 11 47 0402 FITTING BULKHEAD 90 DEG 1 12 95 05 WASHER FLAT 5 16 SAE 1 13 30 0480 RECEPTACLE USB DUAL 1 14 64 1920 PLATE FRONT VENT COVER Serial 01001 01286 1 15 47 0385 RETAINER NO FILTER SOLID Serial 01001 01286 1 16 05 0076 PLUG 2 1 2 HOLE BLK PLASTIC Serial 01001 01286 1 17 ...

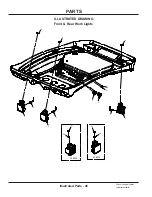
Page 46: ...PARTS Illustrated Parts 46 Use only original Ventrac replacement parts ILLUSTRATED DRAWING Front Rear Work Lights 3 3 4 4 2 2 2 1 1 1 33 0069 20 21 5 5 4 33 0079 30 31 ...

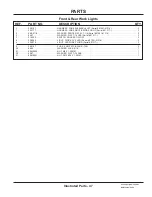
Page 47: ... 99 B0118 WASHER FENDER 5 16 X 1 1 4 Serial 01001 01316 3 2 94 07 WASHER FLAT 7 16 USS Serial 01317 3 3 31 0053 SWITCH ROCKER ON OFF 2 4 33 0069 LIGHT WORK 3 X 3 LED Serial 01001 01316 3 4 33 0079 LIGHT LED WIDE FLOOD Serial 01317 3 5 30 0187 FUSE 5 AMP ATC BLADE TAN 2 20 96 05 WASHER LOCK 5 16 1 21 99 M0025 NUT M8 X 1 25MM 1 30 95 07 WASHER FLAT 7 16 SAE 1 31 99 M0021 NUT SMF M10 X 1 5MM 1 Front ...

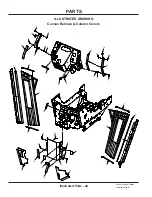
Page 48: ...lustrated Parts 48 Use only original Ventrac replacement parts ILLUSTRATED DRAWING Canvas Bellows Column Covers 7 5 5 4 3 15 16 6 6 6 6 10 9 8 2 2 2 2 2 2 1 1 1 1 1 1 1 1 11 12 12 13 14 14 14 17 18 18 19 19 20 ...

Page 49: ...NVAS COLUMN RIGHT 1 9 64 1739 MOUNT CANVAS COLUMN LEFT 1 10 60 1180 COVER PUMP W FLANGES 1 11 06 0071 VELCRO LOOP 1 2 WIDE X 5 1 12 06 0065 VELCRO LOOP 1 BLACK X 5 1 2 2 13 06 0071 VELCRO LOOP 1 2 BLACK X 2 1 14 06 0065 VELCRO LOOP 1 BLACK X 2 1 2 3 15 44 0328 CANVAS COLUMN LEFT 1 16 44 0329 CANVAS COLUMN RIGHT 1 17 06 0065 VELCRO LOOP 1 BLACK X 1 1 18 06 0065 VELCRO LOOP 1 BLACK X 9 3 4 2 19 06 0...

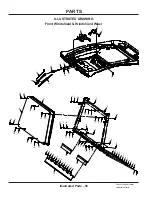
Page 50: ...s 19 19 19 19 19 19 19 20 1 7 6 21 14 15 10 22 9 13 13 17 17 17 17 17 17 17 17 17 17 17 17 17 17 5 5 5 5 5 5 5 11 11 8 8 8 8 8 8 8 8 8 8 8 8 8 8 4 4 4 4 4 4 4 3 3 3 3 3 3 3 18 18 18 18 18 18 18 12 12 2 2 2 2 2 2 2 16 ILLUSTRATED DRAWING Front Windshield Windshield Wiper ...
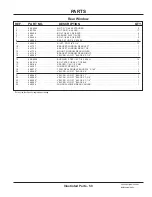
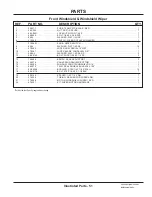
Page 51: ... 1 10 47 0287 WIPER BLADE WINDSHIELD 21 1 11 95 04 3 WASHER FLAT 1 4 SAE SS 2 12 99 K0142 BOLT SHCS 1 4 28 X 1 2 SS 2 13 79 0096 BRUSH CANVAS SUPPORT 2 14 44 0276 CANVAS WINDSHIELD BOTTOM 1 15 44 0306 WINDOW FRONT WINDSHIELD 3 16 1 16 06 0072 TRIM SEAL DOUBLE BULB 3 16 X 128 1 17 85 B0098 BUSHING STEP 1 4 X 7 8 X 5 16H 14 18 99 K0119 BOLT STEP 1 4 20 X 1 1 2 BLK 7 19 05 0166 SPACER 1 4 X 1 2 X 3 8...

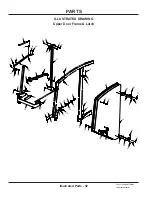
Page 52: ...lacement parts 22 22 19 24 20 20 18 13 13 34 27 14 15 32 23 35 36 33 33 11 31 30 21 21 17 17 17 17 17 17 10 3 3 16 16 16 12 12 7 7 2 6 6 26 37 37 37 9 9 28 28 25 8 1 1 1 1 1 1 1 1 1 1 29 29 29 29 29 5 5 5 5 4 4 4 4 ILLUSTRATED DRAWING Upper Door Frame Latch ...

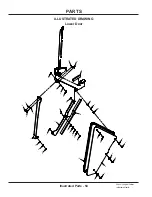
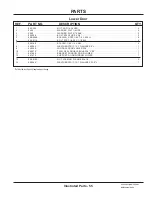
Page 53: ...8 BUSHING STEP 1 4 X 7 8 X 5 16H 6 18 44 0291 WINDOW DOOR UPPER 3 16 1 19 06 0072 TRIM SEAL DOUBLE BULB 3 16 X 127 1 20 44 0274 GASKET GLASS HINGE MOUNT 2 21 85 B0068 BUSHING 3 8 X 1 2 OD X 1 2 LG 2 22 05 0070 PLUG 1 2 HOLE NYLON 2 23 47 0357 KEY DOOR HANDLE KW 2 KEYS 1 24 44 0273 GASKET DOOR HANDLE INNER 1 25 99 M0022 BOLT M6 X 1 0 X 25MM 1 26 99 K0067 MACHINE SCREW 10 32 X 1 1 2 1 27 47 0282 LAT...

Page 54: ...PARTS Illustrated Parts 54 Use only original Ventrac replacement parts 7 7 7 7 14 8 10 9 12 11 5 5 5 5 5 5 5 5 4 4 2 2 2 2 2 2 3 3 13 13 6 6 6 6 1 1 1 1 ILLUSTRATED DRAWING Lower Door ...

Page 55: ...EP 1 4 X 7 8 X 5 16H 8 6 99 K0119 BOLT STEP 1 4 20 X 1 1 2 BLK 4 7 05 0166 SPACER 1 4 X 1 2 X 3 8L 4 8 06 0064 WEATHERSTRIP 1 X1 D SHAPE X 6 L 1 9 44 0292 WINDOW DOOR LOWER 3 16 1 10 06 0072 TRIM SEAL DOUBLE BULB 3 16 X 90 1 11 64 1494 BRACKET WINDOW DOOR LOWER 1 12 64 1472 SUPPORT DOOR WINDOW LOWER 1 13 99 E0102 NUT LOCKING FLANGE 5 16 18 2 14 06 0064 WEATHERSTRIP 1 X1 D SHAPE X 23 5 L 1 Sold by ...

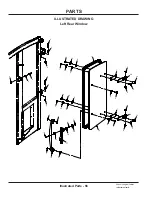
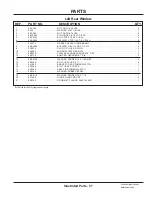
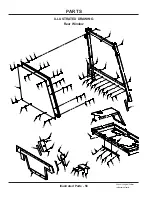
Page 56: ...ated Parts 56 Use only original Ventrac replacement parts 9 9 12 12 18 21 11 17 7 7 10 20 20 15 8 8 6 6 6 6 6 6 6 6 14 14 2 16 13 13 13 13 19 4 4 4 5 5 5 5 1 1 1 1 1 3 3 3 3 3 3 ILLUSTRATED DRAWING Left Rear Window ...

Page 57: ...ING 3 8 X 1 2 OD X 1 2 LG 2 9 05 0070 PLUG 1 2 HOLE NYLON 2 10 44 0293 WINDOW LEFT REAR 3 16 1 11 06 0072 TRIM SEAL DOUBLE BULB 3 16 X 82 1 12 05 0125 BUMPER NEOPRENE 1 DIA 2 13 99 B0100 WASHER FENDER 1 4 X 7 8 OD ZP 4 14 90 0408 BOLT 1 4 20 USS X 1 2 15 64 1952 BRACKET REAR WINDOW LATCH 1 16 99 0408 BOLT 1 4 20 X 1 BSCS 1 17 40 0403 ARM SIDE WINDOW LATCH 1 18 05 0164 WASHER RUBBER EPDM 1 19 99 B0...

Page 58: ...s 8 8 8 8 8 8 8 8 8 8 8 8 8 9 9 9 9 9 9 9 9 9 9 9 9 9 17 17 17 17 17 17 17 18 25 12 11 13 10 15 15 15 15 15 15 15 15 15 15 15 15 15 15 7 7 4 4 4 4 4 4 4 3 3 3 3 3 3 1 1 16 16 16 16 16 16 16 2 2 2 2 2 2 2 2 2 2 2 14 20 20 21 22 22 23 24 19 ILLUSTRATED DRAWING Rear Window ...

Page 59: ... 1 12 64 1734 MOUNT WINDOW REAR LOWER 1 13 64 1736 BRACKET WINDOW REAR RIGHT 1 14 06 0065 VELCRO LOOP 1 BLACK X 2 1 2 1 15 85 B0098 BUSHING STEP 1 4 X 7 8 X 5 16H 14 16 99 K0119 BOLT STEP 1 4 20 X 1 1 2 BLK 7 17 05 0166 SPACER 1 4 X 1 2 X 3 8L 7 18 44 0307 WINDOW REAR 3 16 1 19 06 0072 TRIM SEAL DOUBLE BULB 3 16 X 140 1 20 06 0065 VELCRO LOOP 1 BLACK X 8 2 21 06 0065 VELCRO LOOP 1 BLACK X 1 1 22 0...

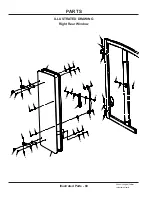
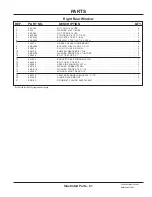
Page 60: ...ated Parts 60 Use only original Ventrac replacement parts 9 9 10 10 16 21 19 15 7 7 18 20 20 13 8 8 6 6 6 6 6 6 6 6 12 12 2 14 11 11 11 11 17 4 4 4 5 5 5 5 1 1 1 1 1 3 3 3 3 3 3 ILLUSTRATED DRAWING Right Rear Window ...

Page 61: ...NG 3 8 X 1 2 OD X 1 2 LG 2 9 05 0070 PLUG 1 2 HOLE NYLON 2 10 05 0125 BUMPER NEOPRENE 1 DIA 2 11 99 B0100 WASHER FENDER 1 4 X 7 8 OD ZP 4 12 90 0408 BOLT 1 4 20 USS X 1 2 13 64 1952 BRACKET REAR WINDOW LATCH 1 14 99 0408 BOLT 1 4 20 X 1 BSCS 1 15 40 0403 ARM SIDE WINDOW LATCH 1 16 05 0164 WASHER RUBBER EPDM 1 17 99 B0116 WASHER FENDER 1 4 X 1 1 4 1 18 44 0294 WINDOW RIGHT REAR 3 16 1 19 06 0072 TR...

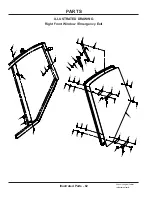
Page 62: ...arts 62 Use only original Ventrac replacement parts 9 9 13 19 17 12 7 7 15 18 18 16 8 8 6 6 6 6 6 6 6 6 2 11 10 10 10 10 14 4 4 4 5 5 5 5 5 5 1 1 1 1 1 1 1 3 3 3 3 3 3 ILLUSTRATED DRAWING Right Front Window Emergency Exit ...

Page 63: ...UNT 2 8 85 B0068 BUSHING 3 8 X 1 2 OD X 1 2 LG 2 9 05 0070 PLUG 1 2 HOLE NYLON 2 10 99 B0100 WASHER FENDER 1 4 X 7 8 OD ZP 4 11 99 0408 BOLT 1 4 20 X 1 BSCS 1 12 40 0403 ARM SIDE WINDOW LATCH 1 13 05 0164 WASHER RUBBER EPDM 1 14 99 B0116 WASHER FENDER 1 4 X 1 1 4 1 15 44 0295 WINDOW RIGHT FRONT ESC 3 16 1 16 64 1953 BRACKET ESCAPE WINDOW LATCH 1 17 06 0072 TRIM SEAL DOUBLE BULB 3 16 X 126 1 18 64 ...

Page 64: ...PARTS Illustrated Parts 64 Use only original Ventrac replacement parts 5 5 5 5 9 7 6 8 3 3 3 3 3 3 3 3 2 2 2 2 2 2 4 4 4 4 1 1 1 1 ILLUSTRATED DRAWING Lower Right Window ...

Page 65: ...USS 6 3 85 B0098 BUSHING STEP 1 4 X 7 8 X 5 16H 8 4 99 K0119 BOLT STEP 1 4 20 X 1 1 2 BLK 4 5 05 0166 SPACER 1 4 X 1 2 X 3 8L 4 6 44 0296 WINDOW RIGHT LOWER 3 16 1 7 06 0072 TRIM SEAL DOUBLE BULB 3 16 X 88 1 8 64 1495 BRACKET WINDOW RIGHT LOWER 1 9 06 0064 WEATHERSTRIP 1 X1 D SHAPE X 24 L 1 Sold by the foot Specify length when ordering Lower Right WIndow ...

Page 66: ...trated Parts 66 Use only original Ventrac replacement parts 7 9 13 13 13 8 8 14 10 15 5 5 12 12 12 12 4 4 4 4 4 4 4 4 11 11 11 11 11 11 11 11 11 11 11 11 6 6 3 3 1 1 1 1 2 2 ILLUSTRATED DRAWING Four Point Seatbelt ...

Page 67: ...16 14 USS X 1 1 4 2 6 99 A07 LOCKNUT STOVER 7 16 14 USS 2 7 06 0050 TRIM TRIM LOC 1 2 X 3 16 X 11 7 8 1 8 11 0053 U BOLT 3 8 16 2 1 16 ID SQ 2 9 06 0050 TRIM TRIM LOC 1 2 X 3 16 X 14 7 8 1 10 47 0288 CUSHION HEADREST 1 11 95 08 WASHER FLAT 1 2 SAE 12 12 90 0810 BOLT 1 2 13 USS X 1 1 4 4 13 06 0065 VELCRO LOOP 1 BLACK X 6 3 14 47 0280 SEAT BELT 4 POINT 1 15 64 1490 MOUNT SEATBELT UPPER 1 Sold by th...

Page 68: ...PARTS Illustrated Parts 68 Use only original Ventrac replacement parts 11 6 8 8 15 16 10 3 3 7 5 4 17 9 2 2 2 2 1 1 1 1 13 12 12 14 18 ILLUSTRATED DRAWING Fuel Tank Cover Frame Seals Decals ...

Page 69: ...NUMBER 1 7 06 0043 TRIM TRIM SEAL W BULB X 7 1 2 1 8 00 0218 DECAL WARNING PINCH POINT 2 9 60 1177 COVER FUEL TANK KW450 1 10 00 0420 DECAL WARNING 1 11 00 0100 DECAL MADE IN USA 1 12 06 0065 VELCRO LOOP 1 BLACK X 8 2 13 06 0071 VELCRO LOOP 1 2 WIDE X 16 1 14 06 0043 TRIM TRIM SEAL W BULB X 21 1 2 1 15 00 0332 DECAL GASOLINE ONLY 1 16 00 0333 DECAL DIESEL ONLY 1 17 44 0327 CANVAS REAR FRAME 1 18 0...

Page 70: ...PARTS Illustrated Parts 70 Use only original Ventrac replacement parts 1 4 3 3 3 2 2 2 ILLUSTRATED DRAWING 70 2006 6 Defrost Fan Kit ...

Page 71: ...nly original Ventrac replacement parts REF PART NO DESCRIPTION QTY 1 30 0317 FUSE 10 AMP ATC BLADE RED 1 2 99 K0047 MACHINE SCREW 10 32 X 3 4 3 3 99 E0049 NUT WASHER 10 32 STAR NUT 3 4 37 0051 FAN DEFROSTER 1 70 2006 6 Defrost Fan Kit ...

Page 72: ...PARTS Illustrated Parts 72 Use only original Ventrac replacement parts 7 7 8 8 8 8 11 11 6 6 10 10 5 5 9 9 12 12 12 12 4 4 4 4 1 1 3 3 3 3 2 2 ILLUSTRATED DRAWING 70 2006 4 Mirror Kit ...

Page 73: ...9 E0082 NUT LOCKING FLANGE 3 8 16 4 4 95 06 WASHER FLAT 3 8 SAE 4 5 90 0608 BOLT 3 8 16 USS X 1 2 6 64 1496 BRACKET MIRROR ARM 2 7 05 0002 WASHER FRIC 2 1 4 X 3 8 2 8 41 0099 SPRING DISC 3 8 ID X 3 4 OD 4 9 90 0610 BOLT 3 8 16 USS X 1 1 4 2 10 64 1497 BRACKET MIRROR MOUNT 2 11 47 0290 MIRROR CONVEX 5 X 7 2 12 94 05 WASHER FLAT 5 16 USS 4 70 2006 4 Mirror Kit ...

Page 74: ...PARTS Illustrated Parts 74 Use only original Ventrac replacement parts 1 7 8 2 2 2 2 6 5 5 5 5 5 5 5 5 4 4 4 4 4 4 4 4 3 3 3 3 3 3 3 3 ILLUSTRATED DRAWING 70 8162 Cab Hazard Lights Kit ...

Page 75: ...187 FUSE 5 AMP ATC BLADE TAN 1 2 33 0070 LIGHT SIGNAL AMBER 4 3 99 K0144 MACHINE SCREW 10 32 X 1 1 4 8 4 99 B0051 WASHER FLAT 10 8 5 99 A1032N LOCKNUT NYLON 10 32 STAINLESS 8 6 35 0127 MODULE DIRECTIONAL LIGHT 1 7 31 0053 SWITCH ROCKER ON OFF 1 8 32 0176 HARNESS WIRE HAZARD 1 70 8162 Cab Hazard Lights Kit ...

Page 76: ...ts 76 Use only original Ventrac replacement parts 13 24 25 25 1 26 17 28 23 14 27 12 19 19 11 21 7 16 3 3 3 3 20 20 15 5 5 5 5 5 5 10 22 4 4 18 18 18 18 8 8 2 2 2 2 2 9 9 9 9 9 6 ILLUSTRATED DRAWING 70 8161 Strobe Light Kit ...

Page 77: ...STROBE MOUNT KW452 1 12 64 1946 BRACKET STROBE PIVOT LATCH 1 13 05 0167 WASHER FRIC 2 25X0 34X3 16T 1 14 41 0108 SPRING COMP 531 OD X 780 LG 1 15 99 A05N LOCKNUT NYLON 5 16 18 USS 1 16 90 0514 BOLT 5 16 18 USS X 1 3 4 1 17 33 0073 LIGHT STROBE AMBER 1 18 99 K0071 MACHINE SCREW 10 32 X 5 8 4 19 64 1948 BUSHING SPRING ARM 2 20 99 A04 LOCKNUT STOVER 1 4 20 USS 2 21 85 B0062 BUSHING 1 2 ID X 5 8 OD X ...

Page 78: ...PARTS Illustrated Parts 78 Use only original Ventrac replacement parts 7 9 8 6 10 12 11 4 2 2 5 1 1 1 1 3 3 3 3 ILLUSTRATED DRAWING 70 8148 Windshield Washer Kit ...

Page 79: ...5 8 4 4 64 1954 MOUNT WINDSHIELD WASHER TANK 1 5 99 K0141 SCREW SELF DRILLING 1 4 X 3 4 1 6 30 0037 TYTON TIE 50 18 X 8 BLACK 4 7 23 0169 VALVE CHECK 5 32 INLINE 1 8 27 0003 TUBING WINDSHIELD WASHER X 1 1 9 27 0002 TUBING WINDSHIELD WASHER X 12 1 10 30 0498 CLAMP WIRE MT ADH 3 4 GRAY 1 11 47 0382 RESERVOIR WINDSHIELD WASHER 1 12 32 0175 HARNESS WIRE WINDSHLD WASHER 1 70 8148 Windshield Washer Kit ...

Page 80: ... replacement parts 23 23 23 17 17 17 17 17 17 19 10 10 18 1 11 12 26 20 3 3 3 7 8 13 13 25 9 4 5 6 2 2 2 2 2 2 24 14 15 16 21 22 ILLUSTRATED DRAWING 70 8160 Console Fan Heater Kit Cabs with serial 01287 and higher include the heater as standard equipment ...

Page 81: ... TEMPERATURE 1 13 47 0386 KNOB FAN SPEED TEMPERATURE 2 14 47 0405 HOSE HEATER 5 8 X 20 L 1 15 47 0404 HOSE HEATER 5 8 X 5 L 1 16 47 0406 HOSE HEATER 5 8 X 23 L 1 17 11 0079 CLAMP SPRING 5 8 HEATER HOSE 6 18 29 P04 PIPE PLUG 1 4 SQ 1 19 29 BF05MP04 FITTING 5 16 BARB X 1 4 MP ST 1 20 47 0328 VALVE FUEL SHUT OFF 5 16 1 21 27 F05 HOSE FUEL LINE X 5 16 X 6 L 1 22 27 F05 HOSE FUEL LINE X 5 16 X 18 L 1 2...

Page 82: ...PARTS Illustrated Parts 82 Use only original Ventrac replacement parts 5 3 7 7 4 2 2 2 2 2 2 9 1 6 8 8 8 8 8 8 8 8 8 8 8 8 ILLUSTRATED DRAWING Heater Blower Assembly ...

Page 83: ... 47 0407 HOUSING HEATER 1 2 99 E0046 NUT U 1 4 20 EXTRUDED 6 3 44 0386 FOAM COIL SEAL 1 4 47 0387 CORE HEATER 1 5 44 0366 GASKET BLOWER HOUSING 1 6 47 0408 PLATE BLOWER BRACKET 1 7 44 0387 FOAM HEATER CORE SEAL 2 8 99 K0147 SCREW 8 X 5 8 FOR PLASTIC 12 9 47 0394 BLOWER HEATER 1 Heater Blower Assembly ...

Page 84: ...PARTS Illustrated Parts 84 Use only original Ventrac replacement parts ILLUSTRATED DRAWING 70 8136 Kubota Heater Install Kit for 4500Y 4500Z ...

Page 85: ...0 1 5 22 0065 HOSE 3 8x28 50 HTR SAE J20R3 1 6 30 0037 TYTON TIE 50 18 X 8 BLACK 10 7 99 SF0406 BOLT SRF 1 4 20 X 3 4 2 8 94 04 WASHER FLAT 1 4 USS 4 9 11 0046 CLAMP CUSHIONED 1 2 2 TUBE 2 10 99 SF04 NUT SRF 1 4 20 USS 2 11 22 0045 HOSE 3 8x94 00 HTR SAE J20R3 2 12 25 304 C 06 FITTING CAP 3 8 6 JIC 2 13 25 2408 06 FITTING PLUG 6 MJIC 2 These fittings are used to plug the hoses when the cab is remo...

Page 86: ...PARTS Illustrated Parts 86 Use only original Ventrac replacement parts ILLUSTRATED DRAWING 70 8137 Kawasaki Heater Install Kit for 4500P ...

Page 87: ...30 0037 TYTON TIE 50 18 X 8 BLACK 10 6 22 0046 HOSE 3 8x50 00 HTR SAE J20R3 1 7 22 0045 HOSE 3 8x94 00 HTR SAE J20R3 2 8 99 SF0406 BOLT SRF 1 4 20 X 3 4 2 9 94 04 WASHER FLAT 1 4 USS 4 10 11 0046 CLAMP CUSHIONED 1 2 2 TUBE 2 11 99 SF04 NUT SRF 1 4 20 USS 2 12 25 304 C 06 FITTING CAP 3 8 6 JIC 2 13 25 2408 06 FITTING PLUG 6 MJIC 2 These fittings are used to plug the hoses when the cab is removed fr...

Page 88: ...PARTS Illustrated Parts 88 Use only original Ventrac replacement parts 2 1 ILLUSTRATED DRAWING 70 4146 Radiator Baffle 4500Y Kit ...

Page 89: ...PARTS Illustrated Parts 89 Use only original Ventrac replacement parts REF PART NO DESCRIPTION QTY 1 70 4146 KIT RADIATOR BAFFLE 4500Y 1 2 00 0422 DECAL CAUTION 4500Y 1 70 4146 Radiator Baffle 4500Y Kit ...

Page 90: ...PARTS Illustrated Parts 90 Use only original Ventrac replacement parts 2 1 ILLUSTRATED DRAWING 70 4147 Radiator Baffle 4500Z Kit ...

Page 91: ...PARTS Illustrated Parts 91 Use only original Ventrac replacement parts REF PART NO DESCRIPTION QTY 1 70 4147 KIT RADIATOR BAFFLE 4500Z 1 2 00 0423 DECAL CAUTION 4500Z 1 70 4147 Radiator Baffle 4500Z Kit ...

Page 92: ...express or implied including but not limited to a warranty of merchantability or fitness for a particular purpose are made by V P I in connection with the manufacture or sale of its products The engine warranty is covered by its respective engine manufacturer Please refer to the engine manufacturer s war ranty statement that is included in the owner s manual The Ventrac turf equipment including an...

Page 93: ... of this warranty vii any claims for lost revenue lost profit or additional cost or expense incurred as a result of a claim of breach of war ranty or viii attorney s fees The remedies of buyer set forth herein are exclusive and are in lieu of all other remedies The liability of V P I whether in contract tort under any warranty or otherwise shall not extend beyond its obligation as set forth herein...

Reviews: