

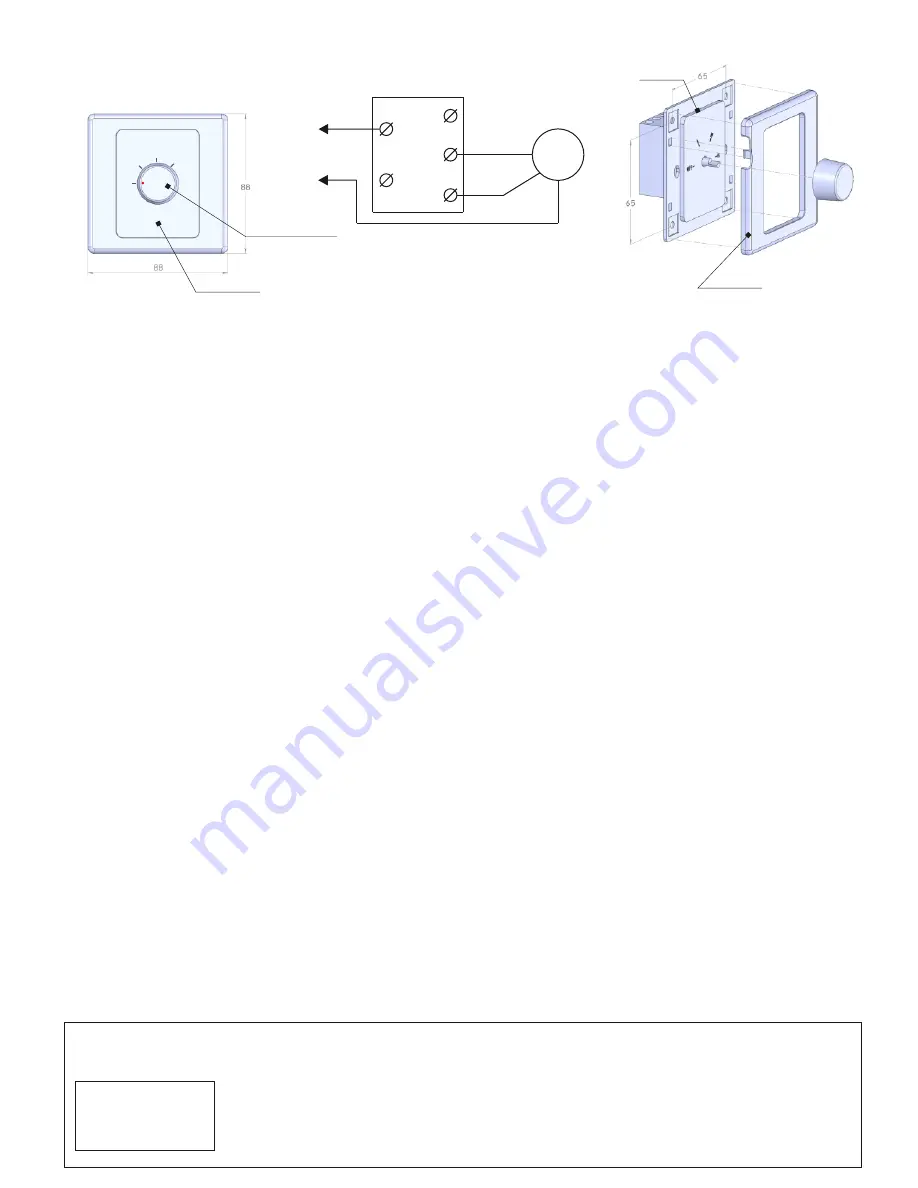
MOUNTING SEQUENCE
(
refer fig. 3)
Remove the speed switch knob with a screwdriver.
The back side of the casing includes four latches for fixing of the switch front panel.
Remove the front panel by pressing two latches slightly.
To connect the cable to power mains:
Switch the automatic circuit breaker off to turn line voltage off.
Strip the wire ends for 5-7 mm, connect them to the screw terminals and fix the wire ends
with screws.
Route the power supply wires in the junction box and fix the speed switch with self-tapping
screws to the junction box.
Place the front panel back and press it slightly to click.
Install the speed switch knob.
Connect the switch to power mains and turn the speed switch knob counterclockwise against
stop (OFF position).
For setting the required fan speed rotate the speed switch knob clockwise.
STORAGE RULES
Store the product in the original packing in a ventilated room at the temperatures b5°C
and +40°C and the relative humidity not more than 80% at 25°C.
MANUFACTURER'S WARRANTY
Manufacturer hereby guarantees normal operation of the product for 12 months from the date of
resale, subject to compliance with transport, storage, mounting and operation rules.
No warranty for mechanically damaged products.
In case of no confirmation of the sales date, warranty period is calculated from the production date.
In case of the product failure due to manufacturing defect during the warranty period the
consumer has the right for the product replacement. Replacements are offered by the Seller.
Contact the Seller for the product replacement.
fig. 1
fig. 2
fig. 3
ACCEPTANCE CERTIFICATE
The speed switch is recognized as serviceable
Model
VENTS P2-1-300
Manufactured on (date):
Approval mark
Sold by
(name of trading enterprise, stamp of store)
Date of sale
N
L
N
B
C
2
1
2
230
V
50
Hz
1
M
speed switch
knob
casing
frame
casing
OFF
OFF
1
2
V23-1EN-02


