
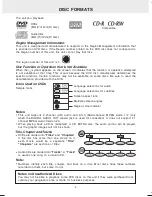
Material: 80g White Woodfree Paper
Print: Black Color
Size: 210 x 148 mm
(*Print black text on white background)
<PAGE 8>
21
0 m
m
148 mm
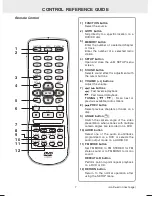
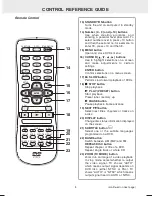
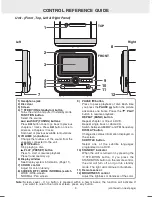
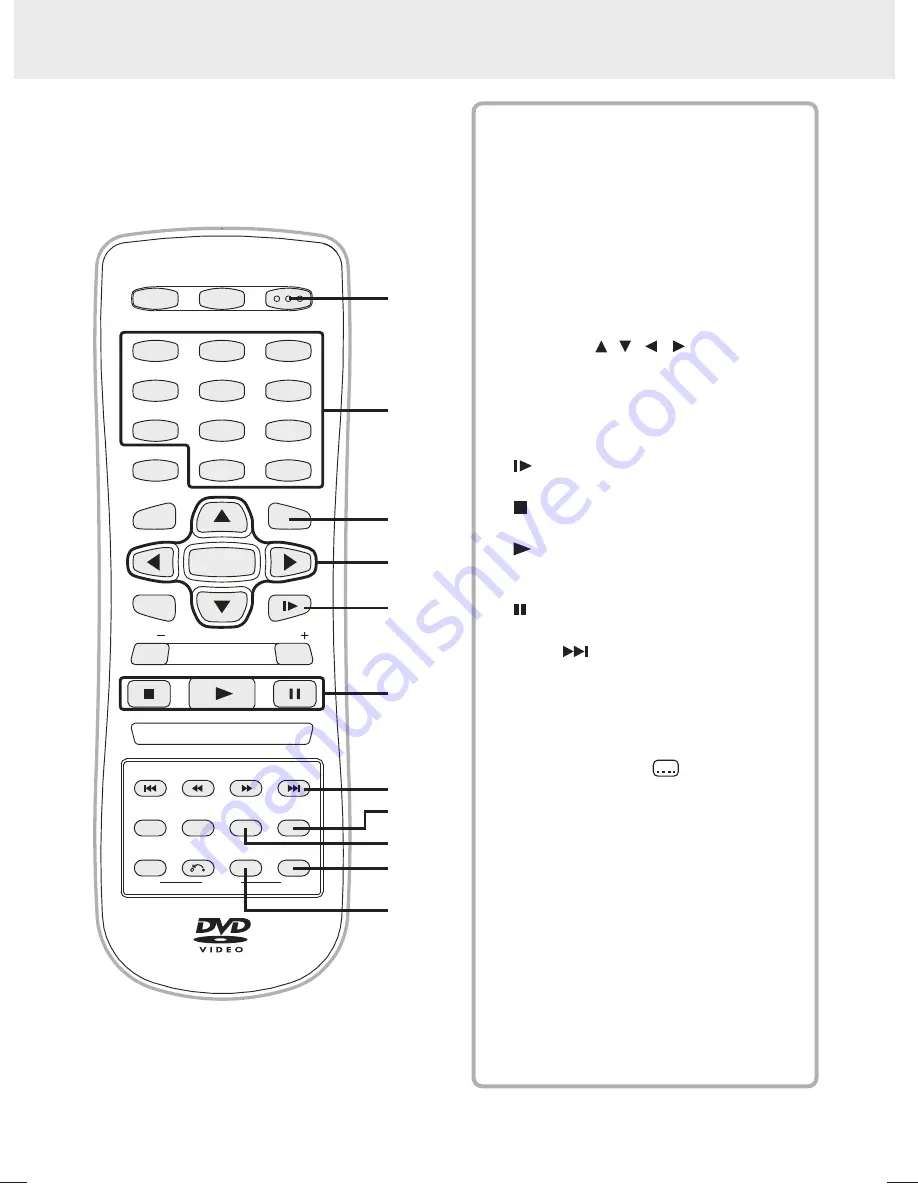
CONTROL REFERENCE GUIDE
8
Remote Control
STANDBY/ON button
Turns the unit on and puts it in standby
mode.
Number (0 - 9) and (+10) buttons
Use when creating programs, and
entering a parental level password. To
select numbers over 9, press +10 button
and then the second no. for example, to
enter 18, press +10 and then 8.
MENU button
Open and close DVD's menu.
CURSOR ( , , , ) buttons
Use to highlight selections on a screen
and make adjustments to certain
settings.
ENTER button
Confirm selections on a menu screen.
SLOW button
Perform slow forward playback of DVDs.
STOP button
Stop playback.
PLAY (PRESET) button
Start playback.
Preset tuner memory up.
PAUSE button
Pause playback, frame advance.
NEXT button
Select next titles, chapters or tracks on
a disc.
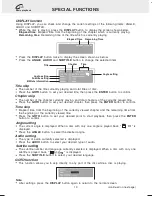
DISPLAY button
Change disc status information displayed
on the screen.
SUBTITLE button
Select one of the subtitle languages
programmed on a DVD.
BAND button
Switch between AM (MW) and FM.
REPEAT-DISC button
Repeat chapter or title of a DVD.
Repeat single track or whole CD.
ZOOM (TV MODE) button
Zoom into an image of a video playback.
In stop mode, select whether to output
the video signal. TV shows "AUTO"
which means output signal depends on
DVD disc (either NTSC or PAL). TV
shows "AUTO" or "NTSC" which means
output signal fixed to AUTO or NTSC.
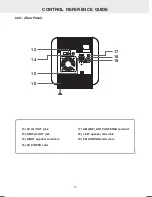
13)
14)
15)
16)
18)
17)
21)
22)
23)
20)
19)
(continued on next page)
13
14
15
16
17
18
19
20
21
22
23
FUNCTION
MEMORY
SETUP
SOUND
VOL
STOP
PLAY
PAUSE
NEXT
PREV
ANGLE
FM MODE
A-B
DISC
REPEAT
BAND
AUDIO SUBTITLE
RETURN ZOOM
DISPLAY
TUNING
VOL
SLOW
MENU
1
2
3
6
5
4
7
8
9
0
ENTER
+10
GOTO
STANDBY/ON
Summary of Contents for MVS6950
Page 1: ......


