background image

28

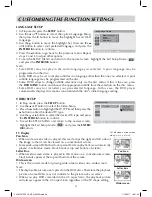
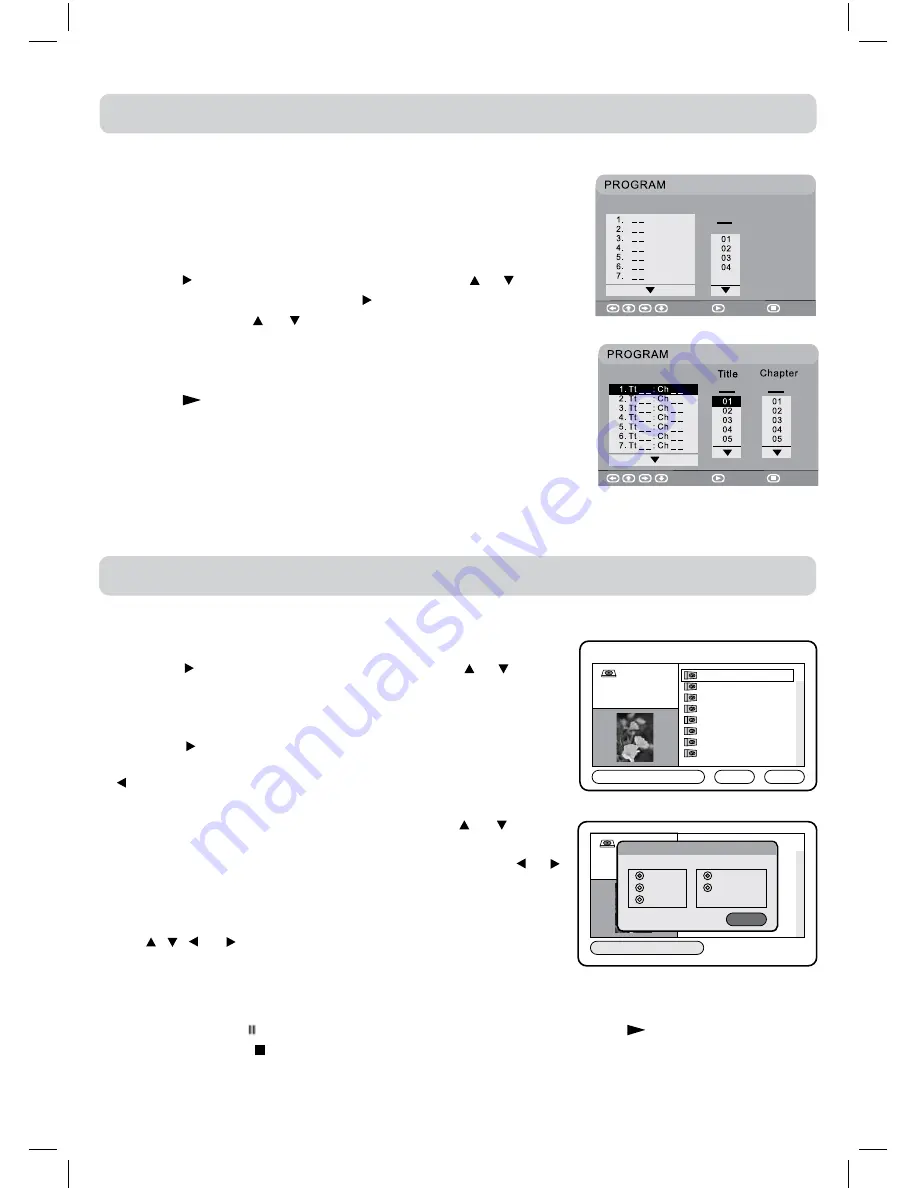
PROGRAMMED MEMORy


1. Press the 

MEMORy

 button to enter program mode. 

2. Press the   button to highlight the List. Press the   or   button 

to  choose  the  desired  files  into  the  program  list.  Press  the 

ENTER/OK

  button  to  confirm.  Repeat  these  steps  to  enter 

more files in the list.

3. Press the   button to select “PLAY” option. Press the 

ENTER/

OK

 button to start playing the programmed list. Or press the 

 button to select “LIST” option. Press the 

ENTER/OK

 button 

to show the programmed list.

  If you want to edit the program list, press the   or   button 

to highlight a file to “Delete it” or select the “Delete All” and 

press the 

ENTER/OK

 button to delete the list. Press the   or   

buttons to highlight “Return”, press the 

ENTER/OK

 button to 

return to Program Mode.

4. Press  the 

yELLOW

  button  to  enter  SORT  FILE  menu.  Press 

the  ,  ,    or    buttons  to  select  the  options  and  press  the 

ENTER/OK

  button  to  confirm.  Press  the 

yELLOW

  button 

again to return to Program Mode.

Note:

• You can press the   

PAUSE

 button to interrupt playback, and press the   

PLAy

 button to resume 

playback. Press the   

STOP

 button to stop the playback. Press 

MEMORy

 button to exit the program 

mode.

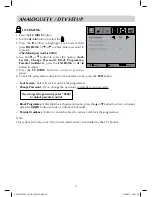
Program Mode

1920x1080

2010/9/1

List

Play

A000001

000002

A000003

A000004

A000005

A000006

A000007

A000008

A

1

2

3

4

5

6

7

8

ROOT

A000001

000002

A000003

A000004

A000005

A000006

A000007

A000008

A

1

2

3

4

5

6

7

8

ROOT

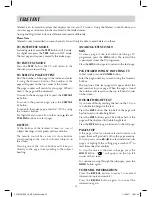
SORT FILE:

Method:

By type
By name
By date

Ascending
Descending

Sequence:

Exit

PROGRAMMABLE PHOTO FILE PLAYBACK

CD/DVD PROGRAMMABLE PLAYBACK

PROGRAMMABLE MEMORy

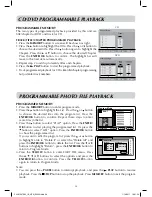
The two types of programmed playback provided by this unit are 
title/chapter for DVD and track for CD.

TRACK/TITLE/CHAPTER PROGRAMMED PLAyBACK

1. Press the 

MEMORy

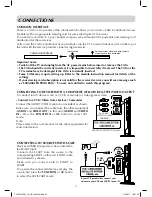
 button. A screen will be shown as right.

2. Press the   button to highlight the Title. Press the   or   button to 

choose the desired title. Press the   button again to highlight the 
Chapter. Press the   or   button to choose the desired Chapter. 
Press  the 

ENTER/OK

  button  to  confirm.  The  highlight  bar  will 

move to the next item automatically.

3. Repeat step 2 to add up to twenty titles and chapters.
4. Press the   

PLAy

 button to start the programmed playback.

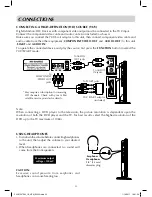
• Track programmed playback for CD is like title/chapter programming 

but just enter track numbers.

Select

Play

Clear

DVD

CD

Select

Play

Clear

Track

PLV91237S52_IB_VEN_W020.indd   28

1/14/2011   18:21:24

Summary of Contents for PLV91187S52

Page 1: ...1 23 6 FULL HD DIGITAL LCD TV DVD OWNER S MANUAL PLV91237S52 PLV91237S52_IB_VEN_W020 indd 1 1 14 2011 18 21 17...

Page 2: ...heated room where it is warm and damp water droplets or condensation may form inside the unit When there is condensation inside the unit the unit may not function normally Let the unit stand for 1 2...

Page 3: ...nect it at the wall outlet SAFE USE OF YOUR EQUIPMENT This equipment has been designed and manufactured to meet UK safety standards but like any electrical equipment care must be taken to obtain the b...

Page 4: ...made this television to meet European safety standards but as with any electronic equipment you must take care to stay safe and get the best results Here is some good advice to help you do this Read t...

Page 5: ...television to dripping or splashing or place any objects filled with liquids such as vases on the television Never put a naked flame source on or near the television Pull the mains plug out of the wal...

Page 6: ...ecting HDMI 23 SOUND SYSTEM 23 CD DVD OPERATION 24 25 Playing a disc 24 Playing a picture file disc 24 Pausing playback still mode 24 Stopping playback 24 Skipping to a different track 24 Fast forward...

Page 7: ...if they were purchased from outside your geographic area or made for business purposes Disc Function or Operation that is Not Available When the symbol appears on the screen it indicates that the fun...

Page 8: ...o place a soft cushioned material such as a pillow or thick piece of foam beneath the screen 3 Install remove the two screws and then install remove the STAND to from the TV MOUNTING ON THE WALL This...

Page 9: ...d for a long time remove the batteries to avoid damage caused by battery leakage corrosion Do not mix old and new batteries Do not mix ALKALINE standard CARBON ZINC or rechargeable NICKEL CADMIUM batt...

Page 10: ...ss to switch the camera angle of the video presentation when scenes with multiple camera angles are recorded on a DVD SIZE button Press to set the letters size of teletext on the screen 12 SUBTITLE bu...

Page 11: ...ress to display the Electronic Programme Guide EPG in DTV mode PAUSE button Press to pause playback and single frame advance INFO button Press to display the channel information in DTV mode 30 SLOW bu...

Page 12: ...of a disc 6 I button Turns the unit on and off 7 COMMON INTERFACE slot For optional Conditional Access Module 8 AUDIO IN jacks Left Right VIDEO IN jack AV IN 1 9 TV Aerial Coaxial TV antenna input 10...

Page 13: ...a transmitter will a temporary antenna reproduce a signal as strongly as a fixed antenna Connect the AC power cord into a wall outlet Press the I button on the unit or remote control to turn the TV o...

Page 14: ...the screen prompts as below to tune in the channels Choose preferred country and regional options You may receive signals from more than one region Use to choose then OK to select each option in turn...

Page 15: ...g a DTV programme you can press the GUIDE button to display the PROGRAMME GUIDE menu Press the or to scroll through the programmes of different channels Press the or to skip to the programmes of diffe...

Page 16: ...Setting only in ATV or DTV mode 1 Press the TV MENU button 2 Use the or button to select 3 Usethe or buttontoselecttheoptions AutoTuning DTV Manual Tuning ATV Manual Tuning Programme Edit adjust them...

Page 17: ...nly for AV mode with NTSC signal Adjust the tint of the picture Colour Temperature Select the colour temperature of the picture Select Normal balanced Warm red white Cool blue white mode Note You can...

Page 18: ...Language Restore Setting OAD adjust them using the or button 4 Press the TV MENU button to return to previous menu 5 To exit the setup menu and return to the normal screen press the EXIT button OSD La...

Page 19: ...u 6 To exit the setup menu and return to the normal screen press the EXIT button Lock System Select to lock or unlock the programmes Change Password If you change the password remember your password B...

Page 20: ...g one of the colour buttons will take you directly to the page corresponding to the subject heading ANALOGUE TEXT ONLY mix To view a page of the text whilst watching a TV programme press the MIX butto...

Page 21: ...ich allows you to insert a CAM Conditional Access Module with an appropriate viewing card for some subscription TV services You need to subscribe to a pay channel company who administer the payments a...

Page 22: ...VIDEO OUT and AUDIO OUT to this unit SCART and AUDIO IN To operate the connected device and play the source first press the FUNCTION button to select the YUV SCART mode USING HEADPHONES Turndownthevol...

Page 23: ...on HDCP is used to protect digital content transmitted and received by DVI compliant or HDMI compliant displays HDMI has the capability to support standard enhanced or high definition video plus stand...

Page 24: ...ck You can press or to list the previous or next block of files You can use the numbered buttons to enter the image number to quickly select any image Press the ANGLE button on the remote control to r...

Page 25: ...anguage Note If only one language is recorded the language does not change About two seconds later playback continues with the new subtitle you selected The number of languages recorded differs depend...

Page 26: ...ou want 3 Press the ENTER OK button to confirm The unit will start playback about 3 second later DISPLAY While the disc is playing press the DISPLAY button repeatedly to display information on operati...

Page 27: ...track is played repeatedly Repeating an entire disc 2 While the disc is playing press the REPEAT DISC button until the indicator displays on the screen The entire disc is played repeatedly To resume...

Page 28: ...tton to stop the playback Press MEMORY button to exit the program mode Program Mode 1920x1080 2010 9 1 List Play A000001 000002 A000003 A000004 A000005 A000006 A000007 A000008 A 1 2 3 4 5 6 7 8 ROOT A...

Page 29: ...sides of the image so that it can be viewed on a conventional screen Some wide screen DVDs that do not permit Pan Scan playback are automatically played in Letter Box mode black bands at top and bott...

Page 30: ...cenes unsuitable for children or you could lock out playback of the disc altogether You cannot play password function equipped DVDs rated higher than the level you selected unless you cancel the paren...

Page 31: ...shaped octagonal etc They may cause malfunctions CLEANING THE UNIT Be sure to turn the unit off and disconnect the AC power cord before cleaning the unit Wipe the unit with a dry soft cloth If the sur...

Page 32: ...e facing frontwards Clean the disc A non valid disc has been inserted The unit and disc region number are incompatible Condensation may have formed inside the unit due to a sudden change in temperatur...

Page 33: ...ll cables are firmly connected Check for local interference No picture or sound F u n c t i o n k e y does not respond correctly Under the influence of electrostatic phenomenon the product may malfunc...

Page 34: ...d il legally using software to remove copy protection and recorded on sub standard discs This can cause problems when trying to play these back on DVD players Known problems include failing to load at...

Reviews: