background image

11

3.  

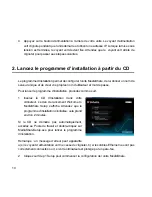
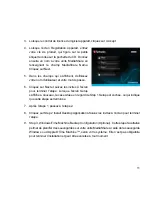
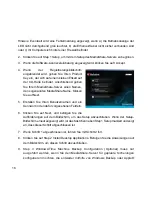
Lorsque le contrat de licence du logiciel apparaît, cliquez sur I Accept.

4.  

Lorsque l’écran Registration apparaît, entrez 
votre clé de produit, qui figure sur la petite 
étiquette collée sur la pochette du CD. Donnez 
ensuite un nom à votre unité MediaShare en 
renseignant le champ MediaShare Name. 
Cliquez sur Next.

5.  Dans les champs qui s’affichent, définissez 

votre nom d’utilisateur et votre mot de passe.

6.  

Cliquez sur Next et suivez les invites à l’écran 
pour terminer l’étape. Lorsque l’écran Setup 
s’affiche à nouveau, la case située en regard de Step 1 Setup est cochée, ce qui indique 
que cette étape est terminée.

7. Après 

l’étape 1, passez à l’étape 2. 

8.  

Cliquez sur Step 2 Install Desktop Applications.Suivez les invites à l’écran pour terminer 
l’étape.

9.  

Step 3, Windows/Time Machine Backup Configuration (Optional). Cette étape facultative
permet de planifier des sauvegardes sur votre unité MediaShare à l’aide de la sauvegarde 
Windows ou d’Apple® Time Machine™, selon votre système. Elle n’est pas obligatoire
pour terminer l’installation et peut être exécutée à tout moment.

Summary of Contents for MediaShare

Page 1: ...MediaShare Quick Start Guide...

Page 2: ...2 Contents English 3 Fran ais 9 Deutsch 14 Italiano 19 Espa ol 24 Portugu s 29 Wersja Polska 34 39 Magyar 44 Nederlands 49 Svenska 54 59 Fran ais 9 Italiano 19 Portugu s 29 39 Nederlands 49 59...

Page 3: ...Quick Start Guide 1 Connect the MediaShare to your network 1 Unpack the MediaShare server be sure it has ample ventilation Do not place items on top of the MediaShare or place any liquids near or on...

Page 4: ...our own user name and password To run the Setup program 1 Insert the Installation CD into your computer The Welcome to MediaShare Setup setup screen displays Wait for the Setup program to initialize a...

Page 5: ...7 Once Step 1 is complete proceed with Step 2 8 Click Step 2 Install Desktop Applications Follow the on screen prompts to complete 9 Step 3 Windows Time Machine Backup Configuration Optional is option...

Page 6: ...Ready status Blink Blue Read write access to internal hard drive Blink Orange System powering off Middle LED Rear USB port s activity Blink Orange Read write activity to USB Blink Blue Read write act...

Page 7: ...land and United Kingdom call 00 800 3883 2222 All other European countries call 353 61 226586 You can email drivesupport verbatim europe com Product replacement is your sole remedy under this warranty...

Page 8: ...ipment at end of life The WEEE logo shown at the left on the product or on its box indicates that this product must not be disposed of or dumped with your other household waste For more information ab...

Page 9: ...hare Guide de d marrage rapide 1 Connectez le serveur MediaShare votre r seau 1 Sortez le serveur MediaShare de son emballage et installez le dans un endroit bien a r Ne posez aucun objet sur le serve...

Page 10: ...ot de passe Pour lancer le programme d installation proc dez comme suit 1 Ins rez le CD d installation dans votre ordinateur L cran de lancement Welcome to MediaShare Setup s affiche Attendez que le p...

Page 11: ...suivez les invites l cran pour terminer l tape Lorsque l cran Setup s affiche nouveau la case situ e en regard de Step 1 Setup est coch e ce qui indique que cette tape est termin e 7 Apr s l tape 1 pa...

Page 12: ...batim com et connectez vous votre serveur MediaShare 2 Renseignez le champ MediaShare Name l aide du nom utilis lors de d installation du serveur 3 Entrez le nom d utilisateur et le mot de passe cr s...

Page 13: ...dur interne Orange clignotant mise hors tension du syst me Voyant du milieu Activit des ports USB l arri re de l unit Orange clignotant activit de lecture criture sur le port USB Bleu clignotant activ...

Page 14: ...Share Installations CD Kurzanleitung 1 Verbinden Sie den MediaShare Server mit Ihrem Netzwerk 1 Packen Sie den MediaShare Server aus Stellen Sie sicher dass er ausreichend bel ftet wird Legen Sie kein...

Page 15: ...hren Sie das Setup Programm auf der Installations CD aus Durch das Ausf hren des Setup Programms wird MediaShare konfiguriert Au erdem werden Sie MediaShare einen eigenen Servernamen geben sowie Ihren...

Page 16: ...ogenannten MediaShare Name Klicken Sie auf Next 5 Erstellen Sie Ihren Benutzernamen und ein Kennwort in den daf r vorgesehenen Feldern 6 Klicken Sie auf Next und befolgen Sie die Aufforderungen auf de...

Page 17: ...ebigen sp teren Zeitpunkt ausgef hrt werden Per Remotezugriff auf MediaShare zugreifen 1 ffnen Sie http www myverbatim com und melden Sie sich bei Ihrem MediaShare Server an 2 Geben Sie den MediaShare...

Page 18: ...Bereitschaftszustand Mittlere LED Aktivit t an den USB Anschl ssen auf der R ckseite Orange blinkend Lese Schreibaktivit t mit USB Anschluss Blau blinkend Lese Schreibaktivit t mit interner Festplatt...

Page 19: ...e di MediaShare Guida rapida 1 Collegare MediaShare alla rete 1 Togli il MediaShare server dalla confezione assicurandosi che abbia a disposine una buona ventilazione Non posizionare alcun oggetto sul...

Page 20: ...vviare il programma di installazione 1 Inserire il CD di installazionenel computer Verr visualizzata la schermata di benvenuto all installazione di MediaShare Attendere circa 2 minuti per l inizializz...

Page 21: ...controllo accanto allaprima fase di installazione sar selezionata ad indicare che questa fase stata completata 7 Una volta completata la fase 1 procedere con la fase 2 8 Fare clic sulla seconda fase p...

Page 22: ...tp www myverbatim com e collegarsi al proprio server MediaShare 2 Immettere il Nome MediaShare scelto al momento della configurazione del server 3 Immettere il Nome utente e laPassword creata durante...

Page 23: ...disco rigido interno Arancione lampeggiante sistema in fase di spegnimento LED centrale Attivit della porta USB posteriore Arancione lampeggiante Attivit di lettura scrittura su USB Blu lampeggiante...

Page 24: ...ernet CD de instalaci n de MediaShare Gu a de inicio r pido 1 Conecte el servidor MediaShare a la red 1 Desembale el servidor MediaShare y aseg rese de que tenga una buena ventilaci n No sit e ning n...

Page 25: ...e continuar con los pasos siguientes 2 Ejecute el programa de instalaci n del CD de instalaci n La ejecuci n del programa de instalaci n configurar la unidad MediaShare Tambi n deber asignarle un nomb...

Page 26: ...onados cree su nombre de usuario y una contrase a 6 Haga clic en Next y siga las instrucciones que aparecen en pantalla para completar la instalaci n Cuando vuelva a aparecer la pantalla de instalaci...

Page 27: ...inicie una sesi n en el servidor MediaShare 2 Introduzca el nombre de MediaShare que utiliz cuando instal el servidor 3 Introduzca el nombre de usuario y la contrase a que cre durante la instalaci n I...

Page 28: ...o de lectura escritura al disco duro interno Naranja intermitente el sistema se est apagando Indicador LED central Actividad de los puertos USB traseros Naranja intermitente actividad de lectura escri...

Page 29: ...nentes que se seguem Servidor MediaShare Cabo de energia Cabo Ethernet CD de instala o do MediaShare Guia de In cio R pido 1 Ligue o MediaShare sua red 1 Desempacote o servidor MediaShare certifique s...

Page 30: ...Execute o programa de Configura o do CD de Instala o A execu o do programa de configura o configura o MediaShare Atribua um nome exclusivo ao servidor MediaShare e crie o seu pr prio nome de utilizado...

Page 31: ...Share Clique em Next Seguinte 5 Nos campos dispon veis crie o seu nome de utilizador e uma palavra passe 6 Clique em Next e siga as indica es que aparecem no ecr para concluir Quando o ecr de Configur...

Page 32: ...ediaShare Remotamente 1 Aceda a http www myverbatim com e inicie sess o no servidor MediaShare 2 Introduza o Nome MediaShare que utilizou para configurar o servidor 3 Introduza o Nome de utilizador e...

Page 33: ...sco r gido interna Laranja Intermitente Desligar do sistema LED do Meio Actividade da s porta s USB posterior Laranja Intermitente Actividade de leitura escrita para USB Azul Intermitente Actividade d...

Page 34: ...asilaj cy Kabel sieciowy Instalacyjny dysk CD z oprogramowaniem MediaShare Podr cznik wprowadzaj cy 1 Pod cz serwer MediaShare do sieci 1 Odpakuj serwer MediaShare ustaw go w miejscu o odpowiedniej we...

Page 35: ...rogram instalacyjny z instalacyjnego dysku CD Program instalacyjny umo liwia skonfigurowanie serwera MediaShare Do serwera MediaShare przypisana zostanie unikalna nazwa i utworzona zostanie nazwa u yt...

Page 36: ...iaShare Kliknij przycisk Next Dalej 5 W odpowiednich polach utw rz swoj nazw u ytkownika oraz has o 6 Aby zako czy konfiguracj kliknij polecenie Next Dalej i post puj zgodnie z instrukcjami wy wietlan...

Page 37: ...n nie jest wymagany do uko czenia konfiguracji i mo na go uko czy w dowolnym momencie w przysz o ci Uzyskiwanie zdalnego dost pu do serwera MediaShare 1 Przejd do witryny http www myverbatim com i zal...

Page 38: ...odczyt z dysku twardego Miga na pomara czowo Trwa wy czanie systemu rodkowa dioda LED Aktywno port w USB znajduj cych si z ty u urz dzenia Miga na pomara czowo Zapis odczyt z urz dzenia USB Miga na n...

Page 39: ...39 Verbatim MediaShare MediaShare Ethernet MediaShare 1 MediaShare 1 MediaShare MediaShare 2 Ethernet MediaShare IP...

Page 40: ...40 3 MediaShare 4 Power IP 2 MediaShare MediaShare 1 MediaShare 2...

Page 41: ...MediaShareSetup exe a b Ethernet c 2 Step 1 Setup 1 MediaShare 3 I Accept 4 Product Key MediaShare MediaShare Name MediaShare Next 5 6 Next Step 1 Setup 1 7 1 2 8 Step 2 Install Desktop Applications...

Page 42: ...ndows Time Machine Backup Configuration Optional 3 Windows Time Machine MediaShare Windows Backup Apple Time Machine MediaShare 1 http www myverbatim com MediaShare 2 MediaShare Name MediaShare 3 User...

Page 43: ...43 MediaShare USB USB eSata eSata...

Page 44: ...telep t CD zembe helyez si tmutat 1 A MediaShare kiszolg l csatlakoztat sa a h l zathoz 1 A MediaShare kiszolg l t a kicsomagol s t k vet en helyezze el gy hogy az eszk z megfelel szell z se biztos t...

Page 45: ...hare egyedi kiszolg l nev t s itt ll thatja be a felhaszn l i nevet s jelsz t A Setup program futttat sa 1 Helyezze a Telep t CD t a sz m t g p be Ekkor megjelenik a telep t dv zl ablaka Welcome to th...

Page 46: ...sokat A telep t ablak ism telt megjelen sekor a Step 1 Setup Els l p s telep t s mellett tal lhat jel l n gyzet jelzi hogy a l p st m r v grehajtotta 7 Az els l p st Step 1 k vet en folytassa a telep...

Page 47: ...be a MediaShare kiszolg l j ra 2 A MediaShare name mez ben adja meg a telep t skor be ll tott MediaShare nevet 3 Adja meg a Your User Name mez ben a telep t skor v lasztott felhaszn l i nevet a Your...

Page 48: ...villog r s olvas s a bels merevlemezre Narancss rg n villog A rendszer le ll t s alatt van K z ps jelz f ny H ts USB port ok m k d se Narancss rg n villog r s olvas s az USB porton K ken villog r s o...

Page 49: ...e cd Snelstartgids 1 Sluit de MediaShare aan op uw netwerk 1 Pak de MediaShare server uit en plaats deze op een vlakke stabiele ondergrond Zorg dat de server voldoende ventilatie heeft Leg of zet geen...

Page 50: ...aShareteconfigureren Methetinstallatieprogramma kunt u de MediaShare bovendien een unieke servernaam geven en een gebruikersnaam en wachtwoord instellen U voert het installatieprogramma als volgt uit...

Page 51: ...tooien Wanneer het hoofdscherm van het installatieprogramma weer verschijnt is het selectievakje naast Step 1 Setup Stap 1 Installatie ingeschakeld om aan te geven dat deze stap is voltooid 7 Ga verde...

Page 52: ...meld u aan op uw MediaShare server 2 Typ de MediaShare naam die u hebt opgegeven tijdens de configuratie van uw server 3 Typ de Username Gebruikersnaam en het Password Wachtwoord dat u tijdens de con...

Page 53: ...f toegang tot interne harde schijf Knipperend oranje Systeem schakelt uit Lampje midden Activiteit op USB poort en achterzijde Knipperend oranje Lees schrijf activiteit op USB poort Knipperend blauw L...

Page 54: ...s CD Snabbstartsguide 1 Anslut MediaShare enheten till ditt n tverk 1 Packa upp MediaShare servern se till att den har god ventilation Placera inga f rem l ovanp MediaShare enheten och placera inga v...

Page 55: ...arnamn och l senord F r att k ra Installationsprogrammet 1 S tt i Installations CD n i din dator Sk rmen Welcome to MediaShare Setup visas V lkommen till MediaShare Installationen V nta medan Installa...

Page 56: ...allation att vara ibockad f r att visa att du fullf ljt detta steg 7 N r Steg 1 fullf ljts forts tt med Steg 2 8 Klicka p Step 2 Install Desktop Applications Steg 2 Installera Skrivbordsapplikationer...

Page 57: ...www myverbatim com och logga in p din MediaShare server 2 Ange det MediaShare Name MediaShare namn du valde n r du installerade din server 3 Ange det Anv ndarnamn och L senord du skapade under Instal...

Page 58: ...bl tt L s skrivaccess till intern h rddisk Blinkar orange Systemet st ngs av Mittlampan Aktivitet i bakre USB port ar Blinkar orange L s skrivaktivitet hos USB Blinkar bl tt L s skrivaktivitet hos int...

Page 59: ...59 Verbatim MediaShare MediaShare Ethernet MediaShare 1 MediaShare 1 MediaShare 2 Ethernet MediaShare IP...

Page 60: ...60 3 MediaShare 4 Power IP 2 MediaShare MediaShare 1 Welcome to MediaShare Setup MediaShare 2...

Page 61: ...61 My Computer MediaShareSetup exe Ehternet 2 Step 1 Setup 1 MediaShare 3 I Accept 4 MediaShare MediaShare Name Next 5 6 Next Step 1 Setup 1 7 Step 2 8 Step 2 Install Desktop Applications 2...

Page 62: ...62 9 Step 3 Wndows Time Machine Backup Configuration 3 Windows Backup Time Machine MediaShare Windows Backup Windows Apple Time Machine MediaShare 1 http myverbatim com MediaShare 2 MediaShare 3...

Page 63: ...63 MediaShare USB USB eSata eSata...

Page 64: ...rt verbatim europe com 353 61 226586 Slovensko drivesupport verbatim europe com 353 61 226586 Slovenija drivesupport verbatim europe com 353 61 226586 T rkiye drivesupport verbatim europe com 353 61 2...

Reviews: