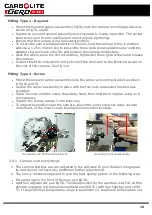
Carefully swing the door arm in a clockwise direction (view from front) to its stop
position, ensuring that the door plug does not touch tube end guard. The door plug
should be clear of the furnace in its fully withdrawn position. It should not be possible to
push the door arm in towards the furnace until the door arm is rotated fully clockwise
(view from front) and the door plug is in line with the work tube front aperture.
The door arm assembly has an Ethernet cable running through it for the camera. The
cable has a connector at each end. One end of the cable comes out of the conduit cable
through the conduit plate and is connected to the Ethernet connector inside the aperture
in the left hand side of the furnace case see fig. 22. Once the cable is connected
carefully insert the connector into the aperture and fix the conduit plate into position.
Note
: take care to keep the cable away from sharp edges.
If no other options are to be added to the rear of the unit i.e. rear lighting option, the
back panel can be replaced, ensuring that the earth tag and fan connections are
securely fitted.
Carefully slide the door plug into the work tube ensuring that it is clear of the front seal
assembly. If the door plug is misaligned, adjustment of its position in relation to the
work tube can be achieved by loosening the front and back door arm fixing screws and
rotating the door arm about the door slide shaft axis. See fig 10a.
3.3.5
Pressure Testing of the Work Tube Assembly
Note
: To ensure that the work tube assembly has been correctly installed it is necessary
to pressure test the furnace prior to use.
Due to the high work tube temperatures used during CAF testing the tube ‘O’ ring seals
will deteriorate with time. The furnace work tube also has a finite life and may
eventually crack due to normal wear and tear. It is necessary to conduct a pressure test
of the work tube assembly at regular intervals during normal use of the furnace to
ensure integrity of the work tube and ‘O’ ring seals. The following procedure applies:
Connect one end of the flexible gas inlet pipe (normally connected between the
bulkhead connection on the front of the furnace case and the work tube front seal
assembly) to the work tube front seal assembly. See fig 11b. Connect the other end to
an adjustable compressed air test line or inert gas supply capable of delivering up to 4
psi. Check all air/ gas connections for leaks, any leakage from the air/ gas supply line
may affect the pressure test results.
Close the door assembly and clamp in position using the swing bolts.
Securely block the work tube vent at the back of the furnace using blanking plug.
Pressurise the work tube assembly via the flexible gas inlet pipe to 3 psi ± 1 psi using
compressed air or inert gas.
Once the furnace gas system is pressurised to 3 psi ±1 turn off the air supply, the gas
system should stay pressurised to 3 psi ±1 for 5 minutes.
Following successful pressure testing of the work tube assembly, connect the flexible gas
inlet pipe to the bulkhead connection on the front of the furnace case. Check all external
gas connections and vent tubes for leaks prior to using the furnace.
14
Summary of Contents for CARBOLITE GERO CAF G5
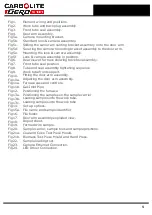
Page 63: ...Fig 3 Front Tube Seal Assembly Fig 4 Door Arm Assembly 63 ...
Page 64: ...Fig 5a Camera Mounting Bracket Fig 5b Lens and Camera Assembly 64 ...
Page 65: ...Fig 5c Sliding the Camera Mounting Bracket Assembly onto the Door Arm 65 ...
Page 66: ...Fig 5d Securing the Camera Mounting Bracket Assembly to the Door Arm 66 ...
Page 67: ...Fig 5e Mounting the Lens and Camera Assembly 67 ...
Page 68: ...Fig 5f Lens and Camera Assembly in Position 68 ...
Page 69: ...Fig 6a Rear View of the Standard CAF G5 Furnace Showing Brick Box Assembly 69 ...
Page 71: ...Fig 7 Front Tube Seal Position 71 ...
Page 72: ...Fig 8 Tube End Seal Assembly Tightening Sequence Fig 9 Work Tube Front Support 72 ...
Page 73: ...Fig 10 Fitting the Door Arm Assembly Fig 10a Adjusting the Door Arm Assembly 73 ...
Page 74: ...Fig 11a Furnace Case and Controls 74 ...
Page 75: ...Fig 11b Gas Inlet Pipe Fig 12 Positioning the Furnace 75 ...
Page 77: ...Fig 13c Loading Samples into the Work Tube 77 ...
Page 78: ...Fig 16 File Folder 78 ...
Page 79: ...Fig 17 Door Arm Assembly Exploded View 79 ...
Page 82: ...SST DT HT FT Fig 18 Report Sheet Page 2 Side View Plan View Fig 19 Formed Wire Sample 82 ...
Page 83: ...Fig 20 Sample Carrier Sample Tiles and Sample Positions 83 ...
Page 84: ...Fig 21a Coal and Coke Test Piece Mould Fig 21b Biomass Test Piece Mould and Hand Press 84 ...
Page 85: ...Fig 22 Sample Loading Tool Fig 23 Camera Ethernet Connection 85 ...
Page 86: ...Fig 24 LED Driver Connection 86 ...
Page 87: ...Notes Service Record Engineer Name Date Record of Work ...


