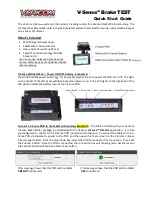
V-Sense
TM
Brake TEST
Quick Start Guide
The Vericom V-Sense
TM
system is the industry
’s
leading test kit for advanced brake/frictional testing. The
V-Sense DAQ, RG and MSI units include a simple test system that is ideal for testing nearly all vehicle types
on a variety of surfaces.
What’s Included
:
V-Sense POD LED Panel
–
Power ON/OFF, Battery, Connected
:
Press and hold the power button for approximately 3 seconds to power the POD on or off. The light
on the far left of the LED panel will illuminate when power is on. The 4 LED lights on the right side of the
LED panel indicate the battery level of the V-Sense POD.
Connect a V-Sense POD to the Tablet with wireless Bluetooth
: The tablet included with your Vericom
V-Sense Brake Meter package is preloaded with the Vericom
V-Sense
TM
Director
application. It is also
preconfigured to connect to the V-Sense POD included within the case. To connect the tablet to the V-
Sense POD via Bluetooth, power on the POD and then open the
Tools screen
on the Vericom V-Sense
Director app (tablet). From the drop-down box, select the
POD
name desired for connection. Then click
the
Connect
button. Once the POD is connected, the connection box will show a green check mark and
the
Connect
button will become a
Disconnect
button.
(This message shows that the POD and the tablet
(This message shows that the POD and the tablet
ARE NOT
connected.)
ARE
connected.)
•
Wall Charger/Power Supply
•
Tablet with V-Sense Director
•
Heavy Duty Vacuum Cup Mount
•
16GB of Test Data Storage (10,000+
brake tests)
The V-Sense User Guide can be found on the
Vericom Website and on the USB drive included
with the package.
Power Button V-Sense is ON V-Sense Connected Light V-Sense POD Battery Level


