4
Tip:
If you do not have a vise, you can improvise with a piece of 2×4 with various sizes
of V-shaped notches cut in it and two C-clamps. Place the piece of wood in a notch
slightly smaller than its diameter, and clamp the 2×4 to a bench or a large stable surface.
Place the tenon cutter on the end of the piece of wood and adjust the drill by eye so that it is in
line with the piece of wood. The tenon cutter will cut tenons in line with the axis of the drill. If
you wish to have a tenon come out of the end of the piece of wood at an angle, clamp the piece
in a vise at the desired angle (using an inclinometer if necessary). Cut the tenon while holding
the tenon cutter straight and level.
Note:
Whether you are cutting in-line or angled tenons, the secret to cutting a uniform tenon is
to keep the drill very steady while cutting.
While leaning into the wood, switch on the drill at a moderate speed (800 to 1000 rpm). Turning
too fast may cause you to wander from a straight cut. If the blade is properly set, the shaving of
wood will curl out of the tenon cutter as it rotates. If the tenon cutter stops cutting or does not
cut at all, you will need to adjust the blade.
Note:
The tenon cutter’s shank has a hole drilled down the center. This is to allow you to insert
a
3
/
16
" dia. pin into the back end to drive out a broken tenon.
Adjusting the Blade
Caution:
Be aware that the blade is sharp; careless handling can result in serious injury.
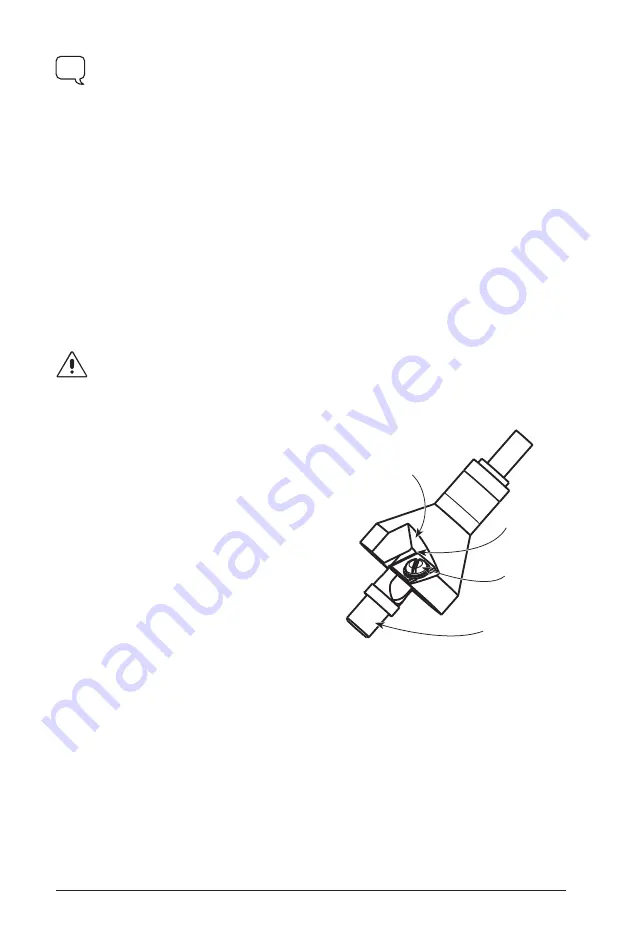
A brass plug gauge has been provided to help you obtain the desired tenon diameter.
Adjusting the Tenon Diameter
Loosen the blade clamping screw slightly to just
allow the blade to slide with minimal vertical
play. Insert the plug gauge into the tenon cutter,
rotating it so that either of the two round surfaces
faces the blade. Lightly push the blade in until
the front corner (the part that determines the fi nal
tenon diameter) touches the plug gauge, while the
right-hand edge remains in contact with the body
shoulder. Firmly tighten the blade clamping screw.
Rotate the plug in either direction until the round
surfaces are no longer touching the blade. While
the fl at on the gauge provides clearance under
the blade, withdraw the gauge. Make a test
cut and measure the tenon. If the tenon is not
cutting the desired size, repeat this procedure, or
see
Troubleshooting
.
...
Body
Shoulder
Blade
Clamping
Screw
Plug Gauge
Front Corner
of Blade
Figure 1: Adjusting the blade.


