147
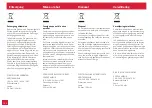
Fonctions d’avertissement
Warning Functions
Waarschuwingsfuncties
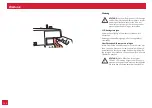
Remarques d’utilisation sur l’écran
Abaissez le levier de la boutonnière
Lors de la sélection du trou de la boutonnière ou du
point pour repriser, le symbole s’affiche sur l’écran
pour que vous n’oubliiez pas d’abaisser le pied.
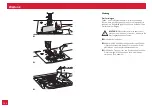
Embobinez le fil inférieur dans la canette
Vous ne pouvez pas coudre et le volant ne peut pas
être tourné tant que le support canette est placé à
droite (dans la position d’embobinage) et que le sym-
bole s’affiche sur l’écran.
Poussez le support canette vers la gauche
(3 bips sonores)
Si vous appuyez sur des touches de la machine à
coudre électronique, lorsque la canette est pleine
ou le support canette se trouve sur la droite, 3 bips
sonores retentissent comme avertissement.
Repoussez alors le support canette vers la gauche.
Remarques générales sur les bips sonores :
– En cas d’utilisation correcte : 1 bip sonore
– En cas d’utilisation incorrecte : 3 bips sonores
– Lorsque la machine à coudre électronique ne fonc-
tionne pas ou ne peut pas coudre : 3 bips sonores
Cela signifie que le fil est tordu ou coincé et que l’axe du
volant ne peut pas être bougé. Dans ce cas, référez-vous
au chapitre dépannage page 153 de ce mode d’emploi.
Dès que le problème a été résolu, la machine à coudre
électronique se remet à coudre.
REMARQUE :
Si vous n’arrivez pas à résoudre le pro-
blème, prenez contact avec votre revendeur.
ATTENTION :
Si les fils s’emmêlent dans la
canette pendant la couture, de manière à ce
que l’aiguille ne puisse plus bouger, et si vous
appuyez quand même encore sur la pédale de
commande, l’interrupteur de sécurité éteint la
machine à coudre électronique. Pour remettre
la machine en marche, vous devez tout d’abord
placer l’interrupteur marche/arrêt sur la po-
sition « arrêt » (sur « O ») puis le remettre en
PDUFKHVXUmƄ|
Instruction message display
Lowering the buttonhole lever
When you select any buttonhole pattern or darning
pattern, LCD screen will show the figure .
It is to remind you to lower the buttonhole lever.
Bobbin winding
When the bobbin winder spindle is activated for bob-
bin winding (in the rightmost position) this figure
appears on the LCD screen as a reminder.
Return bobbin winder shaft to left (3 beeps)
If the bobbin winder shaft is positioned to the right
(engaged) and any button is pressed a 3-beep
warning will be sounded.
Move bobbin winder shaft to the left (disengaged) to
allow the buttons to be operational.
Warning beeping sound:
– When operating correctly: 1 beep
– When operating incorrectly: 3-short beeps
– When the sewing machine is in trouble and can’t sew:
3-short beeps
It means that the thread is twisted or jammed and the
hand wheel axle can’t move. Please refer to the “Trouble
shooting guide” on page 154 for solutions. After the
problem has been solved, the machine will continue to
sew.
NOTE:
If the problem is not resolved, please contact your
local dealer.
ATTENTION:
If the thread gets jammed inside
the hook during sewing, stopping the needle
from moving, the security switch will stop
the machine completely. In order to restart the
sewing machine, you will have to turn the on/
off switch to the („O“) position and then ON
(„–“) again.
Gebruiksaanwijzing op het scherm
Knoopsgathendel laten zakken
Bij het selecteren van een knoopsgat- of stoppatroon
verschijnt op het display altijd het symbool om u
eraan te herinneren dat u de knoopsgathendel moet
laten zakken.
Onderdraad op het spoeltje wikkelen
Zolang het spoelwinderasje naar rechts staat (in de
spoelpositie) en het symbool verschijnt op het
LCD-scherm, kan er niet worden genaaid en kan het
handwiel niet worden gedraaid.
Spoelwinderasje naar links drukken (3 piepjes)
Als er toetsen worden ingedrukt op de computer-
gestuurde naaimachine als het spoeltje vol is of als
het spoelwinderasje naar rechts staat, klinken er
3 pieptonen als een waarschuwingssignaal.
Spoelwinderasje weer naar links drukken.
Algemene pieptoon:
– Bij juist gebruik: 1 pieptoon
– Bij verkeerd gebruik: 3 pieptonen
– Als de naaimachine niet werkt en niet kan naaien:
3 pieptonen
Het betekent dat de draad gedraaid of vastgelopen is en
de handwielas niet kan bewegen. Lees in dit geval pagina
155 van de handleiding over het oplossen van proble-
men hoe het probleem kan worden opgelost. Zodra het
probleem is opgelost, werkt de naaimachine weer.
AANWIJZING:
Als het probleem niet kan worden opge-
lost, neem dan contact op met uw dealer.
LET OP:
Als de draden tijdens het naaien
verstrikt raken in de grijper waardoor de naald
niet kan bewegen en u blijft op het voetpedaal
drukken dan zal de veiligheidsschakelaar de
naaimachine helemaal uitschakelen. Om de
naaimachine weer te starten, moet u de aan-/
uit-schakelaar eerst uitschakelen (op “O”), en
vervolgens weer inschakelen (op “–”).

