background image


38


T1960 Handset Settings 


R9


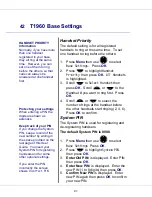
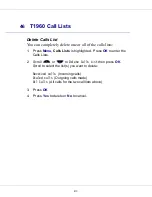
AUTO TALK 

Information 

The default is On

.


Setting Auto Talk = 

On

 will 

make the handset 
automatically answer the 
incoming call when the 
handset is ringing and lifted 
from the base or charger.  

(Same as pressing 

)  

 
If Auto Talk = 

Off

, you must 

press 

 to answer the 

call after the handset is 
lifted from the base or 
charger. 

Menu Color 

You can select 

Blue

Green 

or 

Red

1. Press 

Menu

, then use 

 to select 

Handset

 menu.  Press 

OK

2. Scroll 

 to 

Menu Color

 then press 

OK

3. Scroll 

 or 

 to highlight the 

color you want then press 

Save

4. Press 

and hold


Back

 to return to 

standby. 


Auto Talk 

You can turn the auto-talk feature On or Off.  
The default is On.  To change this setting: 

1. Press 

Menu

, then use 

 to select 

Handset.

  Press 

OK

2. Scroll 

 to 

Auto Talk

.  Press 

OK

.   

3. Press 

or 

 to highlight 

On

 or 

Off

.  Press 

OK

4. Press 

and hold


Back

 to return to 

standby. 


Summary of Contents for T1960

Page 1: ...R9 Verizon Digital Cordless Telephone T1960 USER GUIDE ...

Page 2: ...ices such as Call Waiting Deluxe Directory Assistance Repeat Dialing Call Forwarding 150 Name and Number Phonebook 50 Name and Number Received Calls list 20 Number Dialed Calls list redial Add up to 4 additional handsets to a base No need for additional wiring Handsets have individual phonebooks Handsets include intercom features Speakerphone in the handset 10 selectable ring tones with 8 polyphon...

Page 3: ... telephone please contact the Thomson product support center at 1 800 448 0329 Alternatively you may find the answer in T1960 Troubleshooting Tips on page 53 at the back of this guide Did you receive everything T1960 base T1960 handset 2 x NiMH AAA rechargeable batteries Battery compartment cover AC power adapter Telephone line cord Belt clip In addition If you have purchased one or more additiona...

Page 4: ...laundry tub or in a wet basement or near a swimming pool 2 Avoid using the telephone other than a cordless type during an electrical storm There may be a remote risk of electrical shock from lightning 3 Do not use the telephone to report a gas leak in the vicinity of the leak 4 Use only the AC adapter power cord and batteries indicated in this manual Do not dispose of batteries in a fire They may ...

Page 5: ...ductor may overheat and cause burns 6 Recharge only the batteries provided with or identified for use with this product The battery may leak corrosive electrolyte or explode if it is not the correct type 7 Do not attempt to rejuvenate the batteries provided with or identified for use with this product by heating them Sudden release of the electrolyte may occur causing damage to the eyes or skin 8 ...

Page 6: ...ffs and therefore you may not be able to use your own telephone equipment if you are on a party line Check with your local telephone company 2 Rights of the Telephone Company Should your equipment cause trouble on your line which may harm the telephone network the telephone company shall where practicable notify you that temporary discontinuance of service may be required Where prior notice is not...

Page 7: ... correct the interference by one or more of the following measures Reorient or relocate the receiving antenna that is the antenna for radio or television that is receiving the interference Reorient or relocate and increase the separation between the telecommunications equipment and receiving antenna Connect the telecommunications equipment into an outlet on a circuit different from that to which t...

Page 8: ...etting To Know The T1960 ______________________ 16 The Handset 16 The Base 17 The Display 18 The Menu Map 19 Navigating The Menu 20 Using The T1960 Simple and Easy ________________ 21 Answer a Call 21 Make a Call 21 Speakerphone 22 Dialed Calls List Redial 23 Mute 23 Paging 24 User Set Keypad Lock 24 Intercom Calls 25 Transfer a Call 26 Caller on Hold 26 T1960 Phonebook Names _____________________...

Page 9: ...ller ID With Call Waiting 30 Call Waiting Deluxe 31 Voicemail 34 Optional Calling Features 36 T1960 Handset Settings __________________________ 37 Handset Name 37 Language 37 Menu Color 38 Auto Talk 38 Area Codes 39 Beep Tones 40 T1960 Base Settings_____________________________ 41 Base Ringtone 41 Base Volume 41 Handset Priority 42 System PIN 42 T1960 Call Lists ________________________________ 43...

Page 10: ...___________________ 48 Automatically Setting Date and Time 48 Manually Setting Date and Time 48 Time Format 12 hr or 24 hr 48 Use Your Phone as an Alarm Clock 49 Additional Handsets and Bases ____________________ 50 Register a New T1960 Handset 50 Register Handset with an Additional Base 51 Selecting a Base 51 De register a Handset 52 T1960 Troubleshooting Tips ______________________ 53 Need Help ...

Page 11: ...In This Guide 11 R9 This Page Left Intentionally Blank ...

Page 12: ...es the best signal WARNING Do not place your T1960 in the bathroom or other humid areas IMPORTANT Do not connect the telephone line until the handset is fully charged The base must be plugged into the AC power at all times Battery charging light The red charging light on the base stays on while the handset is on the base even when the batteries are fully charged Talk Standby time Under ideal condi...

Page 13: ...ar out thereby reducing the talk and standby time of the handset Eventually the batteries may need to be replaced Setting Up 1 Plug the power cable into the base 2 Plug the AC power adapter into an electrical wall outlet 3 Insert the 2 x AAA NiMH batteries supplied into the handset paying attention to the polarity Slide the battery compartment cover into place 4 Charge the handset for at least 16 ...

Page 14: ...w ready for use Replacing batteries Use only rechargeable 750 mAh AAA Nickel Metal Hydride NiMH batteries Replacement batteries may be obtained commercially from a retail battery supplier See page 5 for important battery replacement information NOTE The RBRC seal on the battery used in your Thomson Inc product indicates that we are participating in a program to collect and recycle the rechargeable...

Page 15: ... additional handset 3 Insert the 2 x AAA NiMH batteries supplied into the handset paying attention to the polarity See page 13 Slide the battery compartment cover into place 4 If the batteries have enough charge the handset will power up with Not Registered on the display 5 Charge the handset for at least 16 hours Once fully charged your additional handset s are required to be registered to the ba...

Page 16: ...ed Calls list End Call Press to end call hang up INTERCOM Intercom lets you make calls between handsets registered to the base page 24 VOICE MAIL One touch voicemail access page 34 Navigation Keys Scroll Dialed Calls List Scroll through options From the idle display press the up button to open the Dialed Calls list Left Soft Menu1 Key On Screen Options Open the menu and select an option pages 18 1...

Page 17: ...Getting To Know The T1960 17 R9 The Base ...

Page 18: ...18 Getting To Know The T1960 R9 The Display The handset idle display is shown below ...

Page 19: ...es Area Codes Base Settings page 41 Base Ringtone Base Volume Handset Priority System PIN Default Settings Melody Handset page 47 Ringtone Ring Volume Call Lists page 43 Received Calls Dialed Calls Delete Calls List Names Phonebook page 27 Find Entry Add Entry Delete all phonebook Calling Features page 29 Directory assistance Call return Repeat dialing Call forwarding VoiceMail Access Call Waiting...

Page 20: ...Press to decrease or to increase the volume The ring tone is played at each level you select Press OK to confirm Exit back one level in the menu To go back to the previous level in the menu press Back To cancel and return to standby at any time press and hold Back If no button is pressed for 60 seconds the handset returns to the standby idle display automatically The up down left right Navigation ...

Page 21: ...rvice the caller s number and name is displayed after the first ring Make a Call Press then dial the number you want to call Or Preparatory dialing Enter the phone number first If you make a mistake press Clear to delete the last digit entered or multiple times to clear all digits When you are finished entering the phone number press to call the phone number you entered and shown on the display Ca...

Page 22: ...call can be heard over the handset s loudspeaker 2 To switch back to the handset at any time press again i e switches between handset and speakerphone mode 3 Press to end the call Adjust handset speakerphone volume During a call press or to select the volume level Two bars is the minimum and full bars is the maximum You can switch to speakerphone at any time during a call Just press When in speake...

Page 23: ...en press to enable the speakerphone Dialed Calls List Redial You can view and redial up to 20 of the last numbers called To redial a number from the Dialed Calls list 1 Press to enter the Dialed Calls list 2 Scroll or until the number you want is displayed 3 Press to dial the number See page 43 for more details regarding available options from the Dialed Calls list Mute During a call you can talk ...

Page 24: ...dsets ringing User Set Keypad Lock You can lock the keypad to prevent accidental dialing while carrying or handling the handset 1 Press and hold until the screen shows Keypad Locked and the padlock symbol appears 2 Press Unlock SOFT MENU1 then Yes to unlock the keypad You cannot make any calls including 911 emergency calls while the User Set keypad is locked Answer incoming calls by pressing as no...

Page 25: ...n the called handset to answer the intercom call 3 Press to end the intercom call 3 Way Conversations You can place a caller on hold a regular telephone call Intercom to another handset and then make a conference call between all three parties 1 During a regular telephone call press INTERCOM to put your call on hold Enter the handset number 1 5 you want to join on the call 2 When the other handset...

Page 26: ...es not answer or you decide not to transfer the call press INTERCOM to cancel and resume talking to your caller Caller on Hold You can put a call on hold talk to another handset user and then resume your call During a call 1 Press INTERCOM to put your call on hold 2 Enter the handset number 1 5 you want to intercom call 3 Press INTERCOM to end the intercom call and return to your regular call 4 If...

Page 27: ...d numbers Names can be up to 16 characters long and numbers up to 20 digits Add a Name Entry Manually 1 Press Menu then scroll to Names Press OK 2 Scroll to highlight Add Entry then press OK 3 Use the keypad to enter the name then press OK 4 Use the keypad to enter the number and then press OK Note To add a 2 second pause or multiple pauses to your number press the or navigation key for 1 second P...

Page 28: ...r use or to position the cursor Use the keypad to change the name Press OK 3 Edit the number then press OK Display returns to the list of names 4 Press and hold Back to return to standby Delete an Entry 1 Press Names then scroll or to the name you want to delete then press Options Scroll to Edit or Delete then press OK Scroll to Delete Entry then press OK 2 Scroll to Delete Entry then press OK 3 P...

Page 29: ...ming calls Verizon Calling Features Managing Your Calls You may subscribe to any of the following Verizon services for which your T1960 telephone has been designed to make these services easy to use Caller ID Caller ID With Call Waiting Call Waiting Deluxe Voicemail 3 Way Calling Fast access to Verizon Optional Calling Feature services which may be available Directory Assistance Call Return Repeat...

Page 30: ...hen you have subscribed to CIDCW and a new call is received while you are already on a call you will hear a special alerting signal and then the caller s information will be displayed See the information on the sidebar on this page regarding Call Waiting Deluxe menus IMPORTANT To use the Verizon calling features you will first need to subscribe to the desired features for which there may be a mont...

Page 31: ... Waiting Deluxe provides many more options for handling the new waiting call Connecting To The New Caller 1 Press FLASH to put the current call on hold and be connected to the waiting call 2 Press FLASH again to reconnect to the original call and put the 2nd caller on hold 3 Press FLASH to toggle between the first and second caller Call Waiting Deluxe Activate Call Waiting Deluxe Menu The T1960 pr...

Page 32: ...This changes the menus to the Conference State see page 33 Forward to Voicemail The network will immediately forward the CIDCW call to your network voicemail You must subscribe to Verizon s voicemail service for this option to function Drop Answer The CIDCW call is connected and the 1st original call is dropped by the network Tell Busy The network will send a message to the CIDCW caller that the l...

Page 33: ...her The Conference State options are Drop original caller Drop second caller HELD STATE There are options available on the T1960 display while in the Held State Return to held call Toggles connection between the 1st and 2nd call The caller you are not talking to is placed on hold Drop Return to cal Drops the current call and connects to the held call Conference The network will connect all three y...

Page 34: ...ide you through the various options for set up of outgoing messages and other options and for the most often used feature which is listening to the saved messages Voicemail The T1960 includes the following features to help make using your network Voicemail service easy A Voicemail indicator light on both the base and all handsets One button access to call the Voicemail system to check your message...

Page 35: ...hange the access number 1 Press Menu then use to select Calling Features Press OK 2 Press or to highlight VoiceMail Access Press OK You will see the present setting and the Clear option to change the number Note To add a 2 second Pause or multiple pauses to your number press and hold the or navigation key for 1 second A P will be added to your number This is useful if you wish to add your security...

Page 36: ...ing on with 72 then user entered forwarding number or Off with 73 See the Verizon services guide for more information on this service Optional Calling Features Fast access to Verizon Optional Calling Feature services which are designed to save you time and make connecting a call easier The T1960 includes a Calling Feature menu to have the codes for these services dialed for you so you do not have ...

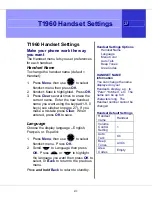
Page 37: ... save Language Choose the display language English Français or Español 1 Press Menu then use to select Handset menu Press OK 2 Scroll to Language then press OK Press or to highlight the language you want then press OK to select or Back to return to the previous menu Press and hold Back to return to standby Handset Settings Options Handset Name Language Menu Color Auto Talk Beep Tones Area Codes HA...

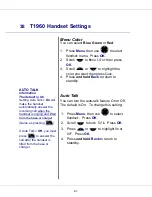
Page 38: ...he base or charger Menu Color You can select Blue Green or Red 1 Press Menu then use to select Handset menu Press OK 2 Scroll to Menu Color then press OK 3 Scroll or to highlight the color you want then press Save 4 Press and hold Back to return to standby Auto Talk You can turn the auto talk feature On or Off The default is On To change this setting 1 Press Menu then use to select Handset Press O...

Page 39: ...al Area Codes match the first 3 digits of the 10 digit Caller ID then the telephone number is formatted as 11 digits 1 Caller ID number Area Codes Information The T1960 can dial numbers back directly from the Caller ID entered into the Received Calls list Most often Caller ID is received with 10 digits 3 digit area code 7 digit phone number regardless of how many digits need to be dialed to call t...

Page 40: ...d Out of range is detected Beep Tones You can turn off the beep tones for Key press Low Battery or Out Of Range The default is On To change this setting 1 Press Menu then use to select Handset Press OK 2 Scroll to Beep tones Press OK 3 Press or to highlight Key beep Low battery or Out of range Press OK 4 Press or to highlight Off or On Press OK ...

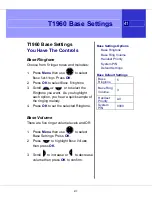
Page 41: ...r a quick sample of the ringing melody 4 Press OK to set the selected Ringtone Base Volume There are five ringer volume levels and Off 1 Press Menu then use to select Base Settings Press OK 2 Press to highlight Base Volume then press OK 3 Scroll to increase or to decrease volume then press OK to confirm Base Settings Options Base Ringtone Base Ring Volume Handset Priority System PIN Default Settin...

Page 42: ...ing is for all registered handsets to ring at the same time To set one handset to ring before the others 1 Press Menu then use to select Base Settings Press OK 2 Press to highlight Handset Priority then press OK All Handsets is highlighted 3 Scroll to Select Handset then press OK Scroll or to the Handset you want to ring first Press OK 4 Scroll or to select the number of rings at the handset befor...

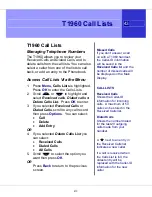
Page 43: ...f you selected Delete Calls List you can select Received Calls Dialed Calls All Calls 5 Scroll to select the option you want then press OK OR Press Back to return to the previous screen Missed Calls If you don t answer a call on with a T1960 handset the Caller ID information will be saved in the Received Calls list and the number of missed calls will be displayed on the Main Display CALL LISTS Rec...

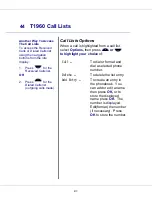
Page 44: ...oing calls made Call Lists Options When a call is highlighted from a call list select Options then press or to highlight your choice of Call To dial or format and dial a selected phone number Delete To delete the list entry Add Entry To create an entry in the phonebook You can add or edit a name then press OK or to store the displayed name press OK The number is displayed Edit format the number if...

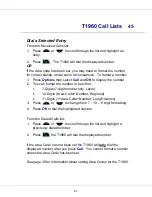
Page 45: ...r to be either 7 Digits 7 digit number only Local 10 Digits Area Code Number Regional 11 Digits 1 Area Code Number Long Distance 3 Press or to change from 7 10 11 digit formatting 4 Press OK to dial the highlighted number From the Dialed Calls list 1 Press or to scroll through the list and highlight a previously dialed number 2 Press the T1960 will dial the displayed number If the Area Code has no...

Page 46: ...lls Lists is highlighted Press OK to enter the Calls Lists 2 Scroll or to Delete Calls List then press OK Scroll to select the list s you want to delete Received calls Incoming calls Dialed calls Outgoing calls made All Calls All calls for the two call lists above 3 Press OK 4 Press Yes to delete or No to cancel ...

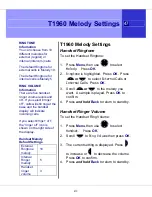
Page 47: ... Handset Melody Default Settings External Ringtone melody 10 Internal Ringer melody 5 Handset ringer volume 3 T1960 Melody Settings Handset Ringtone To set the Handset Ringtone 1 Press Menu then use to select Melody Press OK 2 Ringtone is highlighted Press OK Press or to select External Calls or Internal Calls Press OK 3 Scroll or to the melody you want A sample is played Press OK to confirm 4 Pre...

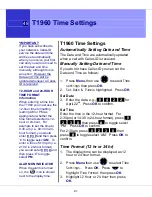
Page 48: ... INDICATOR When the alarm is turned on the icon is shown next to the display time T1960 Time Settings Automatically Setting Date and Time The Date and Time are automatically updated when a call with Caller ID is received Manually Setting Date and Time If you do not have Caller ID you can set the Date and Time as follows 1 Press Menu then use to select Time settings then press OK 2 Set Date Time is...

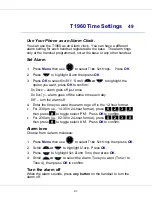
Page 49: ...the same time each day Off turn the alarm off 4 Enter the time you want the alarm to go off in the 12 hour format For 2 30pm i e 14 30 in 24 hour format press _0_ _2_ _3_ _0_ then press _ _ to toggle select PM Press OK to confirm For 2 30am i e 02 30 in 24 hour format press _0_ _2_ _3_ _0_ then press _ _ to toggle select AM Press OK to confirm Alarm tone Choose from 4 alarm melodies 1 Press Menu t...

Page 50: ...an be registered and operated from one T1960 base You can make internal intercom calls between two handsets while a third handset is making an external telephone line call Each handset can be registered on up to four bases If you buy new handsets to use with your T1960 you will have to register them to the base before they can be used Register a New T1960 Handset First on the base 1 Press and hold...

Page 51: ...inute Then the handset will beep and the display will show the base ID number Press OK to confirm The handset screen then shows Handset Registered The handset is now ready for use Selecting a Base To select a base for the handset to use 1 Press Menu then scroll to Registration Press OK 2 Scroll to Select Base then press OK The current base being used is highlighted 3 Scroll or to select the base y...

Page 52: ...ered Then you must use Handset 1 or Handset 3 to de register it De register a Handset You can use one handset to de register another handset from the same base 1 Press Menu then scroll to Registration Press OK 2 Scroll to De register Press OK 3 Enter the system PIN originally 0000 then press OK The screen lists all handsets registered to the base 4 Scroll or to select the handset you want to de re...

Page 53: ...329 Caller ID Problem Solution Caller ID Incomplete Data message The unit displays this message if it detects anything other than valid Caller ID information after a ringing signal Are you subscribed to Verizon s Caller ID service Hearing Aid Noise Please note that the T1960 works by sending radio signals between the base and handset These signals may interfere with some hearing aids causing a hum...

Page 54: ... to the base Does another phone work with the same cord and wall jack Handset or base does not ring Ensure the telephone cord is connected at both ends Does the handset indicate out of range If so move closer to the base Does another phone work with the same cord and wall jack Ensure that the Ringer Volume is not set to OFF Poor reception between handset and base Too close to metal appliances such...

Page 55: ...General Information 55 R9 System Pin Number Default 0000 ...

Reviews: