- 5 -
1.
Choose fireplace location.
2.
Place fireplace into position.
3.
Frame in fireplace with a header across the top. It is
important to allow for finished face when setting the
depth of the frame.
FRAMING AND FINISHING
MANTELS
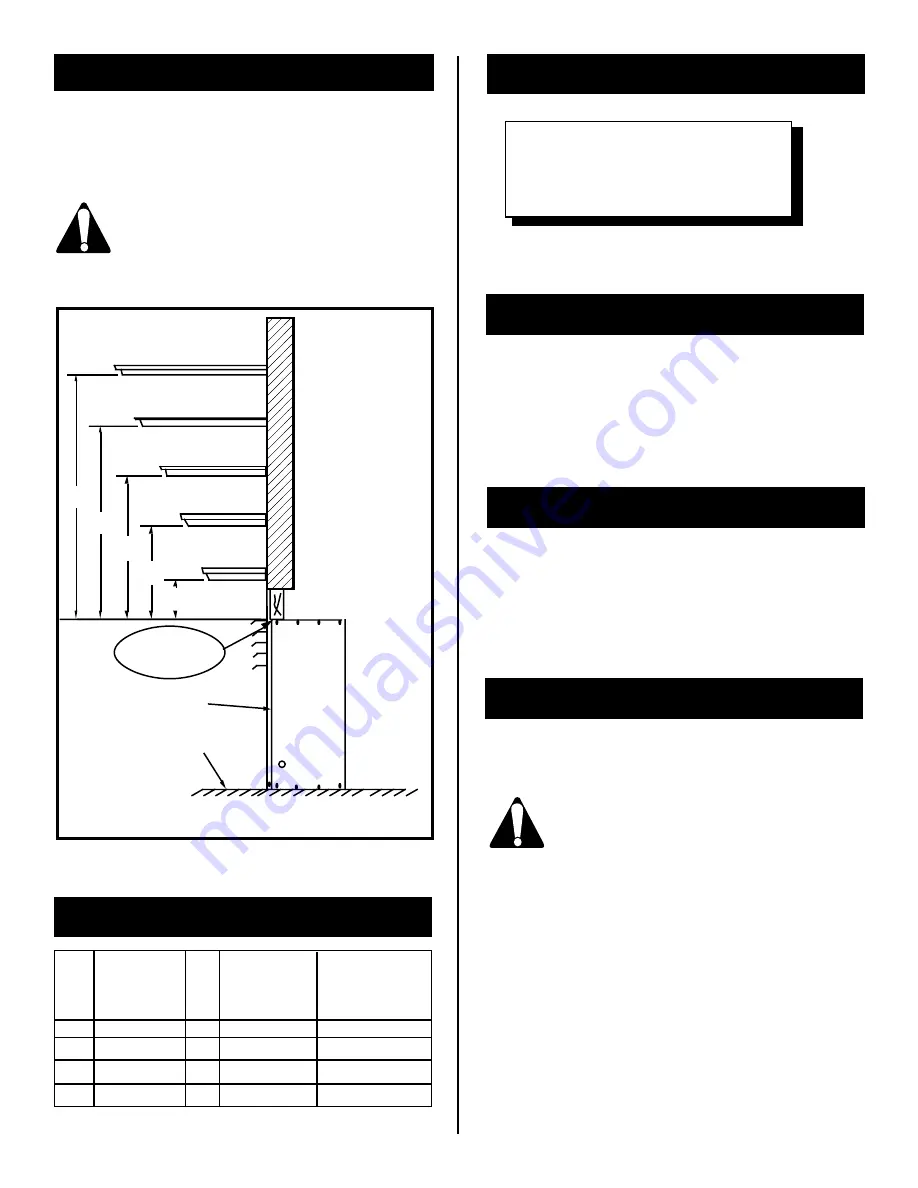
Depending on the width of the mantel it may be installed
higher or lower from the top of the louvre opening. See
drawing and chart below for proper installation height of
your combustible mantel piece. Non-combustible mantels
may be installed at any height above the appliance opening.
When using paint or lacquer to finish the
mantel, such paint or lacquer must be heat
resistant to prevent discolouration.
Sides ....... 0 mm/0 inches
Sides ....... 0mm/0 inches
Floor ........ 0 mm/0 inches
Top .......... 0 mm/0 inches
CLEARANCE TO COMBUSTIBLES
MANTEL CHART
Ref. Mantel & Leg Ref. Mantel From Mantel Leg from
Depth
Top Louvre
Fireplace Side
(Maximum)
(Minimum)
(Minimum)
V
10" (254 mm)
A
12" (305 mm)
10" (254mm)
W
8" (203 mm)
B
10" (254 mm)
8" (203mm)
X
6" (152 mm)
C
8" (203 mm)
6" (152mm)
Y
4" (101 mm)
D
6" (152 mm)
4" (101mm)
Z
2" ( 51 mm)
E
4" (101 mm)
2" (51mm)
X
Y
Z
WALL
TOP
LOUVRE
OPENING
E
D
C
B
A
W
V
SIDE VIEW
OPTIONAL
HEARTH
FRONT GLASS
Fig. 2
Non-combustible materials such as brick and tile can be
extended over the face of the unit (Do not cover louvres
or glass door). If a Trim Kit is going to be installed, brick
and tile will have to be installed flush with the side of this
appliance.
FINAL FINISHING
Cold climate installation recommendation:
When installing this unit against a non-
insulated exterior wall or chase, it is
mandatory that the outer walls be insulated
to conform to applicable insulation codes.
HEARTH
A hearth is not mandatory but it is recommended for
aesthetic purposes. We recommend a non-combustible
hearth which does not obstruct louvre opening.


