8
INSTALLATION, OPERATING, MAINTENANCE—JCV 360
JCV MOTOR s.r.o. , Vikýřovice 562, 788 13, Šumperk, Czech Republic—Europe, www.vernermotor.com, vernermotor@vernermotor.com
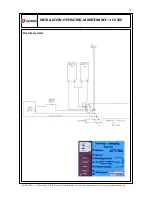
Electronic network, battery:
The engine is using two 12-V batteries that are connected to electronic network.
Wiring diagram is on page 19.
Recommended batery: 2 x 10 cell NiCad – sub C size cells.
Start solenoid, rectifier and voltage regulator are built into the electronic unit.
Rectifier/regulator charges both batteries to 12 V. Electric voltage to accessories is 12 V, but
there is 24V volts to electric starter for engine starting.
Fuel system:
The engine must be connected to the fuel tank through a fuel filter with paper strainer
inside. Fuel tank should be placed above engine – otherwise a check-valve must be installed
in fuel hoses. Check-valve prevents drain of fuel back into the fuel tank. Engine electric star-
ter can be overheated and battery can be discharged due to long starting caused by fallen
fuel level. A plunge primer is suggested to pre-charge the carburetors.
NOTE:
IN CASE OF ANY ENGINE
FAILURE OR LEAKAGE—IT IS FORBIDDEN TO START
ENGINE BEFORE FIXING EVERY PROBLEM
Carburetors:
Engine is equipped with two diaphragm carburetors Walbro WB-37-1.
Carburetors are set to operate satisfactorily between the sea level and 2000 meters MSL
(6,514 ft MSL). Nevertheless further adjustment is necessary on specific combination of
aircraft, propeller and altitude.
Initial Carburetor Adjustment Procedure
For initial adjusting prior to engine start
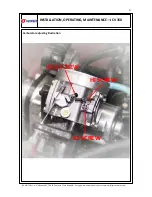
see below (see also illustration on page 21):
1.
Idle screw—screw in for 2-3 turns.
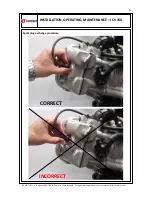
Procedure: Loosen idle screw so that screw point is gently touching throttle butterfly lever.
Then screw idle screw in for 2-3 turns. Repeat same procedure on both carburetors
2.
Lo screw— setting engine run on low RPM—loosen for 4-6 turns.
Procedure: Screw Lo screw in to the limit— carefully or seat can be damaged— then loosen
Lo screw for 4-6 turns. Repeat same procedure on both carburetors.
3.
Hi screw—set engine to run at maximum RPM—loosen for 3-4 turns.
Procedure: Screw Hi screw in to the limit— carefully or seat can be damaged— then loosen
Hi screw for 3-4 turns. Repeat same procedure on both carburetors.


