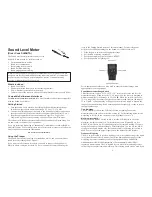
Sound Level Meter
(Order Code SLM-BTA)
The Sound Level Meter measures sound level in
decibels. It can be used for activities such as
Environmental noise studies
Sound level comparisons
Investigating room acoustics
Sound isolation modeling
Sound propagation modeling
Note:
Vernier products are designed for educational use. Our products are not
designed nor are they recommended for any industrial, medical, or commercial
process such as life support, patient diagnosis, control of a manufacturing
process, or industrial testing of any kind.
What's Included
Sound Level Meter
Wind screen (black foam cover for the sensing element)
4 AAA batteries (preinstalled in the meter)
Cable to connect the sensor to a data-collection interface (order code CB-SLM)
Compatible Software and Interfaces
See
www.vernier.com/manuals/slm-bta
for a list of interfaces and software compatible
with the Sound Level Meter.
Getting Started
1. Turn the Sound Level Meter on by sliding the Power/Measurement Range
Switch to an appropriate measurement range (35–90 or 75–130 dB).
2. Connect the mini-end plug of the cable to the Sound Level Meter and connect
the other end of the cable to the interface (LabQuest Mini, LabQuest 2, etc.).
3. Start the appropriate data-collection software (Logger
Pro
, Logger Lite,
LabQuest App) if not already running, and choose New from File menu.
The software will identify the sensor and load a default data-collection setup. You
are now ready to continue your experiment.
If you are collecting data using a Chromebook™, mobile device such as iPad® or
Android™ tablet, or a Vernier wireless sensor or interface, please see the following
link for up-to-date connection information:
www.vernier.com/start/slm-bta
Using the Product
The Sound Level Meter functions as a standalone device, and you can monitor
sound levels by reading the LCD panel.
If you want to collect sound level data, you need to connect the Sound Level
Meter to a data-collection interface. To do so, connect the sensor following the
steps in the Getting Started section of this user manual. For most classroom
activities, the following settings on the Sound Level Meter work well:
1. Slide the power switch to the appropriate range.
2. Set the time weighting switch to S.
3. Set the maximum level hold switch to RESET.
4. Set the frequency weighting to A.
For in-depth sound studies, you may need to choose different settings more
appropriate for your experiment.
Power/Measurement Range Switch
This slide switch, labeled “O/35–90/75–130,” turns on the sensor and sets the
measurement range. When set to the 35–90 range (LO), the sensor is designed to
measure sound levels in the range of 35 to 90 dB. When the switch is set to the
75–130 range (HI), the sensor is designed to measure sound levels in the range of
75 to 130 dB. A range warning will appear if the measured sound is beyond the
range of the current setting. If this warning appears continuously, set the switch to
the appropriate range.
Time Weighting
The S/F switch just below the LCD sets the time weighting. For normal
measurements set the switch to the slow setting (S). For fluctuating noise, set the
weighting to fast (F). In the classroom, you will probably set it to S.
Maximum Level Hold
Setting the MAX/RESET button to MAX sets the LCD display to show the
maximum, weighted sound level. In the classroom you will probably set it to
RESET, in which case it will continually display the sampled reading. If you are
using the Sound Level Meter without a Vernier interface, you can use the MAX
setting to record and display only the loudest sound level. Setting this switch to
MAX does not affect the output signal sent to the data-collection interface.
Frequency Weighting
The A/C switch is used to set the weighting scale. A-weighted setting is the sound
level value that most closely matches that of the human hearing range. It is the
weighting scale most commonly used for Occupational Safety and Health
Administration (OSHA) and Department of Environmental Quality (DEQ)
regulatory measurements. The C-weighted scale is useful for monitoring sources
such as engines, explosions, and machinery. This setting would also be used if you
2


