250
Firmware Version 5.4
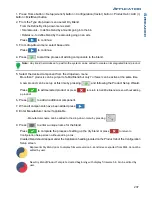
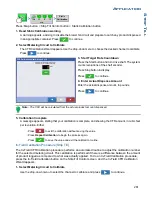
4. Enter Implement Information
Press
and enter implement Make and Model. Press
to continue.
5. Select Implement Attachment Type
Use the drop-down list to select an implement attachment method. Press
to continue.
6. Enter Distance Application Point Offset
Use
to enter distance from hitch to application point (Front to Back). Press
to continue.
7. Select Controller
Use the drop-down menu to select controller or press
to add a controller. Press
to
continue.
8. Select Controller Device and Device Type
Select DirectCommand from the Device drop-down menu. Select Granular Strip-Till Control from the
Device Type drop-down menu. Press
to continue.
9. Enter Controller Name
Controller name defaults to Direct Strip Till. Press
to accept, or press
to enter a new
name if desired. Press
to continue.
10. Enter Full Swath Width
Full Swath width defaults to a value of 30 ft. Use
to enter the full swath width of the implement.
Press
to continue.
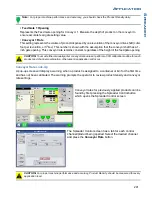
11. Select Application Type from the Implement Wizard:Application Channels screen.
Press the Granular Application button.
12. Select Controller
Use the drop-down menu to select same controller as above. Press
to continue.
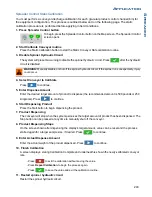
13. Container Setup (Equipment Setup Wizard: Container screen)
Press the desired channel button in order to enable or disable the controller channel. A check mark will
appear in the box when the container is ready to be configured.
Note:
Channel 1 is automatically assigned as a seeding channel and is intentionally unavailable for
user to edit. Proceed with configuration of containers for channels 2 and 3.
14. Assign Container Name
Container name defaults to “Bin 2, or 3”. Press
to enter a new name if desired.
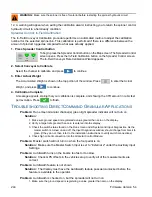
15. Assign Container Capacity
Use
to enter the container capacity. Press
to accept.
Summary of Contents for ag leader
Page 1: ...Operators Manual Firmware Version 5 4 Ag Leader PN 4002722 Rev G ...
Page 2: ...Firmware Version 5 4 ...
Page 20: ...6 Firmware Version 5 4 ...
Page 38: ...24 Firmware Version 5 4 For more information see Legend Settings on page 52 ...
Page 55: ...41 SETUP M ANAGEMENT S ETUP Remove button Press to remove a business ...
Page 56: ...42 Firmware Version 5 4 ...
Page 78: ...64 Firmware Version 5 4 ...
Page 82: ...68 Firmware Version 5 4 Press to Export All Log files Export All Log Files ...
Page 84: ...70 Firmware Version 5 4 ...
Page 94: ...80 Firmware Version 5 4 ...
Page 108: ...94 Firmware Version 5 4 ...
Page 140: ...126 Firmware Version 5 4 ...
Page 154: ...140 Firmware Version 5 4 ...
Page 158: ...144 Firmware Version 5 4 ...
Page 162: ...148 Firmware Version 5 4 ...
Page 222: ...208 Firmware Version 5 4 ...
Page 244: ...230 Firmware Version 5 4 ...
Page 260: ...246 Firmware Version 5 4 ...
Page 290: ...276 Firmware Version 5 4 ...
Page 304: ...290 Firmware Version 5 4 ...


