6-1
TEL-29-N/NE
DAIL
Y
VISUAL
INSPECTION
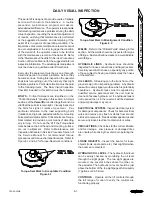
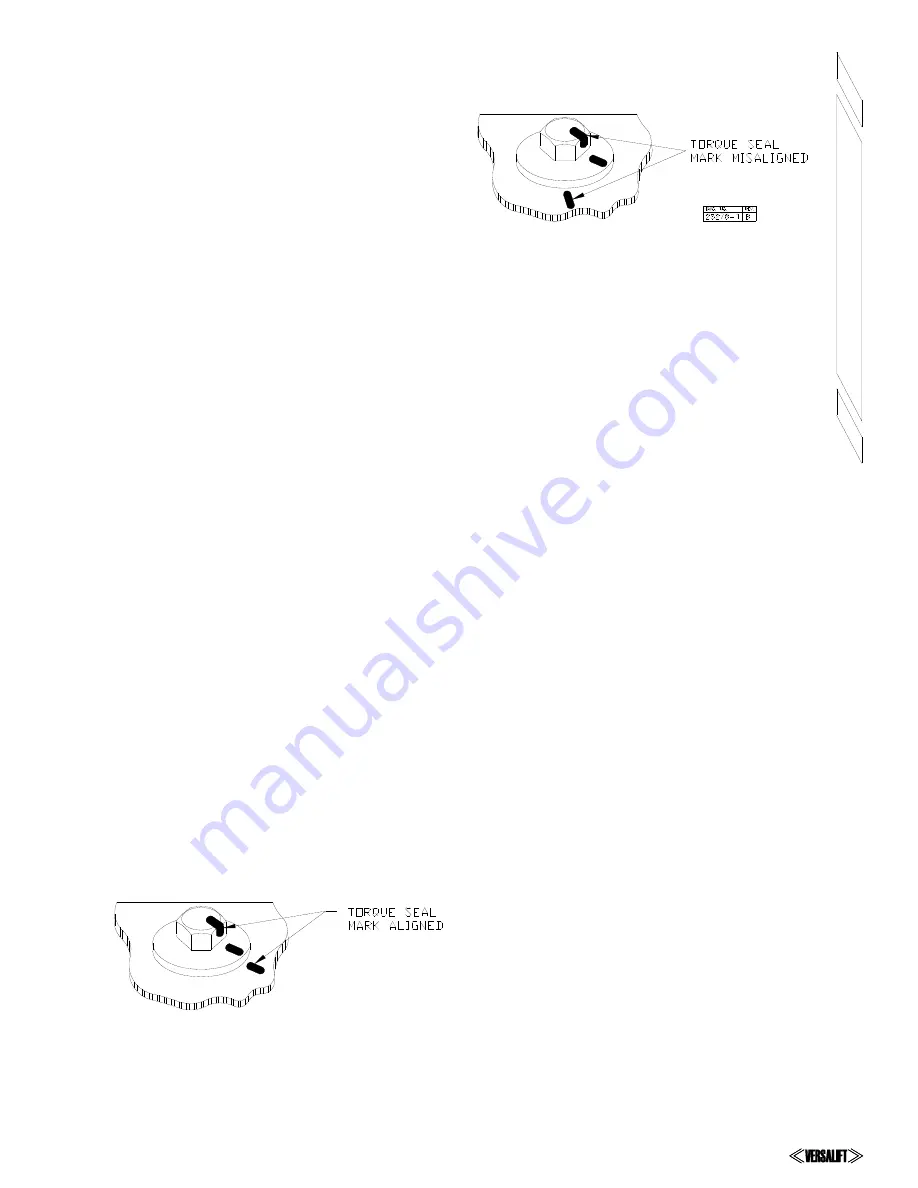
Torque-Seal Mark In Misalignment Condition
Figure 6.2
WELDS
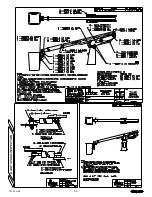
- Refer to the “Critical Welds” drawing in this
section. All the welds should be inspected for signs
of fatigue. Rust and hairline cracks on a weld indicate
weld fatigue.
HYDRAULIC LINES
- Hydraulic lines should be
inspected for loose connections and frayed jackets.
Carefully examine the hoses, especially any portion
of hose subject to flexing and particularly the hoses
at the platform.
OIL LEAKS
- Oil leaking onto the truck floor or the
ground is sign of an impending problem. A hydraulic
leak will create a slippery surface which is potentially
hazardous. Hydraulic leaks must be repaired by
qualified service personnel and the unit must be
cleaned of excess hydraulic oil. If a hydraulic leak is
not repaired the oil in the reservoir will be depleted
and pump damage may occur.
ELECTRICAL SYSTEM
- Inspect electrical system
for damaged components. Check for bare electrical
wires and remove any trash or debris from around
elctrical components. Repair all damaged wires and
secure any loose electrical components or wires.
VEHICLE TIRES
- Check tires for the correct inflation
and for damage. Low pressure or damaged tires
are unsafe while driving the vehicle or operating the
lift.
LOOSE OBJECTS
- Inspect the booms for loose
objects (tools, spare parts, etc.) that might fall when
the booms are elevated.
HYDRAULIC OIL LEVEL
- The hydraulic fluid level
can be easily checked by monitoring the oil level
through the sight gages. The two sight gages are
mounted, one several inches above the other, on
the pedestal. The hydraulic oil level should be just
above the bottom of the top sight gage at full capacity
(7 gallons or 26.5 liters)
CONTROLS
- Operate all the lift controls through
the full range of motion to verify the controls are
functioning properly.
This aerial lift is designed to provide years of reliable
service with minimum maintenance. A routine
preventive maintenance program will assure
extended aerial lift service. The operator is responsible
for detecting maintenance problems during the daily
visual inspection, reporting the need for adjustments
or repairs, verifying that maintenance is performed
at the suggested intervals, and determining if the
aerial lift is in a good, safe operating condition. The
importance of accurate maintenance records cannot
be over emphasized. In order to judge the condition
of the aerial lift, the operator needs to be familiar
with the maintenance records of the aerial lift. Refer
to the “Maintenance Checklist” in Service Procedures
Section of Service Manual for the suggested interval
inspection information. The actual repair or adjustment
must be done by a qualified aerial lift mechanic.
Every day the equipment must be given a thorough
visual inspection to detect problems before they
become serious. During this inspection the operator
shall look for anything out of the ordinary that might
indicate a problem. Particular attention must be paid
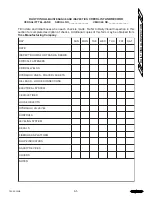
to the following items. The Daily Visual Inspection
Checklist included in this section must be followed.
BOLTS
- Critical fasteners are identified on the
“Critical Fasteners” drawing in this section. All major
sections of the
Versalift
are bolted together and it is
vital that these bolts remain tight. Visually inspect all
the bolts for signs of relative movement. Pay
particular attention to the load supporting bolts
(rotation bearing bolts, pedestal/subframe mounting
bolts, platform rotator bolts). Critical bolts are Torque-
Seal marked to provide a quick means of detecting
any turning. Do not use the lift if the Torque-Seal
mark between the bolt head and mounting surface,
are not in alignment. Refer to Maintenance and
Inspection Schedule in Service Procedure Section of
the Service Manual for recommended torque
procedures and torque chart specifications. Refer to
Figure 6.1 and 6.2 for Torque-Seal mark conditions.
Torque-Seal Mark In Acceptable Condition
Figure 6.1
DAILY VISUAL INSPECTION
Summary of Contents for TEL-29-N
Page 2: ......
Page 4: ......
Page 6: ......
Page 8: ...1 2 TEL 29 N NE INTRODUCTION Figure 1 1 Model TEL 29 N NE Nomenclature ...
Page 11: ...2 3 TEL 29 N NE RESPONSIBILITIES SAFETY ...
Page 20: ...3 6 TEL 29 N NE SPECIFICATIONS ...
Page 22: ...3 8 TEL 29 N NE SPECIFICATIONS ...
Page 24: ...3 10 TEL 29 N NE SPECIFICATIONS ...
Page 25: ...3 11 TEL 29 N NE SPECIFICATIONS ...
Page 26: ......
Page 34: ......
Page 38: ......
Page 42: ...6 4 TEL 29 N NE DAILY VISUAL INSPECTION ...
Page 44: ...6 6 TEL 29 N NE DAILY VISUAL INSPECTION ...


